Avaya
Telephone Quick Installation Guide
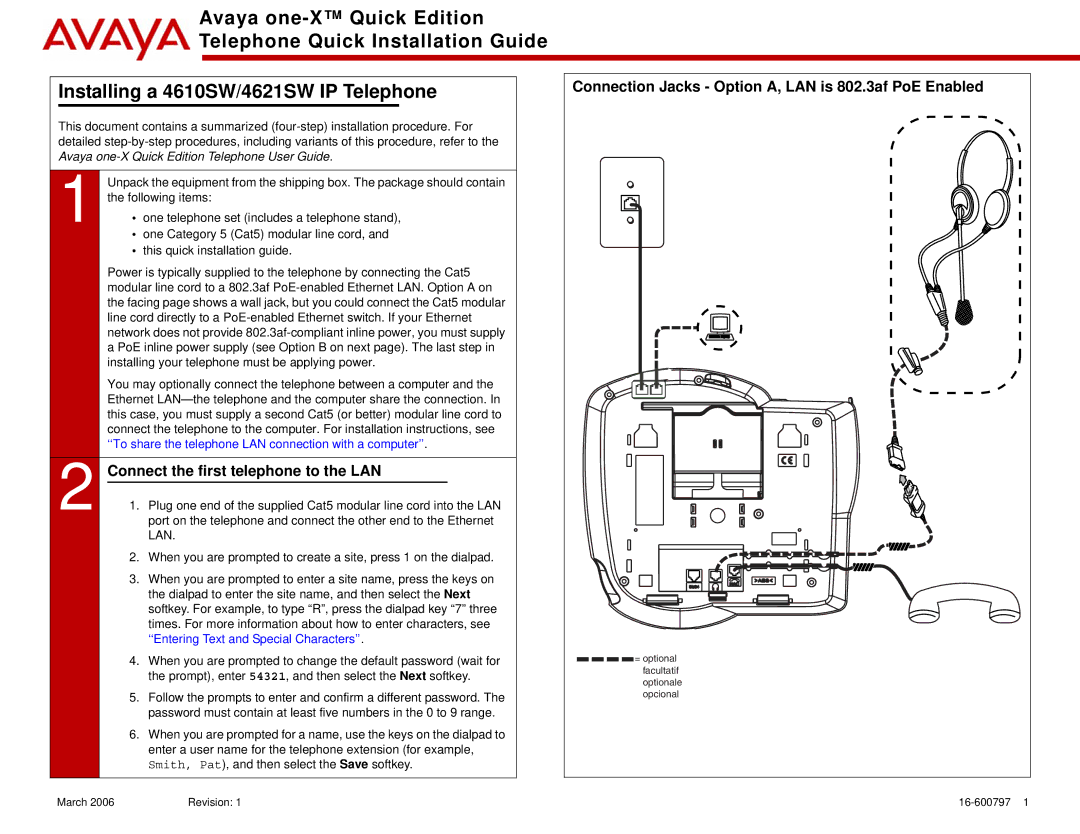
Installing a 4610SW/4621SW IP Telephone | Connection Jacks - Option A, LAN is 802.3af PoE Enabled | ||
This document contains a summarized |
| ||
detailed |
| ||
Avaya |
| ||
1 | Unpack the equipment from the shipping box. The package should contain |
| |
the following items: |
| ||
• | one telephone set (includes a telephone stand), |
| |
• | one Category 5 (Cat5) modular line cord, and |
| |
•this quick installation guide.
| Power is typically supplied to the telephone by connecting the Cat5 |
|
|
| ||
| modular line cord to a 802.3af |
|
|
| ||
| the facing page shows a wall jack, but you could connect the Cat5 modular |
|
|
| ||
| line cord directly to a |
|
|
| ||
| network does not provide |
|
|
| ||
| a PoE inline power supply (see Option B on next page). The last step in |
|
|
| ||
| installing your telephone must be applying power. |
|
|
| ||
| You may optionally connect the telephone between a computer and the |
|
|
| ||
| Ethernet |
|
|
| ||
| this case, you must supply a second Cat5 (or better) modular line cord to |
|
|
| ||
| connect the telephone to the computer. For installation instructions, see |
|
|
| ||
| ‘‘To share the telephone LAN connection with a computer’’. |
|
|
| ||
|
|
|
|
| ||
| Connect the first telephone to the LAN |
|
|
|
| |
2 1. | Plug one end of the supplied Cat5 modular line cord into the LAN |
|
|
| ||
port on the telephone and connect the other end to the Ethernet |
|
|
| |||
|
| LAN. |
|
|
| |
| 2. When you are prompted to create a site, press 1 on the dialpad. |
|
|
| ||
| 3. When you are prompted to enter a site name, press the keys on |
|
|
| ||
|
| the dialpad to enter the site name, and then select the Next |
|
|
| |
|
| softkey. For example, to type “R”, press the dialpad key “7” three |
|
|
| |
|
| times. For more information about how to enter characters, see |
|
|
| |
|
| ‘‘Entering Text and Special Characters’’. |
|
|
| |
4. | When you are prompted to change the default password (wait for | = optional | ||||
|
| the prompt), enter 54321, and then select the Next softkey. |
| facultatif | ||
|
|
| optionale | |||
|
|
|
|
| ||
5. | Follow the prompts to enter and confirm a different password. The |
| opcional | |||
|
| password must contain at least five numbers in the 0 to 9 range. |
|
|
| |
6.When you are prompted for a name, use the keys on the dialpad to enter a user name for the telephone extension (for example, Smith, Pat), and then select the Save softkey.
March 2006 | Revision: 1 |