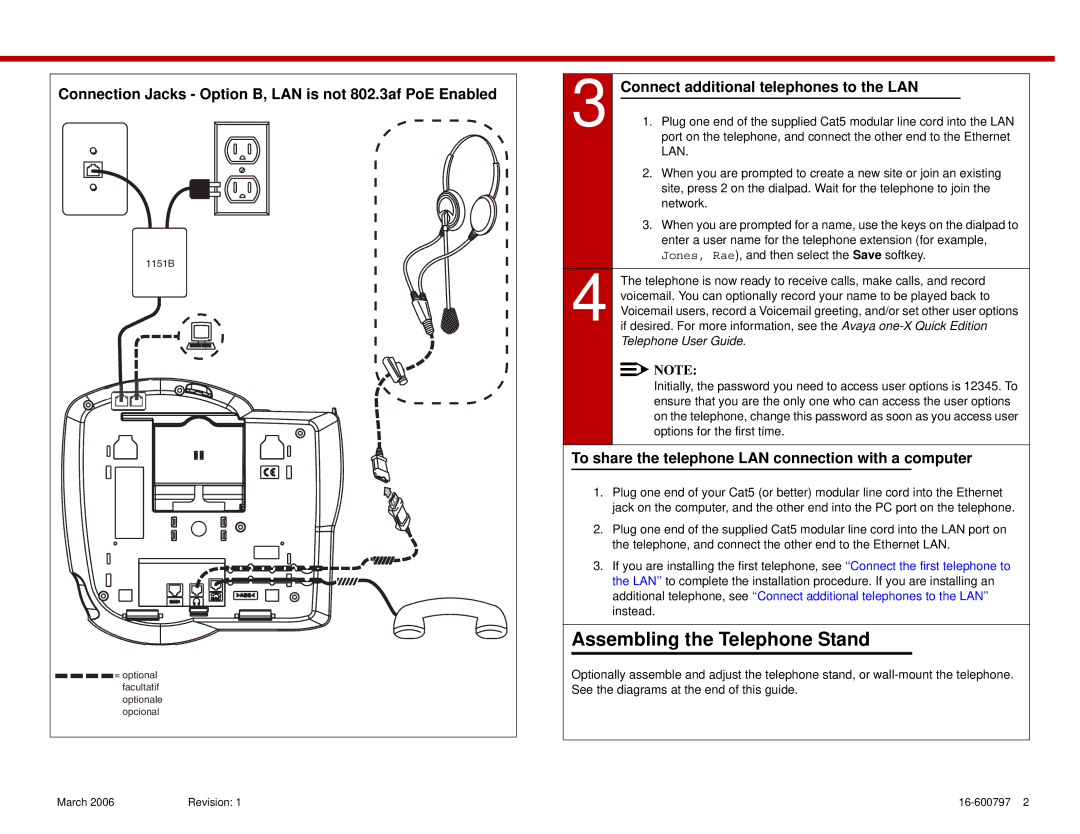
Connection Jacks - Option B, LAN is not 802.3af PoE Enabled
1151B
![]() = optional facultatif optionale opcional
= optional facultatif optionale opcional
3 |
| Connect additional telephones to the LAN |
| |
|
| Plug one end of the supplied Cat5 modular line cord into the LAN | ||
|
| 1. port on the telephone, and connect the other end to the Ethernet | ||
|
|
| LAN. | |
|
|
| 2. When you are prompted to create a new site or join an existing | |
|
|
| site, press 2 on the dialpad. Wait for the telephone to join the | |
|
|
| network. | |
|
|
| 3. When you are prompted for a name, use the keys on the dialpad to | |
|
|
| enter a user name for the telephone extension (for example, | |
|
|
| Jones, Rae), and then select the Save softkey. | |
4 |
| The telephone is now ready to receive calls, make calls, and record | ||
| voicemail. You can optionally record your name to be played back to | |||
| Voicemail users, record a Voicemail greeting, and/or set other user options | |||
if desired. For more information, see the Avaya | ||||
|
| Telephone User Guide. | ||
|
|
| NOTE: | |
|
|
| ||
|
|
| ||
|
|
| Initially, the password you need to access user options is 12345. To | |
|
|
| ensure that you are the only one who can access the user options | |
|
|
| on the telephone, change this password as soon as you access user | |
|
|
| options for the first time. | |
|
|
|
|
|
To share the telephone LAN connection with a computer
1.Plug one end of your Cat5 (or better) modular line cord into the Ethernet jack on the computer, and the other end into the PC port on the telephone.
2.Plug one end of the supplied Cat5 modular line cord into the LAN port on the telephone, and connect the other end to the Ethernet LAN.
3.If you are installing the first telephone, see ‘‘Connect the first telephone to the LAN’’ to complete the installation procedure. If you are installing an additional telephone, see ‘‘Connect additional telephones to the LAN’’ instead.
Assembling the Telephone Stand
Optionally assemble and adjust the telephone stand, or
March 2006 | Revision: 1 |
