
215 PTZ-E specifications
Axis Communications 215 PTZ-E is a robust and versatile surveillance camera designed for enhanced monitoring capabilities across various environments. This camera exemplifies Axis's commitment to quality and innovation in the field of video surveillance. With its PTZ (pan-tilt-zoom) functionalities, it allows operators to cover expansive areas, making it an excellent choice for outdoor surveillance applications.One of the standout features of the Axis 215 PTZ-E is its exceptional image quality. It is equipped with a high-resolution sensor that delivers clear and detailed images, even in varying light conditions. The camera supports multiple video resolutions, ensuring that users can select the resolution that best fits their requirements, whether that’s for detailed analysis or general monitoring. Additionally, the camera’s ability to function effectively in low-light environments makes it ideal for 24/7 surveillance.
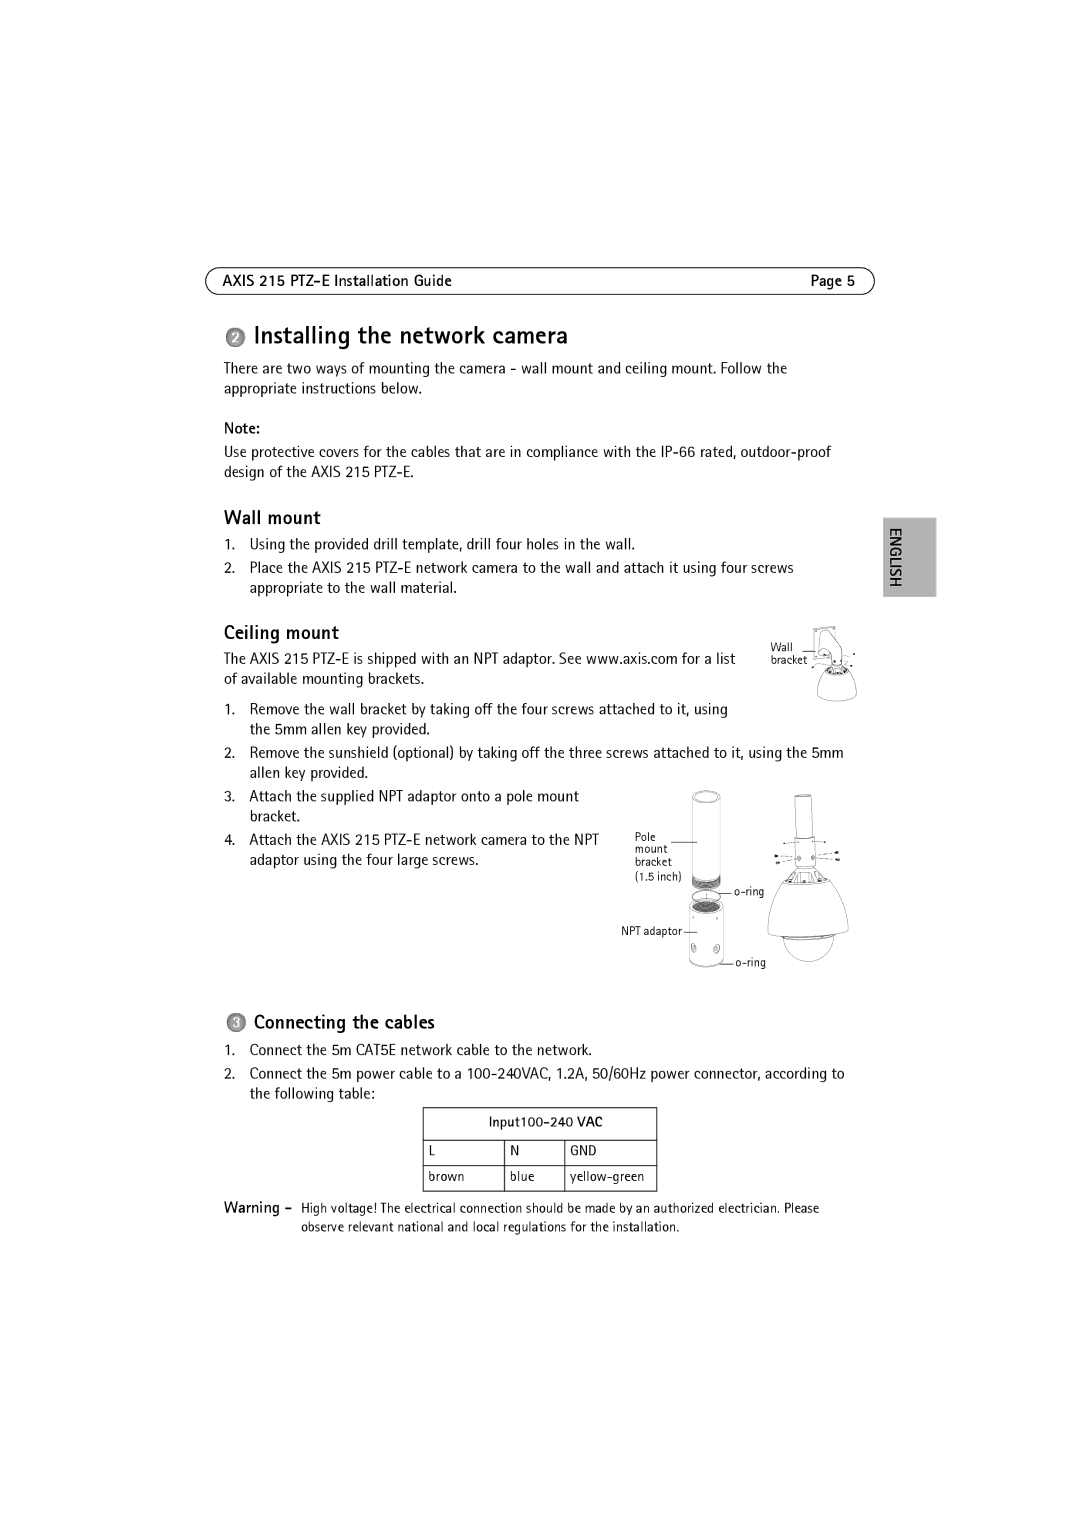
In terms of its design, the Axis 215 PTZ-E is built to withstand the elements. It is housed in a weather-resistant enclosure, making it suitable for both indoor and outdoor use. The camera also features built-in heaters and fans, ensuring optimal performance regardless of the temperature variations in its surroundings.
Axis has incorporated advanced technologies in the 215 PTZ-E that enhance its operational capabilities. The camera comes equipped with powerful 18x optical zoom, allowing users to zoom in on distant objects without sacrificing image quality. This is particularly useful for monitoring large areas or for identifying specific objects or individuals from a distance. The PTZ functionality grants the camera the ability to pan 360 degrees and tilt 90 degrees, offering comprehensive coverage and the flexibility to follow moving targets.
Motion detection features are also integral to the Axis 215 PTZ-E. The camera can be programmed to trigger alerts or recordings upon detecting movement, thereby enhancing security by ensuring that all suspicious activities are monitored closely. Furthermore, users can set predefined patrol paths, allowing the camera to automatically navigate specific routes, reducing the need for constant manual operation.
With its open architecture design, the Axis 215 PTZ-E is compatible with a wide range of third-party software and systems, making it a flexible choice for diverse surveillance setups. It also supports Power over Ethernet (PoE), simplifying installation and reducing the need for additional cabling.
In summary, the Axis Communications 215 PTZ-E stands out as a powerful surveillance tool equipped with high-resolution imaging, durability for outdoor use, advanced PTZ capabilities, and integration flexibility. Its combination of features makes it an ideal solution for comprehensive security monitoring in various settings.