Page 8 | AXIS T91A Series Installation Guide |
5.Use the Torx screws to secure the parapet bracket to the bracket holder.
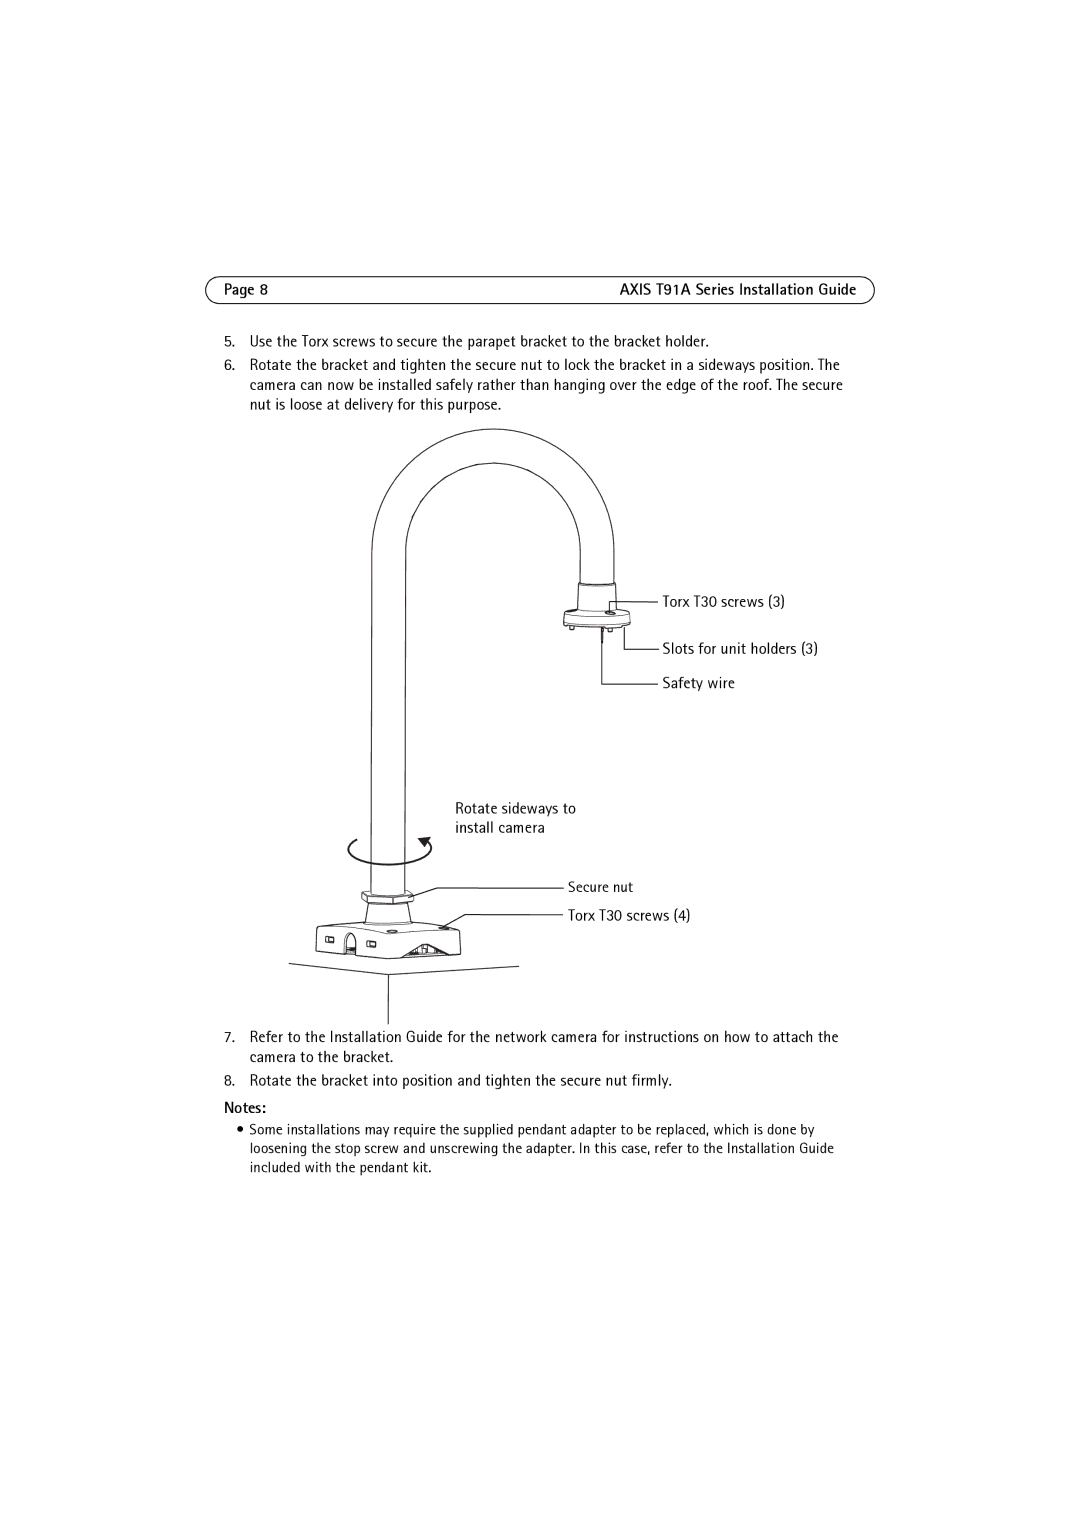
6.Rotate the bracket and tighten the secure nut to lock the bracket in a sideways position. The camera can now be installed safely rather than hanging over the edge of the roof. The secure nut is loose at delivery for this purpose.
![]() Torx T30 screws (3)
Torx T30 screws (3)
![]() Slots for unit holders (3)
Slots for unit holders (3)
Safety wire
Rotate sideways to install camera
Secure nut
Torx T30 screws (4)
7.Refer to the Installation Guide for the network camera for instructions on how to attach the camera to the bracket.
8.Rotate the bracket into position and tighten the secure nut firmly.
Notes:
•Some installations may require the supplied pendant adapter to be replaced, which is done by loosening the stop screw and unscrewing the adapter. In this case, refer to the Installation Guide included with the pendant kit.