WARNING
FAILURE TO OBSERVE THE FOLLOWING WARNINGS COULD RESULT IN INJURY
USING THE TOOL
•Keep hands, loose clothing and long hair away from the reaction arm and working area during operation. Do not attempt to support the tool with your hands during operation.
•This tool will exert a strong reaction force. Use proper mechanical support and correct reaction arm positioning to control these forces. Do not position the reaction arm so that it tilts the tool off the axis of the bolt and never use the swivel inlets as a reaction stop.
•Avoid sharp bends and kinks that will cause severe
•Use accessories recommended by Aztec Bolting Services.
•Use only impact sockets and accessories. Do not use hand (chrome) sockets or accessories.
•Use only sockes and accesssories that correctly fit the bolt or nut and function without tilting the tool off the axis of the bolt.
•This tool is not designed for working in explosive atmospheres
•This tool is not insulated against electric shock. When using this tool with a pump having an electrical power source or circuits, follow the pump instructions for proper grounding.
Always wear eye protection when operating
or performing maintenance on this tool.
The Torque Reaction Arm must be positioned
against a positive stop. Do not use the Arm as a dead
handle. Take all precautions to make certain the
operator’s hand cannot be pinched between the Arm
and a solid object.
Keep body stance balanced and firm. Do not
overreach when operating this tool.
Always wear ear protection
when operating this tool.
!
Do not carry the tool by the
hose.
Always turn off the pump and
disconnect the power before installing, removing, or adjusting any accessory on this tool, or before performing any maintenance on this tool.
OFF ON
POWER
Operate at 10,000 psig
(681bar) maximum pressure.
10,000 psig
(681 bar)
Do not use damaged, frayed or
deteriorated hydraulic hoses and fittings.
PLACING THE TOOL IN SERVICE
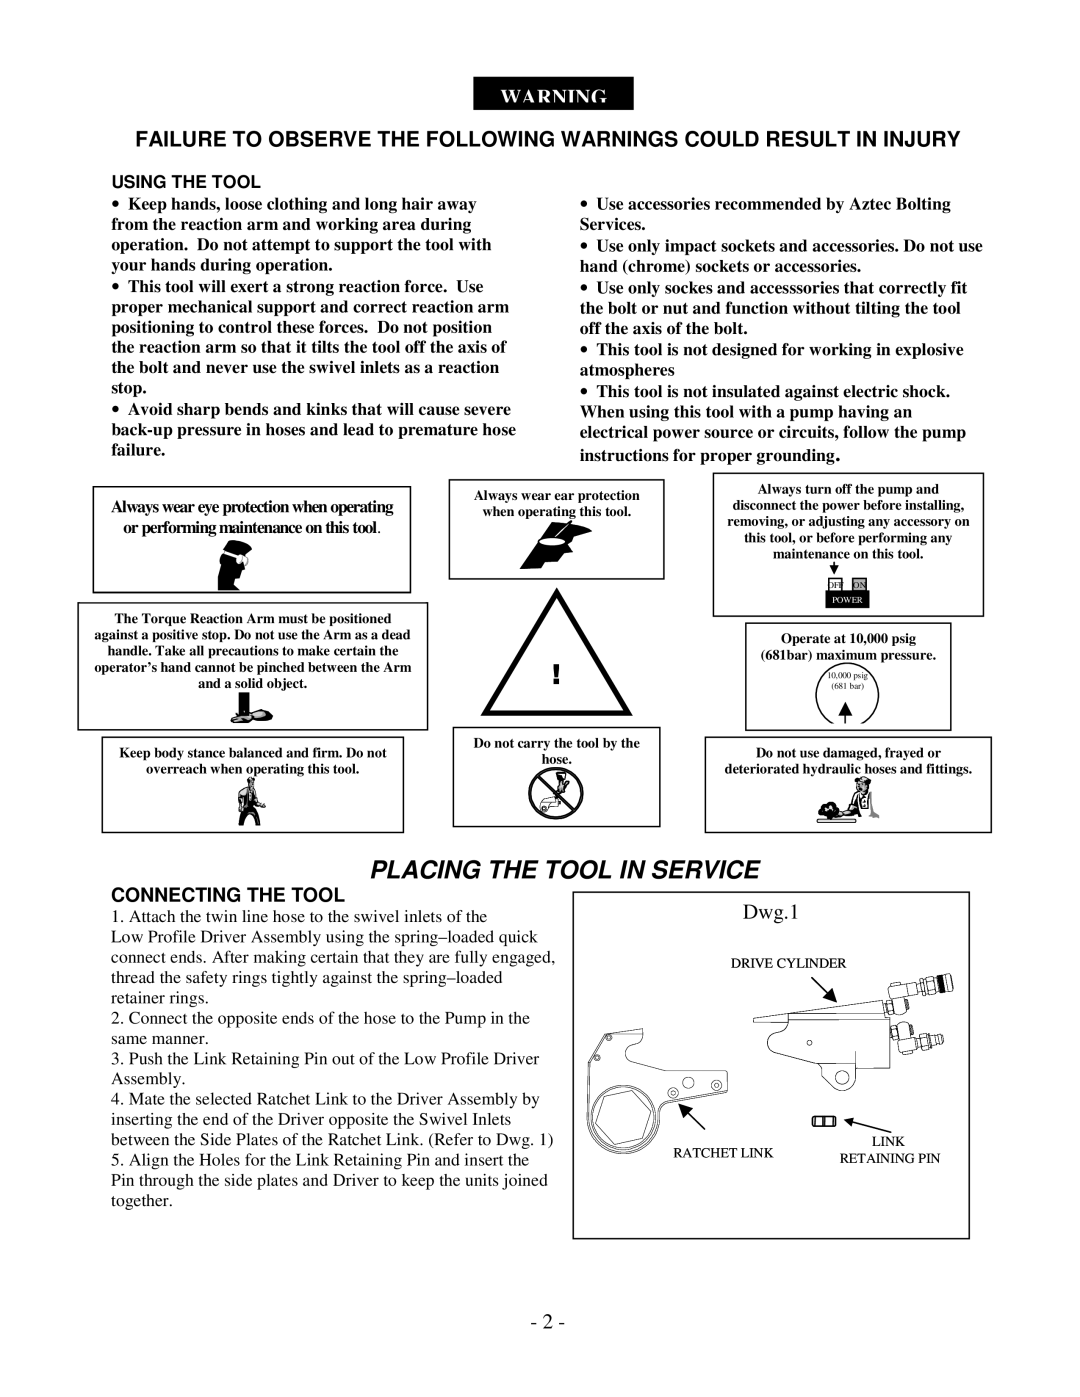
CONNECTING THE TOOL
1. Attach the twin line hose to the swivel inlets of the
Low Profile Driver Assembly using the
2.Connect the opposite ends of the hose to the Pump in the same manner.
3.Push the Link Retaining Pin out of the Low Profile Driver Assembly.
4.Mate the selected Ratchet Link to the Driver Assembly by inserting the end of the Driver opposite the Swivel Inlets between the Side Plates of the Ratchet Link. (Refer to Dwg. 1)
5.Align the Holes for the Link Retaining Pin and insert the
Pin through the side plates and Driver to keep the units joined together.
Dwg.1 |
| |
DRIVE CYLINDER | ||
RATCHET LINK | LINK | |
RETAINING PIN | ||
| ||
- 2 -
