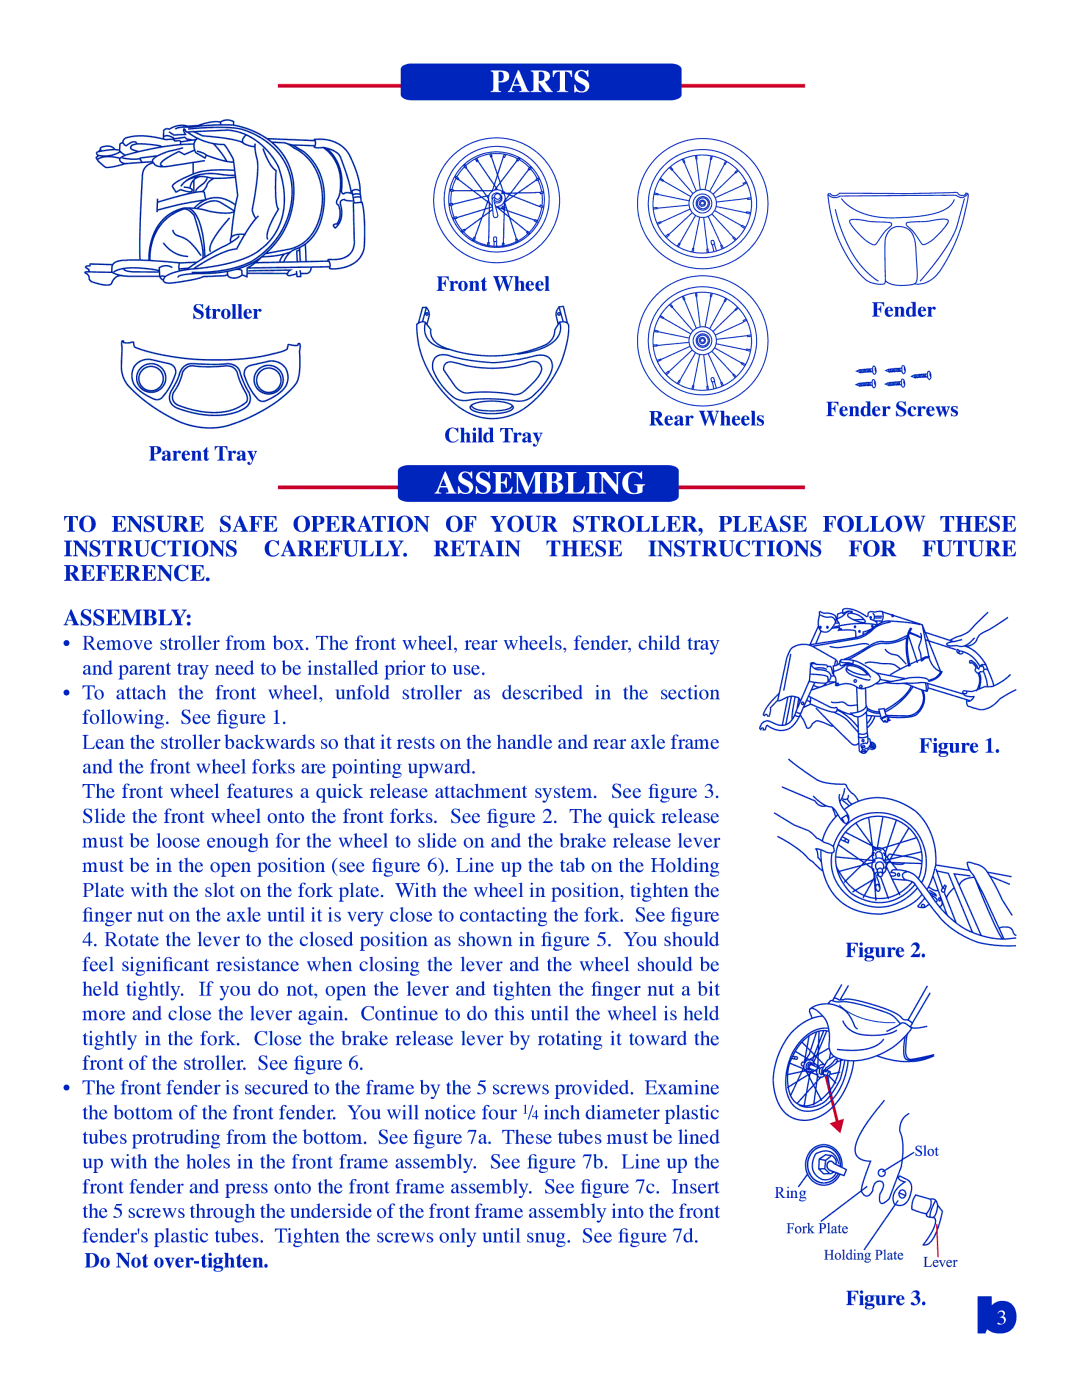
Front Wheel
Stroller | Fender |
| Child Tray | Rear Wheels | Fender Screws |
|
| ||
Parent Tray |
|
| |
|
|
|
TO ENSURE SAFE OPERATION OF YOUR STROLLER, PLEASE FOLLOW THESE | ||
INSTRUCTIONS CAREFULLY. RETAIN THESE INSTRUCTIONS FOR FUTURE | ||
REFERENCE. |
| |
ASSEMBLY: |
| |
• | Remove stroller from box. The front wheel, rear wheels, fender, child tray |
|
| and parent tray need to be installed prior to use. |
|
• To attach the front wheel, unfold stroller as described in the section |
| |
| following. See figure 1. |
|
| Lean the stroller backwards so that it rests on the handle and rear axle frame | Figure 1. |
| and the front wheel forks are pointing upward. |
|
| The front wheel features a quick release attachment system. See figure 3. |
|
| Slide the front wheel onto the front forks. See figure 2. The quick release |
|
| must be loose enough for the wheel to slide on and the brake release lever |
|
| must be in the open position (see figure 6). Line up the tab on the Holding |
|
| Plate with the slot on the fork plate. With the wheel in position, tighten the |
|
| finger nut on the axle until it is very close to contacting the fork. See figure |
|
| 4. Rotate the lever to the closed position as shown in figure 5. You should | Figure 2. |
| feel significant resistance when closing the lever and the wheel should be | |
|
| |
| held tightly. If you do not, open the lever and tighten the finger nut a bit |
|
| more and close the lever again. Continue to do this until the wheel is held |
|
| tightly in the fork. Close the brake release lever by rotating it toward the |
|
| front of the stroller. See figure 6. |
|
• | The front fender is secured to the frame by the 5 screws provided. Examine |
|
| the bottom of the front fender. You will notice four 1/4 inch diameter plastic |
|
| tubes protruding from the bottom. See figure 7a. These tubes must be lined |
|
| up with the holes in the front frame assembly. See figure 7b. Line up the |
|
| front fender and press onto the front frame assembly. See figure 7c. Insert | Ring |
| the 5 screws through the underside of the front frame assembly into the front |
|
| fender's plastic tubes. Tighten the screws only until snug. See figure 7d. |
|
| Do Not |
|
|
| Figure 3. |
|
| 3 |