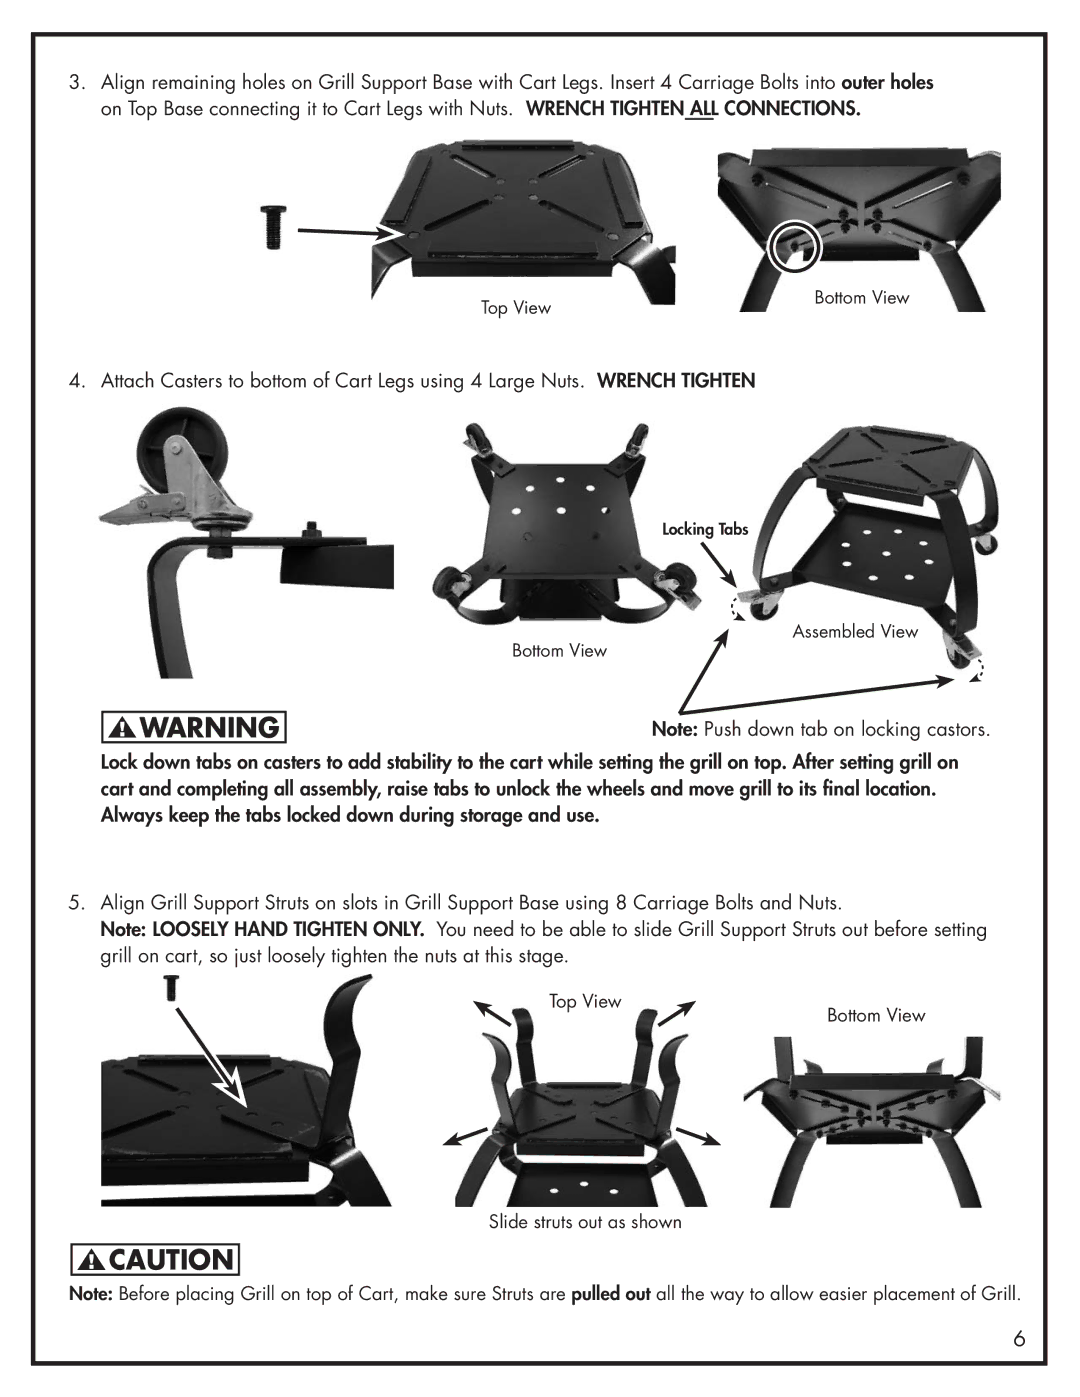
3.Align remaining holes on Grill Support Base with Cart Legs. Insert 4 Carriage Bolts into outer holes on Top Base connecting it to Cart Legs with Nuts. WRENCH TIGHTEN ALL CONNECTIONS.
Top View | Bottom View |
|
4. Attach Casters to bottom of Cart Legs using 4 Large Nuts. WRENCH TIGHTEN
![]()
![]() WARNING
WARNING
Locking Tabs
Assembled View
Bottom View
Note: Push down tab on locking castors.
Lock down tabs on casters to add stability to the cart while setting the grill on top. After setting grill on cart and completing all assembly, raise tabs to unlock the wheels and move grill to its final location. Always keep the tabs locked down during storage and use.
5.Align Grill Support Struts on slots in Grill Support Base using 8 Carriage Bolts and Nuts.
Note: LOOSELY HAND TIGHTEN ONLY. You need to be able to slide Grill Support Struts out before setting grill on cart, so just loosely tighten the nuts at this stage.
Top View
Bottom View
Slide struts out as shown
![]()
![]() CAUTION
CAUTION
Note: Before placing Grill on top of Cart, make sure Struts are pulled out all the way to allow easier placement of Grill.
6