2. CONTROL ELEMENTS AND CONNECTIONS
6
simultaneously turn one of the push encoders. The new preset number blinks in the display. s Press STORE again, and STORE LED and the display stop blinking.
s If you want to overwrite the current preset, press the STORE button twice (step 2 is omitted). s You can cancel the store by pressing the EDIT/EXIT button.
+ We have deliberately refrained from having an automatic store function. This way, in the meantime you can assign a new MIDI command to a control element without changing the current preset. Should you then wish to restore the previous preset, briefly dial up another preset and then switch back to the old preset. Now, all the data has been restored, including the control element whose function had previously been briefly reassigned.
The EDIT/EXIT button has two functions:
1. EDIT mode: To activate the EDIT mode, keep the EDIT/EXIT button pressed and actuate the desired
control element (push encoders through or buttons through ). After that, release the EDIT/EXIT button. The EDIT mode is now activated for the selected control element and is shown in the display (e.g. E(ncoder) 3 > LED is lit or b(utton) 1 > LED blinks).
To exit the EDIT mode, press the EDIT/EXIT button. The unit switches back into normal operating mode.
+ All EDIT mode functions for particular controller types are listed in tables 6.3 and 6.4.
+ There are two different types of assignable control elements: CONTINUOUS (knobs) and SWITCH (buttons). The corresponding functions and setting options are described in tables 6.3 and 6.4.
+ Please keep in mind that 2 different data types can be assigned to a push encoder (either “continuous” or “switch-type”).
+ All the settings made here are stored only temporarily! If you wish to store them permanently, you will have to store them in a preset.
2. GLOBAL mode: All cross-functional settings that affect not only presets but the whole unit are made in this mode.
s Keep the EDIT/EXIT button pressed and then press the STORE button. You are now in the global setup and can release both buttons.
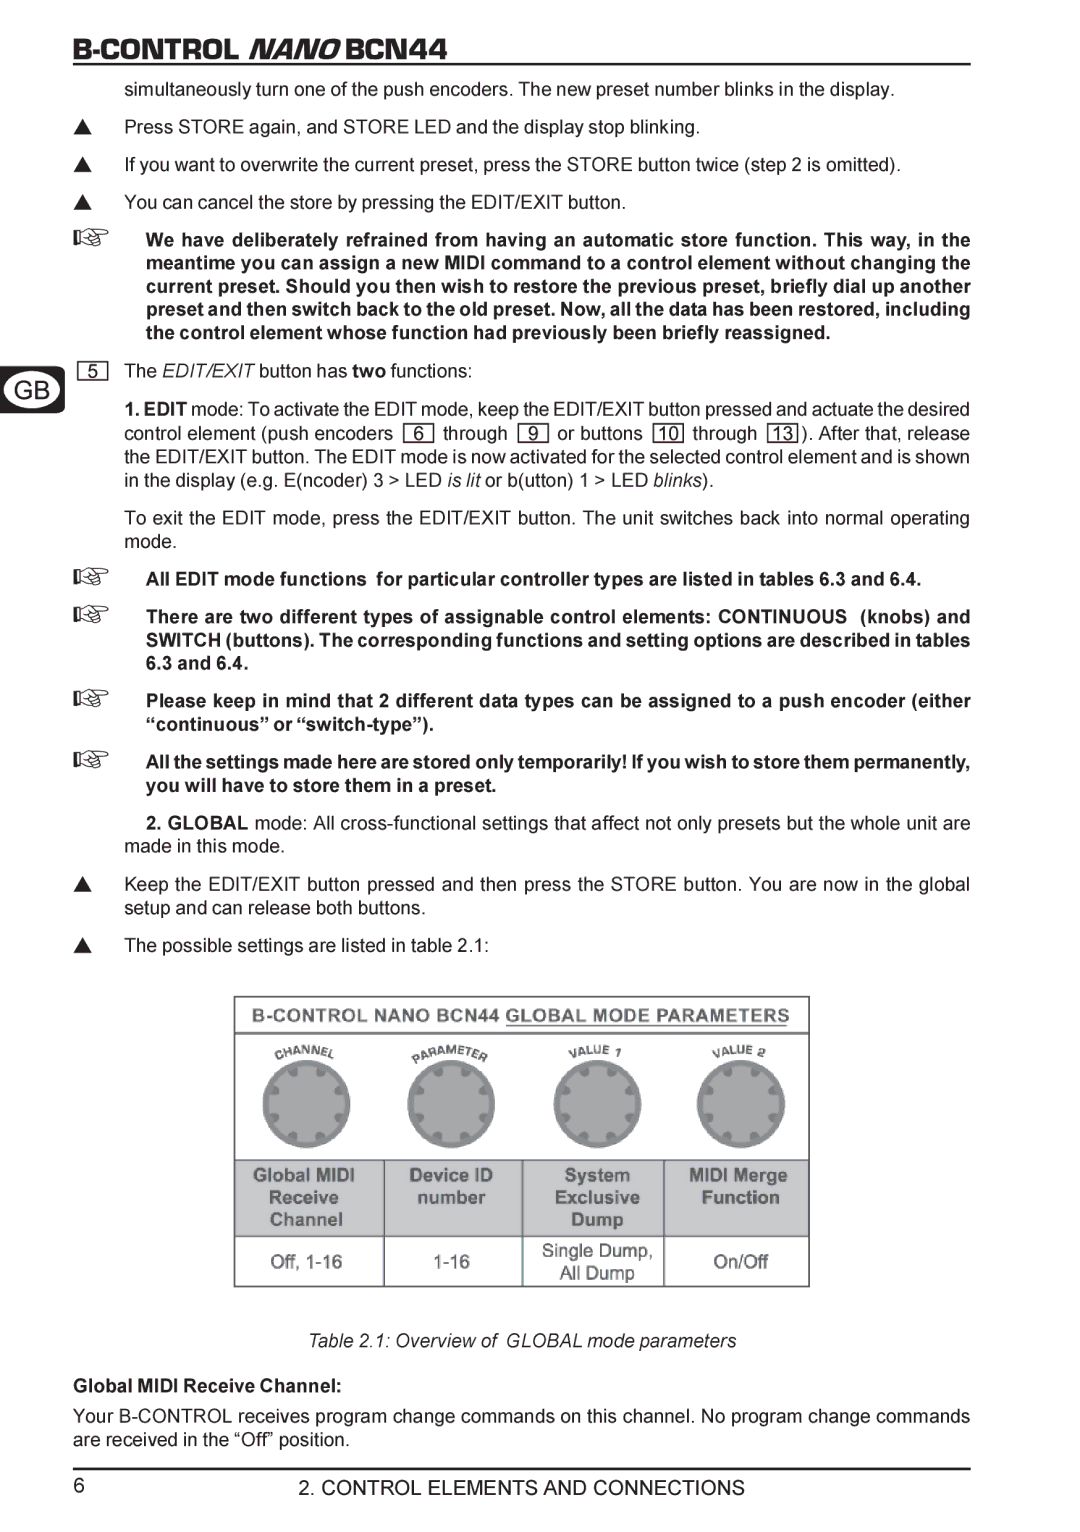
s The possible settings are listed in table 2.1:
Table 2.1: Overview of GLOBAL mode parameters
Global MIDI Receive Channel:
Your B-CONTROL receives program change commands on this channel. No program change commands are received in the “Off” position.
