Manuals
/
Behringer
/
Home Audio
/
Stereo Amplifier
Behringer
PROMIC2200
manual
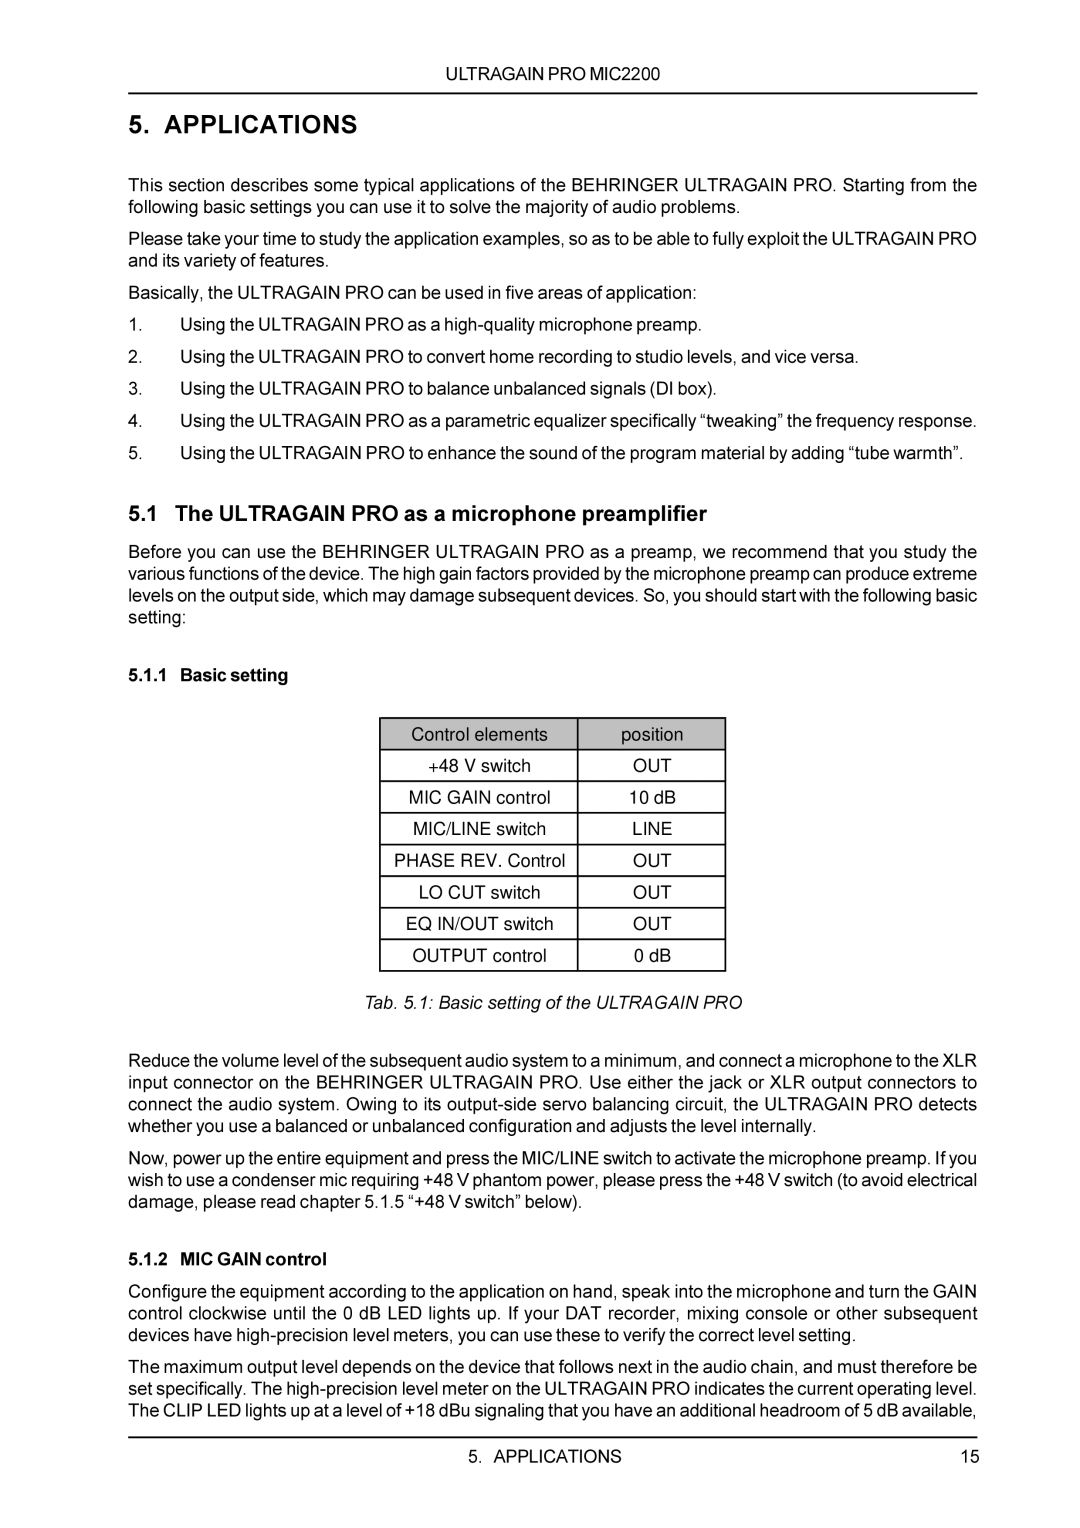
Applications, Tab. 5.1 Basic setting of the ULTRAGAIN PRO
Models:
PROMIC2200
1
15
20
20
Download
20 pages
14.49 Kb
12
13
14
15
16
17
18
19
Specification
Install
Warranty
Safety
Page 15
Image 15
Page 14
Page 16
Page 15
Image 15
Page 14
Page 16
Contents
ULTRAGAIN PRO MIC2200
ENGLISH
SAFETY INSTRUCTIONS
FOREWORD
ULTRAGAIN PRO
TABLE OF CONTENTS
1. INTRODUCTION
1.1 Technical background
1.2 The tube used in the ULTRAGAIN PRO
ULTRAGAIN PRO MIC2200
Fig. 1.3 diode
Fig. 1.4: triode
k= k22 + k32
Fig. 1.5 pentode
Formula for calculating total harmonic distortion
2.2 Inputs and outputs
3. INSTALLATION
2. THE DESIGN CONCEPT
2.1 High quality components and design
3. INSTALLATION
3.1 Rack mounting
3.2 Mains voltage
3.3 Audio connections
4. CONTROL ELEMENTS
4.1 Front panel control elements
Fig. 4.1 Control elements on the front panel
4.2 Rear panel control elements
Tab. 5.1 Basic setting of the ULTRAGAIN PRO
5. APPLICATIONS
ULTRAGAIN PRO MIC2200
5.2 The ULTRAGAIN PRO as a level translator
5.3 The ULTRAGAIN PRO as a direct-injectionbox
5.4 The ULTRAGAIN PRO’s parametric equalizer
5.5 The ULTRAGAIN PRO as a tube interface
6. SPECIFICATIONS
6. SPECIFICATIONS
ULTRAGAIN PRO MIC2200
7.WARRANTY
7. WARRANTY
ULTRAGAIN PRO MIC2200
Top
Page
Image
Contents