Installation
Position the Control Arm
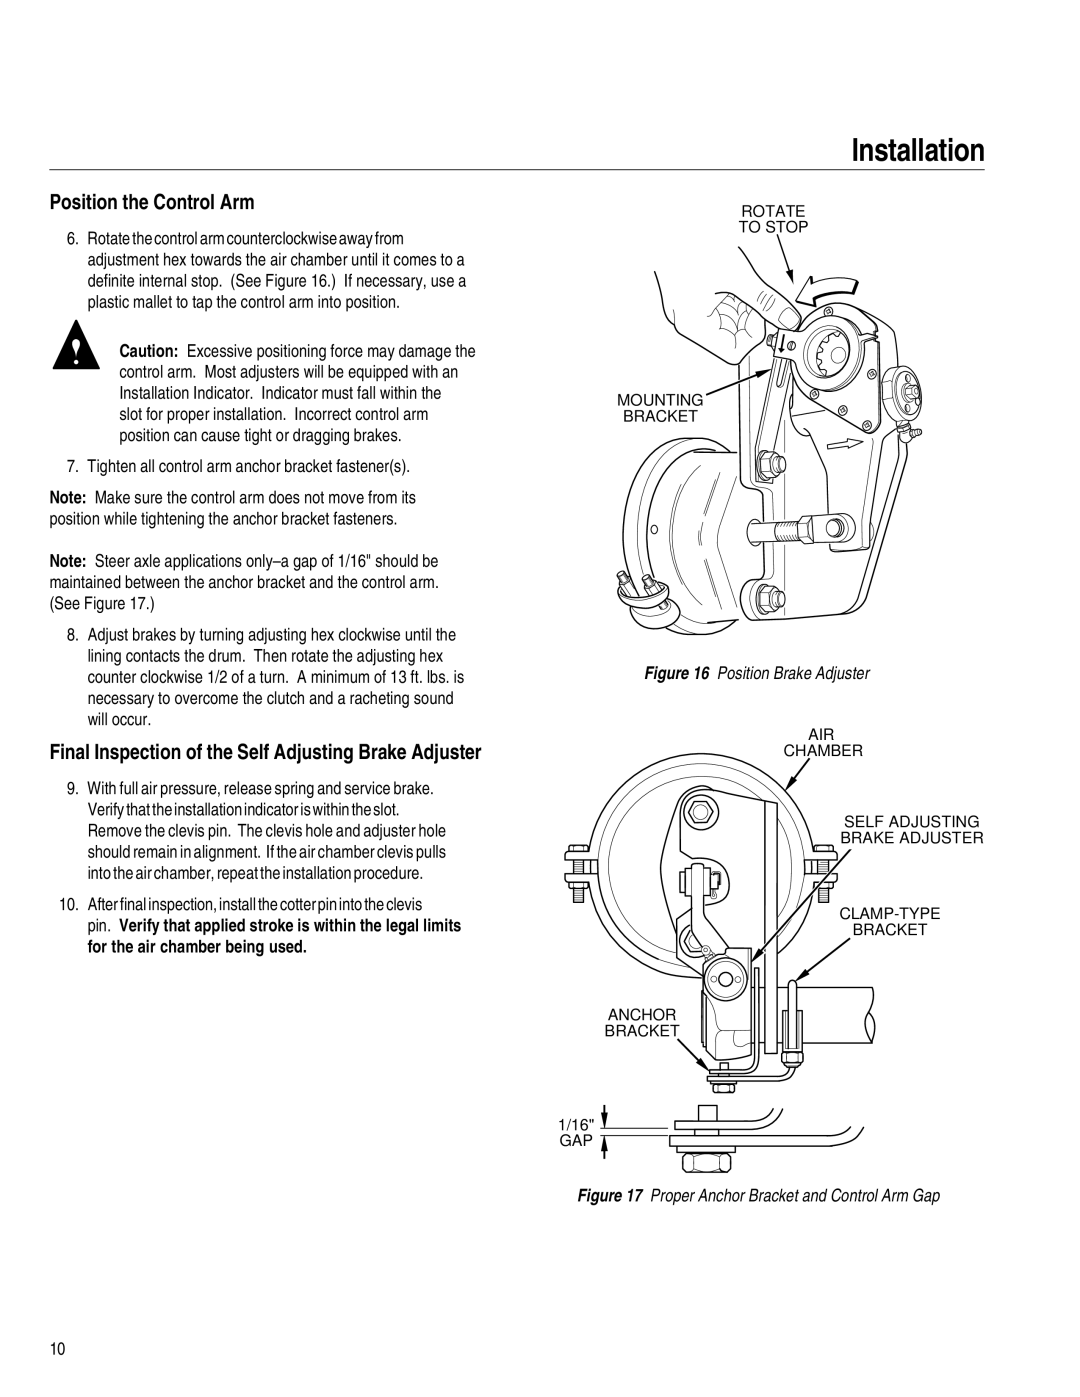
6.Rotate the control arm counterclockwise away from adjustment hex towards the air chamber until it comes to a definite internal stop. (See Figure 16.) If necessary, use a plastic mallet to tap the control arm into position.
Caution: Excessive positioning force may damage the control arm. Most adjusters will be equipped with an Installation Indicator. Indicator must fall within the slot for proper installation. Incorrect control arm position can cause tight or dragging brakes.
7. Tighten all control arm anchor bracket fastener(s).
Note: Make sure the control arm does not move from its position while tightening the anchor bracket fasteners.
Note: Steer axle applications
8.Adjust brakes by turning adjusting hex clockwise until the lining contacts the drum. Then rotate the adjusting hex counter clockwise 1/2 of a turn. A minimum of 13 ft. lbs. is necessary to overcome the clutch and a racheting sound will occur.
Final Inspection of the Self Adjusting Brake Adjuster
9.With full air pressure, release spring and service brake. Verify that the installation indicator is within the slot. Remove the clevis pin. The clevis hole and adjuster hole should remain in alignment. If the air chamber clevis pulls into the air chamber, repeat the installation procedure.
10.After final inspection, install the cotter pin into the clevis
pin. Verify that applied stroke is within the legal limits for the air chamber being used.
ROTATE
TO STOP
MOUNTING
BRACKET
Figure 16 Position Brake Adjuster
AIR
CHAMBER
AUTOMATIC
SELFSLADJUSTINGCK
BRAKEADJUSTERADJUSTER
BRACKET
ANCHOR
BRACKET
1/16" ![]()
GAP ![]()
Figure 17 Proper Anchor Bracket and Control Arm Gap
10
