Installation
Installation Procedure
Caution: The procedures shown in this section are applicable to vehicles originally equipped with Spicer® brand self adjusting brake adjusters only, and must not be used for aftermarket retrofit. Specific retrofit instructions are provided with retrofit kits.
Attach the Self Adjusting Brake Adjuster
WARNING: BLOCK WHEELS TO PREVENT VEHICLE FROM ROLLING. CAGE SPRING BRAKES IF INSTALLED.
NOTE: A properly working Automatic Slack Adjuster does not require manual adjustment while in service. The manual adjuster hex is intended for use during adjuster installation and brake overhaul.
WARNING: Automatic slack adjusters should not be repeatedly adjusted to correct excessive in service pushrod stroke, because this condition indicates that a problem exists with the automatic adjuster, with the installation of the adjuster or with related foundation brake components which manual adjustment will not correct.
1.Verify that the pushrod is fully retracted. Apply air to release spring brake. If air is not available, spring brake must be manually caged off.
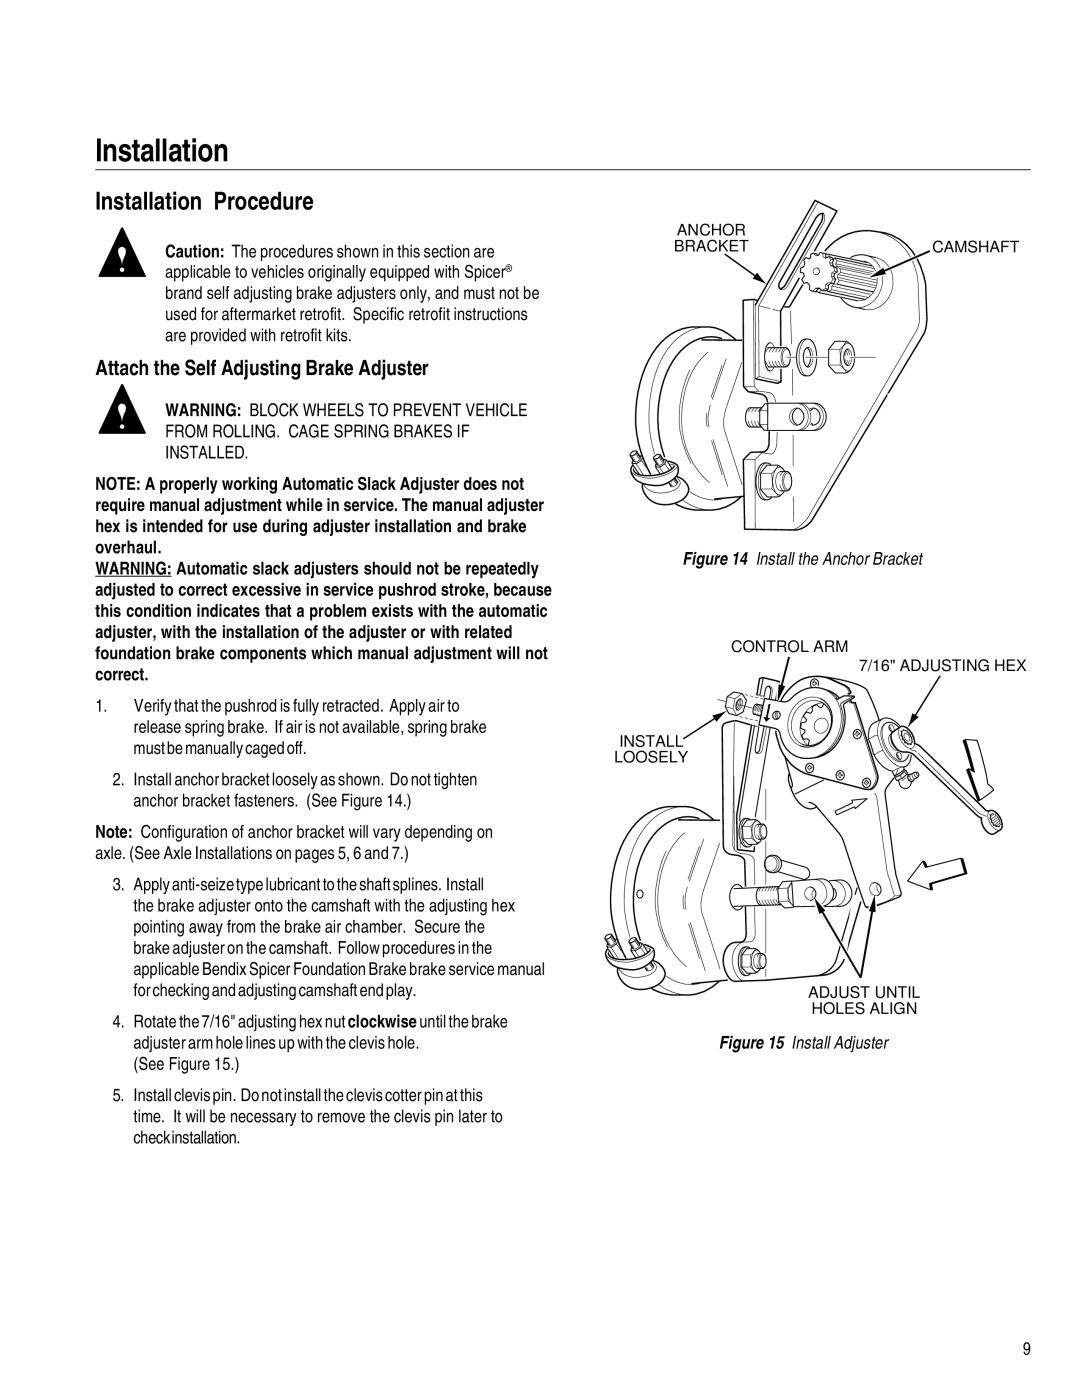
2.Install anchor bracket loosely as shown. Do not tighten anchor bracket fasteners. (See Figure 14.)
Note: Configuration of anchor bracket will vary depending on axle. (See Axle Installations on pages 5, 6 and 7.)
3.Apply
the brake adjuster onto the camshaft with the adjusting hex pointing away from the brake air chamber. Secure the brake adjuster on the camshaft. Follow procedures in the applicable Bendix Spicer Foundation Brake brake service manual for checking and adjusting camshaft end play.
4.Rotate the 7/16" adjusting hex nut clockwise until the brake adjuster arm hole lines up with the clevis hole.
(See Figure 15.)
5.Install clevis pin. Do not install the clevis cotter pin at this time. It will be necessary to remove the clevis pin later to checkinstallation.
ANCHOR
BRACKETCAMSHAFT
INSTALL
LOOSELY
Figure 14 Install the Anchor Bracket
CONTROL ARM
7/16" ADJUSTING HEX
INSTALL
LOOSELY
ADJUST UNTIL
HOLES ALIGN
Figure 15 Install Adjuster
9
