Bulletin | Page: 2 of 3 |
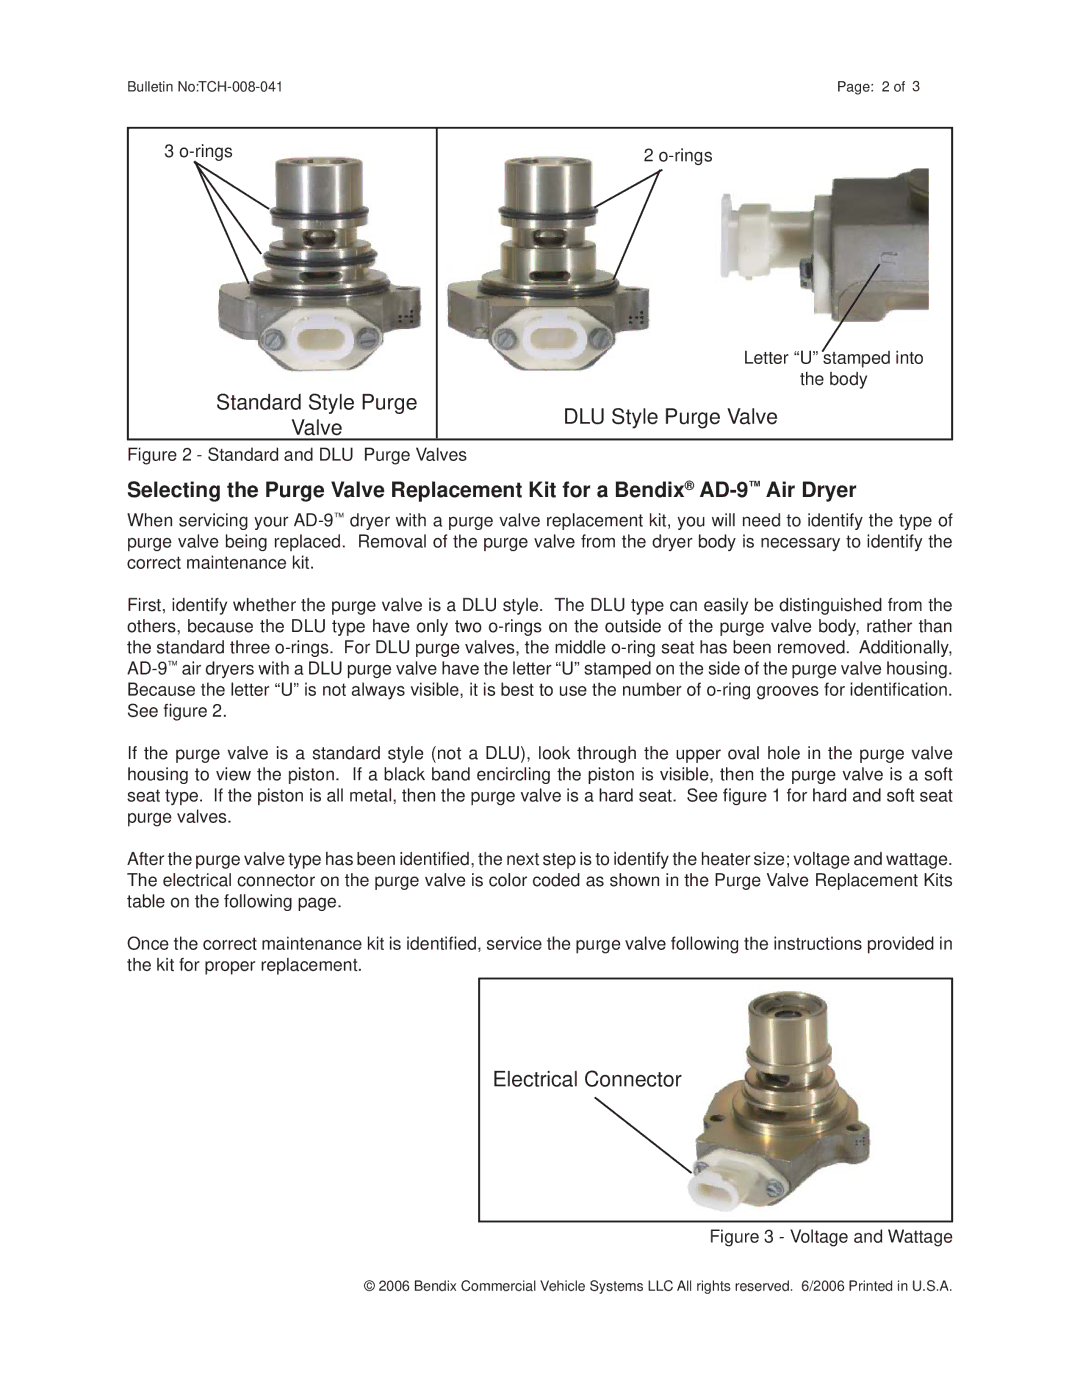
3
Standard Style Purge
Valve
2
Letter “U” stamped into
the body
DLU Style Purge Valve
Figure 2 - Standard and DLU Purge Valves
Selecting the Purge Valve Replacement Kit for a Bendix®
When servicing your
First, identify whether the purge valve is a DLU style. The DLU type can easily be distinguished from the others, because the DLU type have only two
If the purge valve is a standard style (not a DLU), look through the upper oval hole in the purge valve housing to view the piston. If a black band encircling the piston is visible, then the purge valve is a soft seat type. If the piston is all metal, then the purge valve is a hard seat. See figure 1 for hard and soft seat purge valves.
After the purge valve type has been identified, the next step is to identify the heater size; voltage and wattage. The electrical connector on the purge valve is color coded as shown in the Purge Valve Replacement Kits table on the following page.
Once the correct maintenance kit is identified, service the purge valve following the instructions provided in the kit for proper replacement.
Electrical Connector
Figure 3 - Voltage and Wattage
© 2006 Bendix Commercial Vehicle Systems LLC All rights reserved. 6/2006 Printed in U.S.A.
