GAS CONVERSION
WARNING!
Before carrying out this operation, disconnect
the appliance from gas and electricity.
Gas conversion shall be conducted by a factory‐
trained professional.
Call the customer service hotline to identify a factory‐trained professional near your home.
The gas conversion procedure for this range includes 6 steps:
1.Pressure regulator
2.Surface burners
3.Main oven burner
4.Broiler burner
5.Visual checks prior to closure of oven bottom panel
6.Adjustment of minimum setting
The conversion is not completed if all 6 steps have not been concluded properly.
Before performing the gas conversion, locate the package containing the replacement nozzle shipped with every range. IMPORTANT: Each nozzle has a number indicating its flow diameter printed on the body. Consult the table on page 20 for matching nozzles to burners.
Save the nozzles removed from the range for future use.
STEP 1: PRESSURE REGULATOR
The pressure regulator supplied with the appliance is a convertible type pressure regulator for use with Natural Gas at a nominal outlet pressure of 4” w.c. or LP gas at a nominal outlet pressure of 11” w.c. and it is pre‐arranged from the factory to operate with one of these gas/pressure as indicated in the labels affixed on the appliance, package and Instruction booklet.
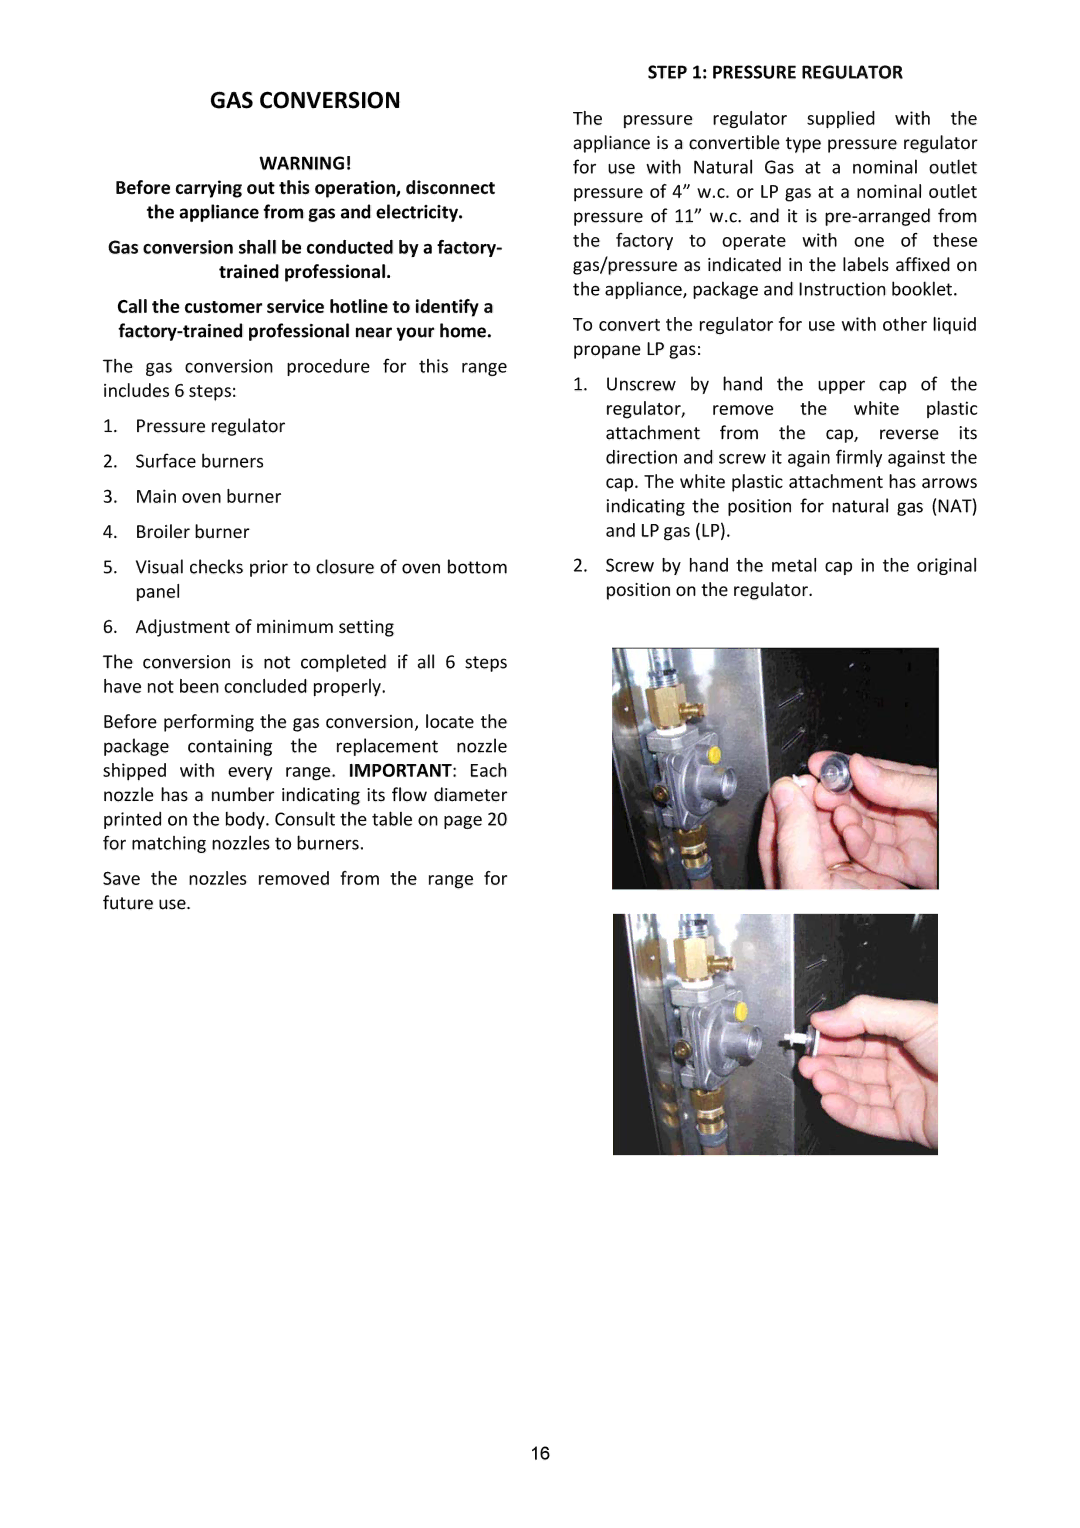
To convert the regulator for use with other liquid propane LP gas:
1.Unscrew by hand the upper cap of the regulator, remove the white plastic attachment from the cap, reverse its direction and screw it again firmly against the cap. The white plastic attachment has arrows indicating the position for natural gas (NAT) and LP gas (LP).
2.Screw by hand the metal cap in the original position on the regulator.
16
