
1620 specifications
The Bissell 1620 is a versatile and powerful carpet cleaner designed to tackle tough stains and refresh carpets in your home. Its unique features and advanced technologies make it a favorite among homeowners looking for effective cleaning solutions.One of the standout features of the Bissell 1620 is its Express Clean mode. This innovative technology enables users to clean carpets quickly while allowing them to dry in under 30 minutes. This is particularly beneficial for households with high foot traffic, as it ensures minimal downtime and the convenience of using carpets shortly after cleaning.
The machine is equipped with a dual-tank tank system that separates clean and dirty water. The clean water tank is easy to fill and has a large capacity, allowing for extended cleaning without frequent refills. The dirty water tank, on the other hand, is designed for easy disposal, ensuring a hygienic cleaning experience.
Another impressive characteristic is the Bissell 1620's powerful suction capabilities, which help to lift stubborn dirt and grime from deep within carpet fibers. This impressive suction is complemented by the machine’s DirtLifter PowerBrush, featuring multiple rotating bristle rows that scrub carpets effectively. This brush not only loosens the dirt but also helps to deep clean and revive tired-looking carpets.
The Bissell 1620 is also quite user-friendly, with a lightweight design that allows for easy maneuverability. The compact size makes it simple to store and transport, while the 22-foot power cord provides ample reach without the need for constant unplugging and replugging.
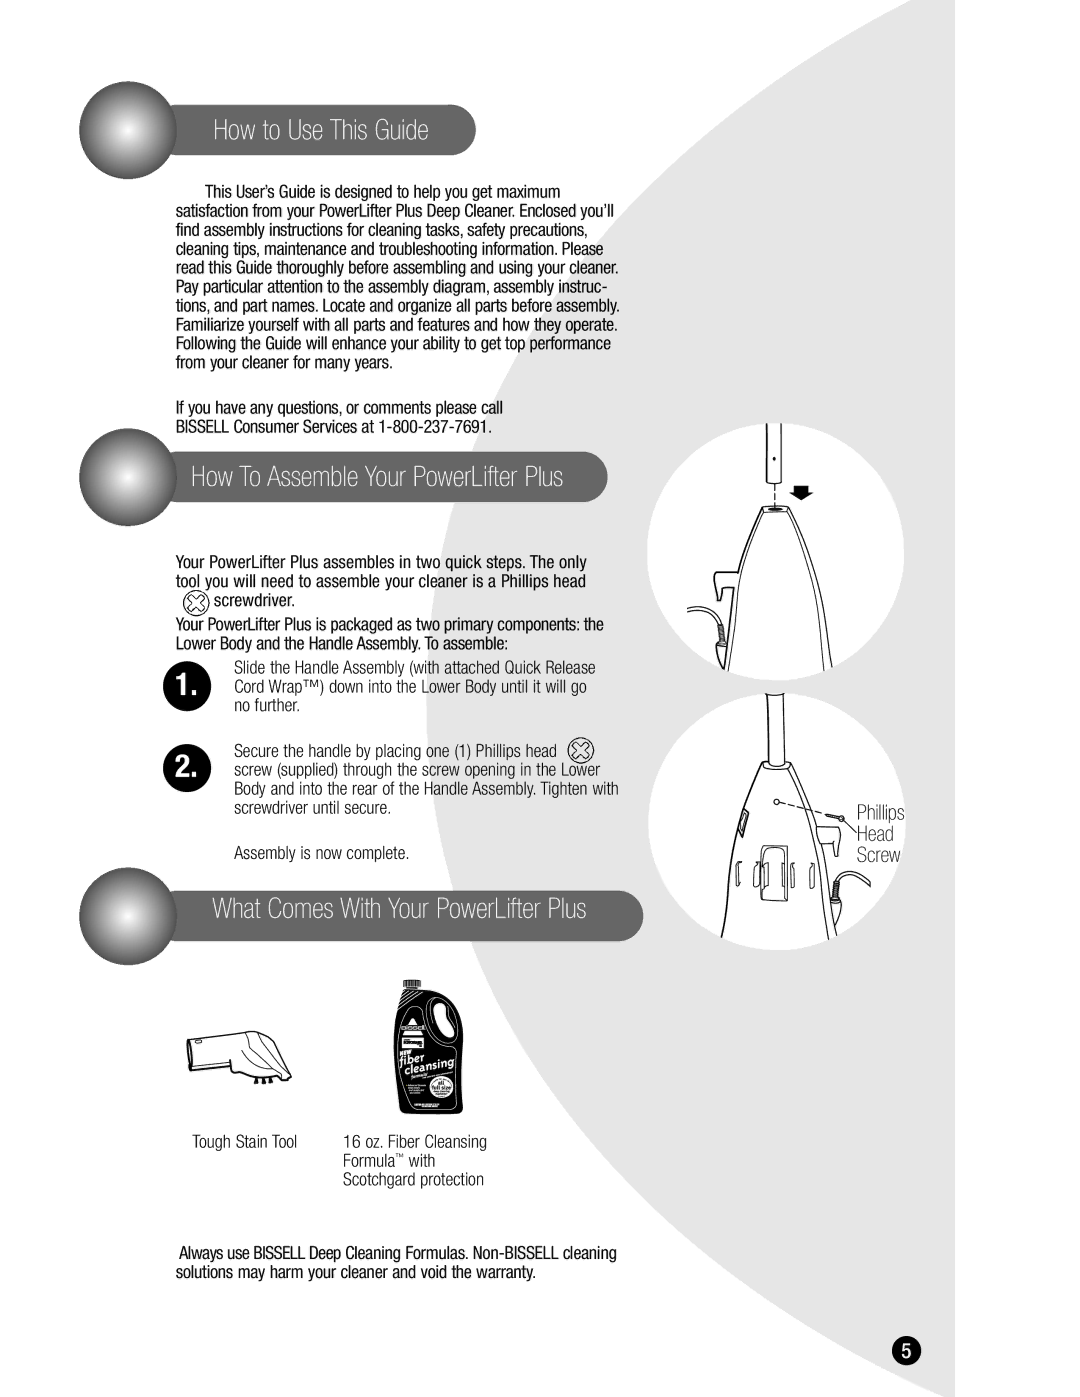
For added convenience, the carpet cleaner comes with specialized cleaning tools, including a tough stain tool designed to target stubborn spots and high-traffic areas. This versatility makes the Bissell 1620 suitable for various surfaces, including upholstery, rugs, and stairs.
Overall, the Bissell 1620 is a powerful and efficient carpet cleaner that embodies practicality and effectiveness. With its innovative features, advanced technologies, and user-friendly design, it stands out as an excellent option for those aiming to achieve a cleaner, fresher home environment. Whether dealing with pet messes or everyday stains, the Bissell 1620 is equipped to handle the challenge with ease.