| Operations |
|
|
| Getting Ready | 1A | 1B |
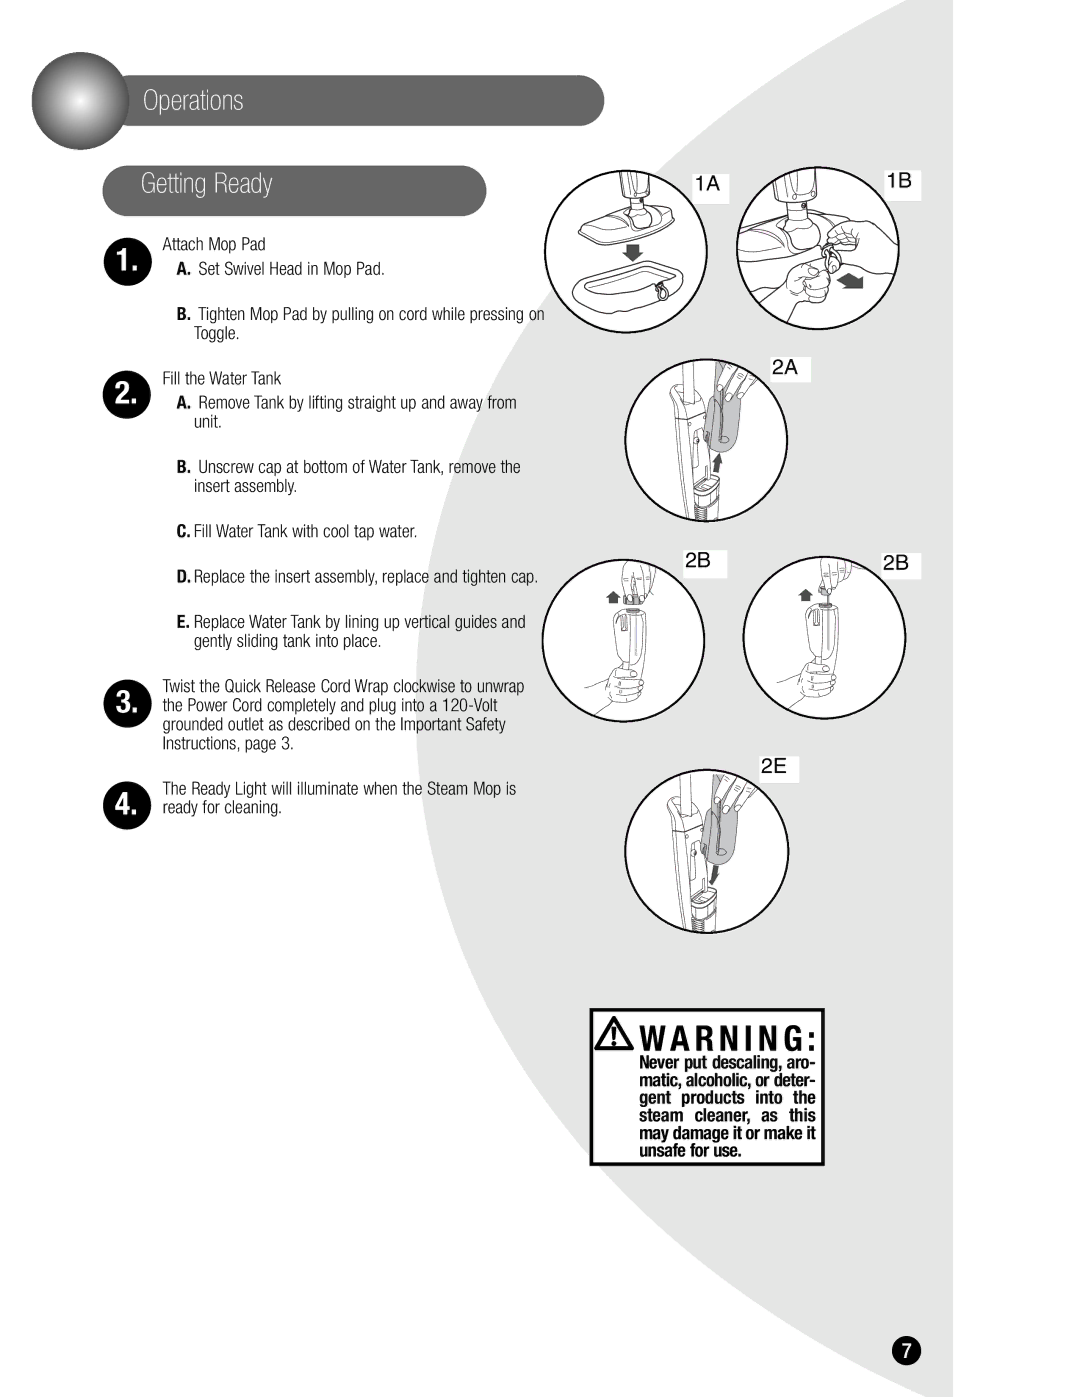
1. | Attach Mop Pad |
|
|
A. Set Swivel Head in Mop Pad. |
|
| |
| B. Tighten Mop Pad by pulling on cord while pressing on |
|
|
| Toggle. |
|
|
2. | Fill the Water Tank |
| 2A |
|
| ||
A. Remove Tank by lifting straight up and away from |
|
|
unit.
B. Unscrew cap at bottom of Water Tank, remove the insert assembly.
C. Fill Water Tank with cool tap water.
D. Replace the insert assembly, replace and tighten cap.
E. Replace Water Tank by lining up vertical guides and gently sliding tank into place.
Twist the Quick Release Cord Wrap clockwise to unwrap
3. the Power Cord completely and plug into a
The Ready Light will illuminate when the Steam Mop is
4. ready for cleaning.
2B2B
2E
 W A R N I N G :
Never put descaling, aro- matic, alcoholic, or deter- gent products into the steam cleaner, as this may damage it or make it unsafe for use.
7