Manuals
/
Bissell
/
Household Appliance
/
Vacuum Cleaner
Bissell
66E1
warranty
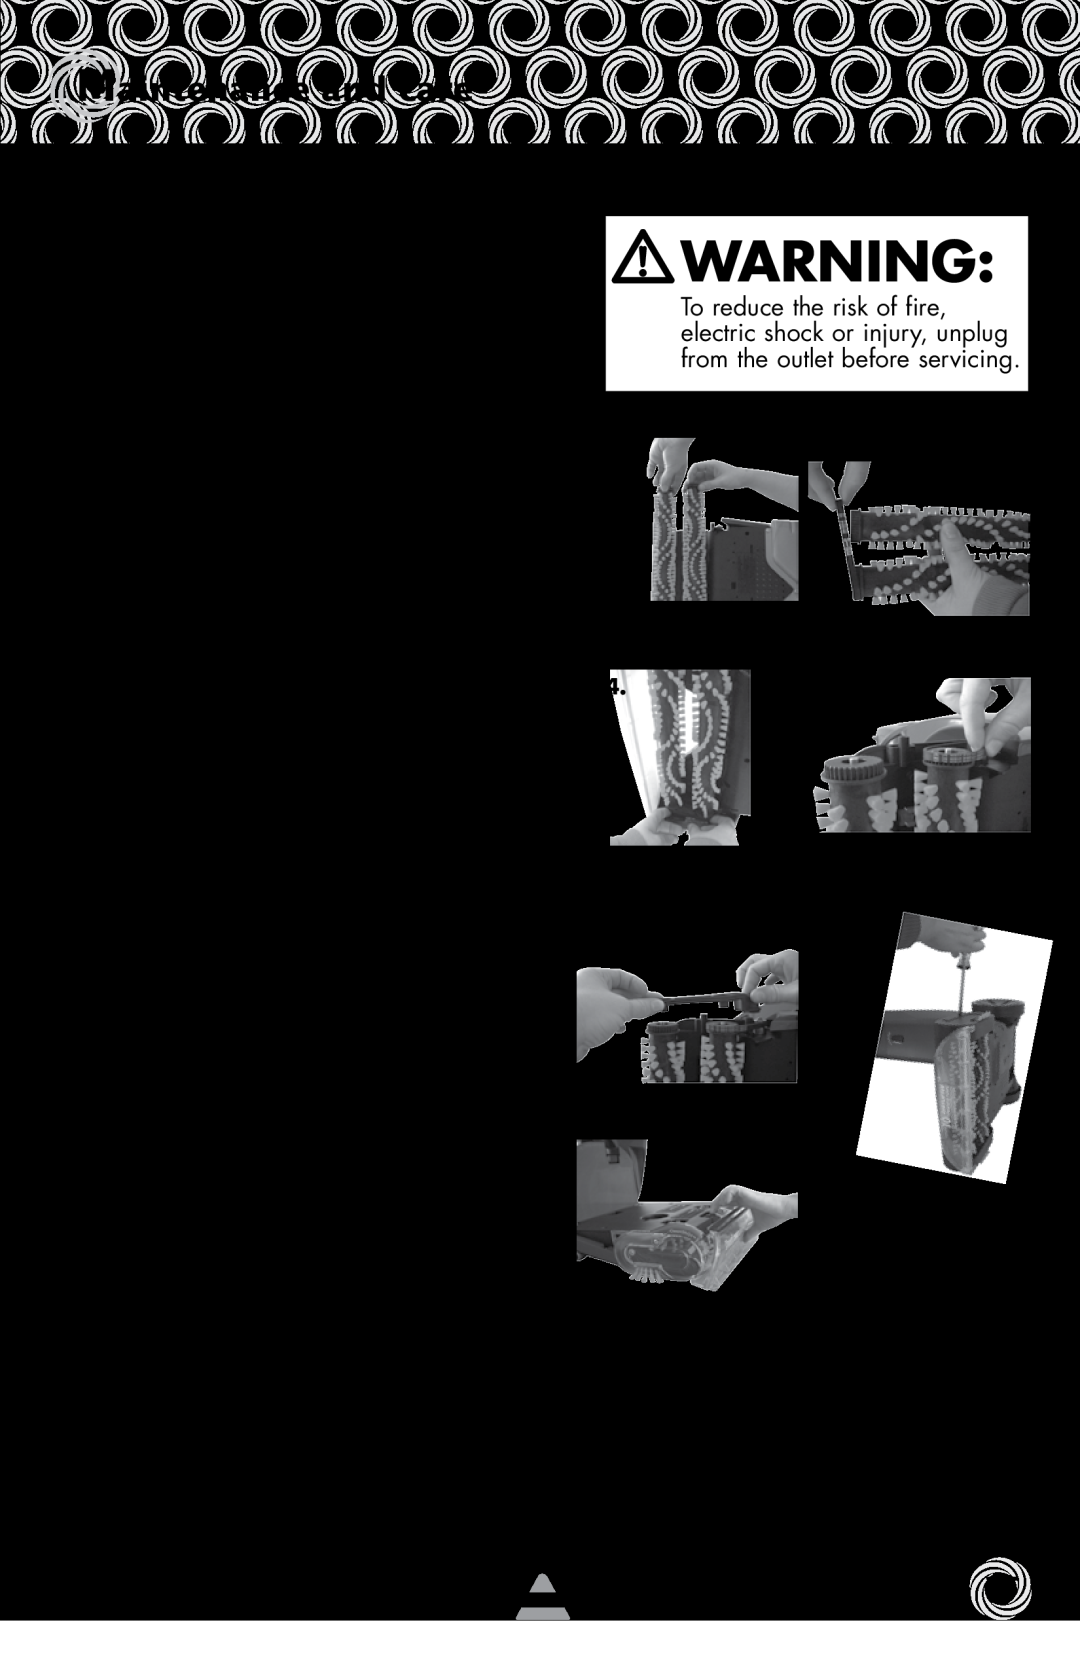
Brush removal and large belt replacement as needed, Maintenance and care
Models:
66E1
1
15
20
20
Download
20 pages
37.77 Kb
12
13
14
15
16
17
18
19
Troubleshooting
Warranty
Maintenance
Assembly
Cleaning fluid
Safety
Faster Service
Special features
Page 15
Image 15
Page 14
Page 16
Page 15
Image 15
Page 14
Page 16
Contents
Warranty Product Registration Consumer Care
Earn BISSELL Rewards
Thank You Safety Instructions Product View Assembly Operations
Maintenance and Care Troubleshooting Accessories Replacement Parts
Thanks for buying a BISSELL Deep Cleaner
DETACHABLE INNOVATION
Complete Line of BISSELL Lift-Off Products
GROUNDING INSTRUCTIONS
To reduce the risk of fire, electric shock, or injury
IMPORTANT SAFETY INSTRUCTIONS
SAVE THESE INSTRUCTIONS
EdgeSweep Brushes
Product view
Heat Indicator Light Formula Water Tank Power Button Power Cord
Quick Release Cord Wrap Portable Spot Cleaning Release Pedal
Cleaning fluid
Your deep cleaner comes in two easy to assemble components
Assembly
Heatwave Technology
Special features
Innovative cleaning technology
Operations
Filling formula & water tank
Before you clean
Upright cleaning mode
Cleaning
Empty dirty tank
Upright cleaning mode continued
Cleaning continued
Cleaning your machine
Let all parts dry completely and replace onto machine
Cleaning your machine continued
2. Rinse the front nozzle of any dirt and debris
2c. Rinse the nozzle out at the faucet
Filling tank
Portable spot cleaning mode
Cleaning with Tools
Preparing the machine
Cleaning with Deep Reach Tool
Portable spot cleaning mode continued
Cleaning portable machine
Replacing portable machine on base
Machine care check regularly
Maintenance and care
Cleaning suction gate
Cleaning spray tips
IMPORTANT with portable spot cleaning pedal facing down
Small belt removal and replacement as needed
BISSELL Consumer Care
Brush removal and large belt replacement as needed
DirtLifter PowerBrush does not turn
Troubleshooting
service. Contact us directly at
Heater indicator light does not illuminate
Accessories - BISSELL deep cleaner
Part No. Part Name
11 12
Item Part No. Part Name
Replacement parts - BISSELL deep cleaner
EXCEPTIONS AND EXCLUSIONS FROM THE TERMS OF THE LIMITED WARRANTY
Warranty - BISSELL Deep Cleaner
Limited Three-Year Warranty
If your BISSELL product should require service
Faster Service
BISSELL Consumer Care
Dont forget to register your product
BISSELL Consumer Care
Top
Page
Image
Contents