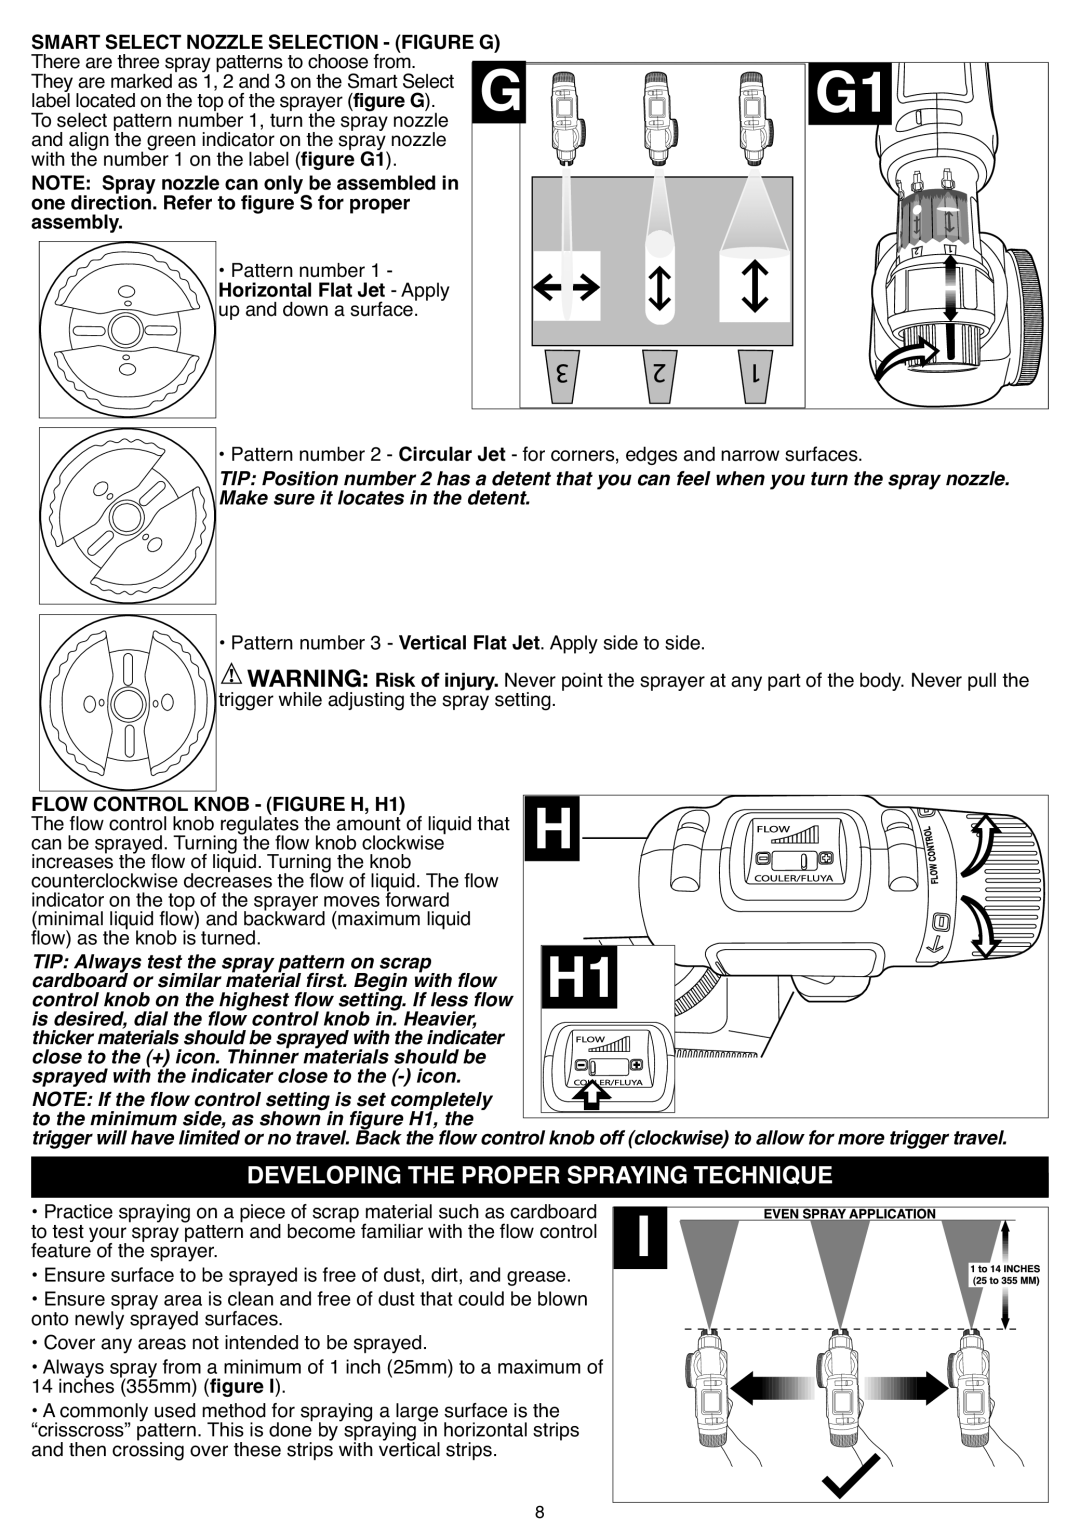
SMART SELECT NOZZLE SELECTION - (FIGURE ) There are three spray patternsto choose from.
They are marked as 1, 2 and 3 on the Smart Select label locatedon the top of the sprayer (figure G). To select pattern number 1, turn the spray nozzle and align the green indicator on the spray nozzle with the number 1 on the label (figure G1).
NOTE: Spray nozzle can only be assembled in one direction. Refer to figure S for proper assembly.
•Pattern number 1 - Horizontal Flat Jet - Apply up and down a surface.
1 |
• Pattern number 2 - Circular Jet - for corners, edges and narrow surfaces.
TIP: Position number 2 has a detent that you can feel when you turn the spray nozzle. Make sure it locates in the detent.
• Pattern number 3 - Vertical Flat Jet. Apply side to side. | ||
WARNING: Risk of injury. Never point the sprayer at any part of the body. Never pull the | ||
trigger while adjusting the spray setting. |
| |
FLOW CONTROL KNOB - (FIGURE H, H1) |
|
|
The flow control knob regulates the amount of liquid that |
|
|
can be sprayed. Turning the flow knob clockwise |
|
|
increases the flow of liquid. Turning the knob |
|
|
counterclockwise decreases the flow of liquid. The flow |
|
|
indicator on the top of the sprayer moves forward | H1 |
|
(minimal liquid flow) and backward (maximum liquid |
| |
flow) as the knob is turned. |
| |
TIP: Always test the spray pattern on scrap |
| |
cardboard or similar material first. Begin with flow |
| |
iscontroldesired,knobdialonthetheflowhighestcontrolflowknobsetting.in. Heavier,If less flow |
| |
thicker materials shouldbe sprayedwith the indicater |
|
|
close to the (+) icon. Thinner materials should be |
|
|
sprayed with the indicater close to the |
|
|
NOTE: If the flow control setting is set completely |
|
|
to the minimum side, as shown in figure H1, the |
|
|
trigger will have limited or no travel. Back the flow controlknob off (clockwise)to allow for more triggertravel. | ||
DEVELOPING THE PROPER SPRAYINGTECHNIQUE | ||
• Practice spraying on a piece of scrap material such as cardboard | I | |
to test your spray pattern and become familiar with the flow control | ||
•featureEnsureofsurfacethe sprayer.to be sprayed is free of dust, dirt, and grease. | ||
• Ensure spray area is clean and free of dust that could be blown |
| |
onto newly sprayed surfaces. |
|
|
• Cover any areas not intended to be sprayed. |
|
|
• Always spray from a minimum of 1 inch (25mm) to a maximum of |
| |
14 inches (355mm) (figure I). |
|
|
• A commonly used method for spraying a large surface is the |
| |
“crisscross” pattern. This is done by spraying in horizontal strips |
| |
and then crossing over these strips with vertical strips. |
|
|
| 8 |
|