CO75Pub600066R1 7/21/06 3:18 PM Page 4
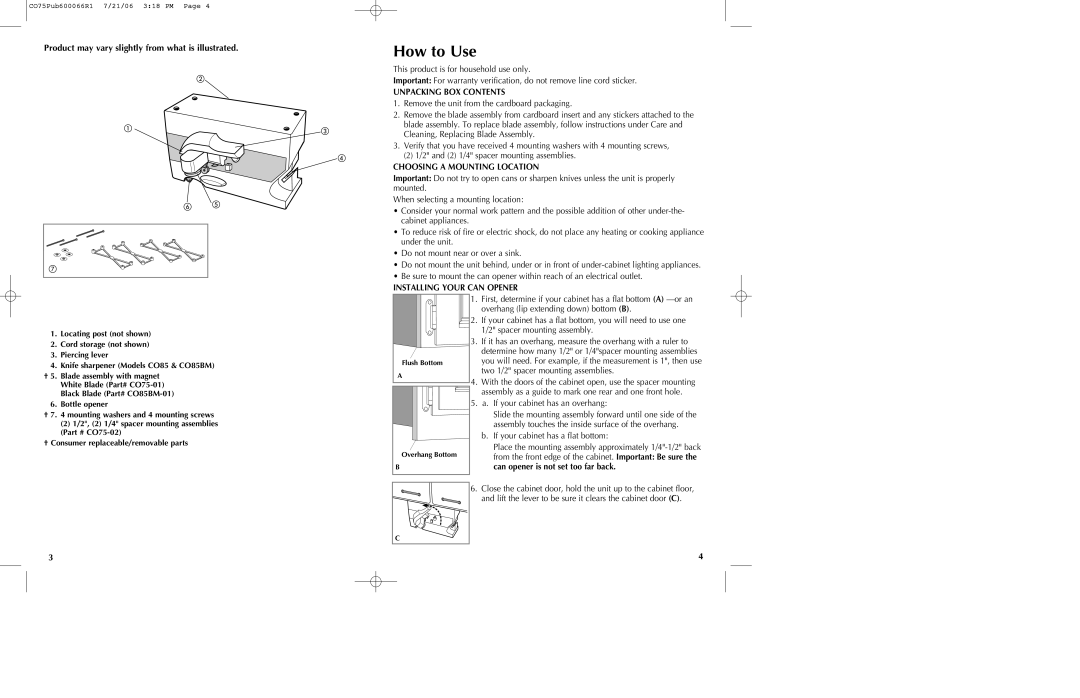
Product may vary slightly from what is illustrated.
How to Use
This product is for household use only.
Important: For warranty verification, do not remove line cord sticker.
UNPACKING BOX CONTENTS
1.Remove the unit from the cardboard packaging.
2.Remove the blade assembly from cardboard insert and any stickers attached to the blade assembly. To replace blade assembly, follow instructions under Care and Cleaning, Replacing Blade Assembly.
3.Verify that you have received 4 mounting washers with 4 mounting screws,
(2) 1/2" and (2) 1/4" spacer mounting assemblies.
CHOOSING A MOUNTING LOCATION
Important: Do not try to open cans or sharpen knives unless the unit is properly mounted.
When selecting a mounting location:
•Consider your normal work pattern and the possible addition of other
•To reduce risk of fire or electric shock, do not place any heating or cooking appliance under the unit.
•Do not mount near or over a sink.
•Do not mount the unit behind, under or in front of
•Be sure to mount the can opener within reach of an electrical outlet.
INSTALLING YOUR CAN OPENER
1.Locating post (not shown)
2.Cord storage (not shown)
3.Piercing lever
4.Knife sharpener (Models CO85 & CO85BM)
†5. Blade assembly with magnet
White Blade (Part#
Black Blade (Part#
6. Bottle opener
†7. 4 mounting washers and 4 mounting screws
(2) 1/2", (2) 1/4" spacer mounting assemblies (Part #
†Consumer replaceable/removable parts
Flush Bottom
A
Overhang Bottom
B |
C |
1.First, determine if your cabinet has a flat bottom (A)
2.If your cabinet has a flat bottom, you will need to use one 1/2" spacer mounting assembly.
3.If it has an overhang, measure the overhang with a ruler to determine how many 1/2" or 1/4"spacer mounting assemblies you will need. For example, if the measurement is 1", then use two 1/2" spacer mounting assemblies.
4.With the doors of the cabinet open, use the spacer mounting assembly as a guide to mark one rear and one front hole.
5.a. If your cabinet has an overhang:
Slide the mounting assembly forward until one side of the assembly touches the inside surface of the overhang.
b.If your cabinet has a flat bottom:
Place the mounting assembly approximately
6.Close the cabinet door, hold the unit up to the cabinet floor, and lift the lever to be sure it clears the cabinet door (C).
3 | 4 |