CO75Pub600066R1 7/21/06 3:18 PM Page 6
7. Mark the 4 holes through the assembly onto the underside |
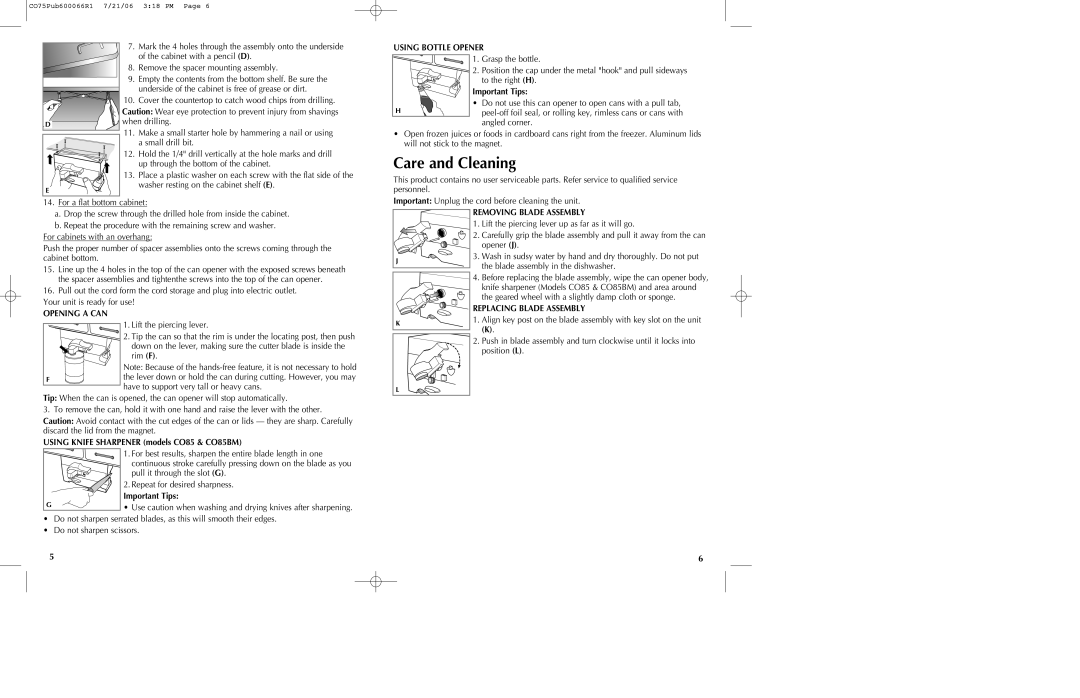
USING BOTTLE OPENER
| of the cabinet with a pencil (D). |
8. | Remove the spacer mounting assembly. |
9. | Empty the contents from the bottom shelf. Be sure the |
| underside of the cabinet is free of grease or dirt. |
| 10. Cover the countertop to catch wood chips from drilling. |
| Caution: Wear eye protection to prevent injury from shavings |
D | when drilling. |
H |
1.Grasp the bottle.
2.Position the cap under the metal "hook" and pull sideways to the right (H).
Important Tips:
•Do not use this can opener to open cans with a pull tab,
11. | Make a small starter hole by hammering a nail or using |
| a small drill bit. |
12. | Hold the 1/4" drill vertically at the hole marks and drill |
| up through the bottom of the cabinet. |
13. | Place a plastic washer on each screw with the flat side of the |
E | washer resting on the cabinet shelf (E). |
|
14.For a flat bottom cabinet:
a.Drop the screw through the drilled hole from inside the cabinet.
b.Repeat the procedure with the remaining screw and washer. For cabinets with an overhang:
Push the proper number of spacer assemblies onto the screws coming through the cabinet bottom.
15.Line up the 4 holes in the top of the can opener with the exposed screws beneath the spacer assemblies and tightenthe screws into the top of the can opener.
16.Pull out the cord form the cord storage and plug into electric outlet.
Your unit is ready for use!
•Open frozen juices or foods in cardboard cans right from the freezer. Aluminum lids will not stick to the magnet.
Care and Cleaning
This product contains no user serviceable parts. Refer service to qualified service personnel.
Important: Unplug the cord before cleaning the unit.
REMOVING BLADE ASSEMBLY
![]() 1. Lift the piercing lever up as far as it will go.
1. Lift the piercing lever up as far as it will go.
2. Carefully grip the blade assembly and pull it away from the can opener (J).
J | 3. Wash in sudsy water by hand and dry thoroughly. Do not put | |
the blade assembly in the dishwasher. | ||
|
4. Before replacing the blade assembly, wipe the can opener body, |
knife sharpener (Models CO85 & CO85BM) and area around |
the geared wheel with a slightly damp cloth or sponge. |
REPLACING BLADE ASSEMBLY |
OPENING A CAN
F
1.Lift the piercing lever.
2.Tip the can so that the rim is under the locating post, then push down on the lever, making sure the cutter blade is inside the rim (F).
Note: Because of the
K | 1. Align key post on the blade assembly with key slot on the unit | |
(K). | ||
|
2. Push in blade assembly and turn clockwise until it locks into position (L).
L
Tip: When the can is opened, the can opener will stop automatically.
3. To remove the can, hold it with one hand and raise the lever with the other.
Caution: Avoid contact with the cut edges of the can or lids — they are sharp. Carefully discard the lid from the magnet.
USING KNIFE SHARPENER (models CO85 & CO85BM)
G |
1.For best results, sharpen the entire blade length in one continuous stroke carefully pressing down on the blade as you pull it through the slot (G).
2.Repeat for desired sharpness.
Important Tips:
• Use caution when washing and drying knives after sharpening.
•Do not sharpen serrated blades, as this will smooth their edges.
•Do not sharpen scissors.
5 | 6 |