11. Press the Power button and brewing begins.
Note: To delay brewing see, Delayed Brewing section.
• If you like milk or |
the carafe before brewing. Make sure to leave enough room in the carafe for the |
amount of coffee you wish to brew. |
| 6:00 |
K | BR |
ROG | |
| 6:00 |
L | BRE |
OG | |
| STR |
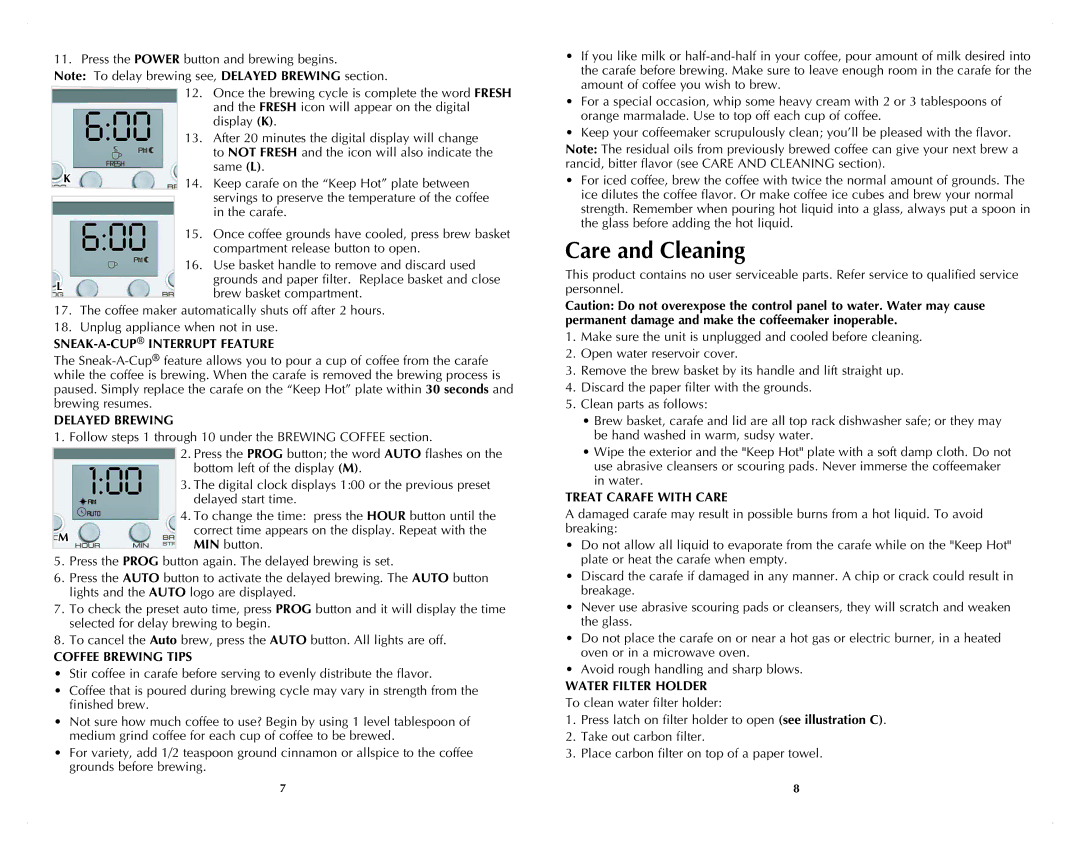
12.Once the brewing cycle is complete the word Fresh and the Fresh icon will appear on the digital display (K).
13.After 20 minutes the digital display will change to Not Fresh and the icon will also indicate the same (L).
14.Keep carafe on the “Keep Hot” plate between servings to preserve the temperature of the coffee in the carafe.
15.Once coffee grounds have cooled, press brew basket compartment release button to open.
16.Use basket handle to remove and discard used grounds and paper filter. Replace basket and close brew basket compartment.
• | For a special occasion, whip some heavy cream with 2 or 3 tablespoons of |
| orange marmalade. Use to top off each cup of coffee. |
• | Keep your coffeemaker scrupulously clean; you’ll be pleased with the flavor. |
Note: The residual oils from previously brewed coffee can give your next brew a rancid, bitter flavor (see Care and Cleaning section).
•For iced coffee, brew the coffee with twice the normal amount of grounds. The ice dilutes the coffee flavor. Or make coffee ice cubes and brew your normal strength. Remember when pouring hot liquid into a glass, always put a spoon in the glass before adding the hot liquid.
Care and Cleaning
This product contains no user serviceable parts. Refer service to qualified service personnel.
17.The coffee maker automatically shuts off after 2 hours.
18.Unplug appliance when not in use.
SNEAK-A-CUP® INTERRUPT FEATURE
The
DELAYED BREWING
1. Follow steps 1 through 10 under the Brewing Coffee section.
Caution: Do not overexpose the control panel to water. Water may cause permanent damage and make the coffeemaker inoperable.
1. | Make sure the unit is unplugged and cooled before cleaning. |
2. | Open water reservoir cover. |
3. | Remove the brew basket by its handle and lift straight up. |
4. | Discard the paper filter with the grounds. |
5. | Clean parts as follows: |
| • Brew basket, carafe and lid are all top rack dishwasher safe; or they may |
| be hand washed in warm, sudsy water. |
1:00
ROGM
HOUR![]()
![]() MIN
MIN
BRE
STRE![]()
2.Press the Prog button; the word Auto flashes on the bottom left of the display (M).
3.The digital clock displays 1:00 or the previous preset delayed start time.
4.To change the time: press the Hour button until the correct time appears on the display. Repeat with the Min button.
• Wipe the exterior and the "Keep Hot" plate with a soft damp cloth. Do not |
use abrasive cleansers or scouring pads. Never immerse the coffeemaker |
in water. |
TREAT CARAFE WITH CARE
A damaged carafe may result in possible burns from a hot liquid. To avoid breaking:
• Do not allow all liquid to evaporate from the carafe while on the "Keep Hot" |
5.Press the Prog button again. The delayed brewing is set.
6.Press the Auto button to activate the delayed brewing. The Auto button lights and the Auto logo are displayed.
7.To check the preset auto time, press Prog button and it will display the time selected for delay brewing to begin.
8.To cancel the Auto brew, press the Auto button. All lights are off.
COFFEE BREWING TIPS
•Stir coffee in carafe before serving to evenly distribute the flavor.
•Coffee that is poured during brewing cycle may vary in strength from the finished brew.
•Not sure how much coffee to use? Begin by using 1 level tablespoon of medium grind coffee for each cup of coffee to be brewed.
•For variety, add 1/2 teaspoon ground cinnamon or allspice to the coffee grounds before brewing.
| plate or heat the carafe when empty. |
• | Discard the carafe if damaged in any manner. A chip or crack could result in |
| breakage. |
• | Never use abrasive scouring pads or cleansers, they will scratch and weaken |
| the glass. |
• | Do not place the carafe on or near a hot gas or electric burner, in a heated |
| oven or in a microwave oven. |
• | Avoid rough handling and sharp blows. |
WATER FILTER HOLDER
To clean water filter holder:
1.Press latch on filter holder to open (see illustration C).
2.Take out carbon filter.
3.Place carbon filter on top of a paper towel.
7 | 8 |
