How to Use

This product is for household use only.

GETTING STARTED

Remove all packing material, and any stickers from the product.

Remove and save literature.

Wash all removable parts as instructed in Care and Cleaning section of this manual.

Open one-piece cover and insert empty paper filter into

removable filter basket (C).

10.To keep coffee hot, replace carafe on the “Keep Hot” plate when not serving coffee. The coffeemaker will keep coffee warm for 2 hours before automatically shutting off.

11.Once coffee grounds have cooled, carefully open one-piece cover to expose filter basket and using basket handle, remove and discard used grounds and paper filter. Close one-piece cover.

12.Unplug appliance when not in use.

SNEAK-A-CUP®INTERUPT FEATURE

The Sneak-A-Cup®feature allows you to pour a cup of coffee from the carafe while the coffee is brewing. When the carafe is removed, the brewing process is paused. Simply replace the carafe on the carafe plate within 30 seconds and brewing resumes.

SETTING THE CLOCK

C

Pour fresh cold water up to 12-cup level mark into the water reservoir (D).

• Uncoil power cord and plug into standard electrical outlet.

Brew water through appliance following the “Brewing

12:00

G

1.Plug appliance into standard electrical outlet.

2.The digital clock display flashes 12:00 A.M. until correct time is programmed into appliance (G). The coffeemaker will brew coffee without the clock being set.

3.To set correct time of day: Press HOUR (HR) button until the correct time appears on the display. Repeat process with MIN button.

D


Coffee” instructions without adding coffee grounds.


This removes any dust or residue that may remain in the


system during the manufacturing process.

Discard the water from the carafe and the paper filter from brew basket.

Turn off the appliance; unplug it and allow appliance to cool down.

BREWING COFFEE

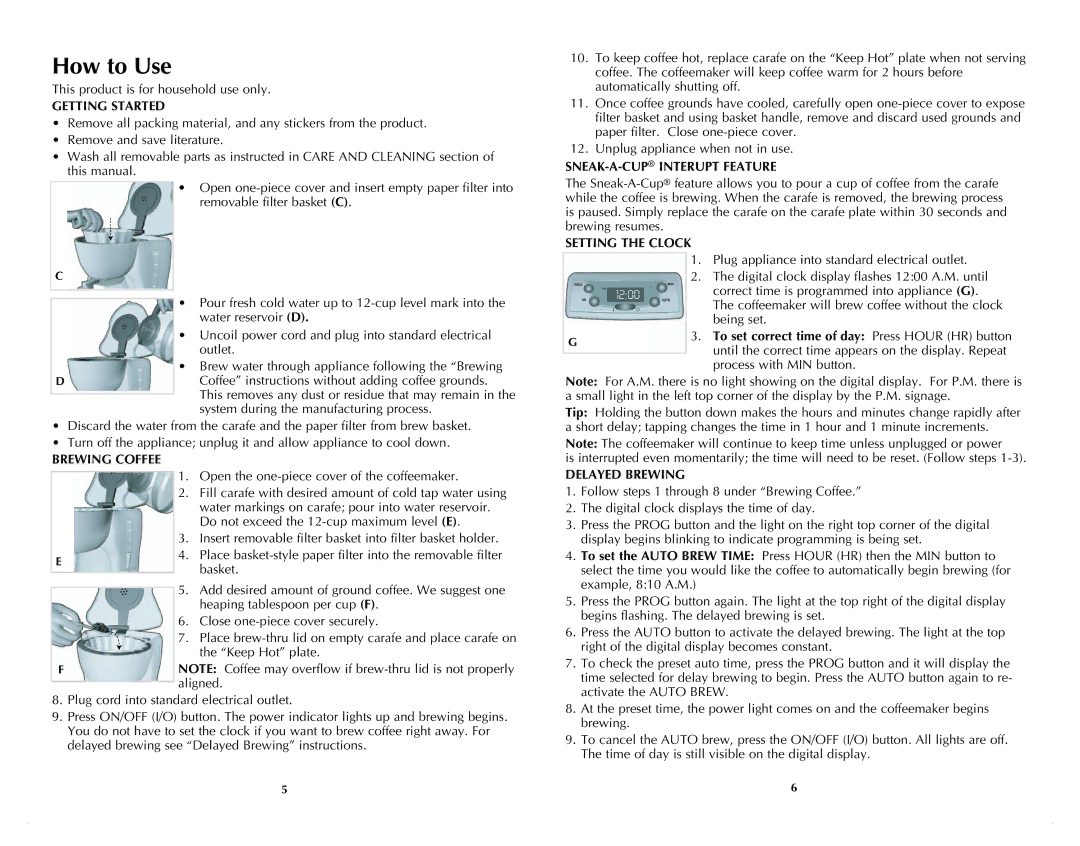
1. Open the one-piece cover of the coffeemaker.

2.Fill carafe with desired amount of cold tap water using water markings on carafe; pour into water reservoir.


Do not exceed the 12-cup maximum level (E).


3.

Insert removable filter basket into filter basket holder.

E

4.

Place basket-style paper filter into the removable filter


basket.


5.

Add desired amount of ground coffee. We suggest one


heaping tablespoon per cup (F).

6.Close one-piece cover securely.

7.Place brew-thru lid on empty carafe and place carafe on

the “Keep Hot” plate.

F

NOTE: Coffee may overflow if brew-thru lid is not properly


aligned.


8.Plug cord into standard electrical outlet.

9.Press ON/OFF (I/O) button. The power indicator lights up and brewing begins. You do not have to set the clock if you want to brew coffee right away. For delayed brewing see “Delayed Brewing” instructions.

Note: For A.M. there is no light showing on the digital display. For P.M. there is a small light in the left top corner of the display by the P.M. signage.

Tip: Holding the button down makes the hours and minutes change rapidly after a short delay; tapping changes the time in 1 hour and 1 minute increments.

Note: The coffeemaker will continue to keep time unless unplugged or power

is interrupted even momentarily; the time will need to be reset. (Follow steps 1-3).

DELAYED BREWING

1.Follow steps 1 through 8 under “Brewing Coffee.”

2.The digital clock displays the time of day.

3.Press the PROG button and the light on the right top corner of the digital display begins blinking to indicate programming is being set.

4.To set the AUTO BREW TIME: Press HOUR (HR) then the MIN button to select the time you would like the coffee to automatically begin brewing (for example, 8:10 A.M.)

5.Press the PROG button again. The light at the top right of the digital display begins flashing. The delayed brewing is set.

6.Press the AUTO button to activate the delayed brewing. The light at the top right of the digital display becomes constant.

7.To check the preset auto time, press the PROG button and it will display the time selected for delay brewing to begin. Press the AUTO button again to re- activate the AUTO BREW.

8.At the preset time, the power light comes on and the coffeemaker begins brewing.

9.To cancel the AUTO brew, press the ON/OFF (I/O) button. All lights are off. The time of day is still visible on the digital display.

5

6

Page 4
Image 4
Black & Decker DLX1050BC, DLX1050WC manual How to Use

DLX1050WC, DLX1050BC specifications

The Black & Decker DLX1050BC and DLX1050WC are stand mixers that bring power, versatility, and convenience to your kitchen. These models are designed to cater to both novice cooks and experienced bakers, ensuring that a wide range of culinary tasks can be accomplished with ease and precision.

One of the standout features of both DLX1050BC and DLX1050WC is their robust motor, which delivers an impressive 350 watts of mixing power. This high-performance motor is capable of handling tough doughs, whipping cream, and mixing batters efficiently, allowing users to create a variety of recipes with minimal effort. The appliance is equipped with a three-speed electronic control, making it easy to adjust the mixing speed according to the texture and consistency required for different types of mixtures.

Another compelling characteristic is the Planetary Mixing Action technology. This innovative approach ensures that the mixing attachments rotate around the bowl's interior, covering every angle and guaranteeing that all ingredients are thoroughly combined. This feature is particularly beneficial when mixing dense doughs or large batches of batter, ensuring consistent results every time.

The DLX1050 also comes with a variety of mixing attachments, including a whisk, dough hook, and flat beater. These attachments are made of durable materials and are designed to tackle various mixing tasks efficiently. The easy-to-use release mechanism allows for quick switching between attachments, streamlining the cooking process.

For added convenience, both models feature a large 4.5-quart stainless steel mixing bowl which provides ample space for mixing ingredients. The bowl is dishwasher-safe, allowing for effortless cleanup after cooking. Additionally, the unit includes a splash guard designed to prevent messes during mixing, ensuring that your kitchen stays clean.

The ergonomic design of the DLX1050BC and DLX1050WC makes it comfortable to use, with a tilt-back head that allows for easy access to the bowl and attachments. Its compact footprint ensures that it can fit comfortably on any countertop, whether you have a large or small kitchen.

In summary, the Black & Decker DLX1050BC and DLX1050WC stand mixers are versatile kitchen appliances that offer power, convenience, and quality performance. With features like a powerful motor, planetary mixing action, various attachments, and user-friendly design, these mixers are an excellent addition to any culinary enthusiast's toolkit, helping to make baking and cooking an enjoyable experience.