
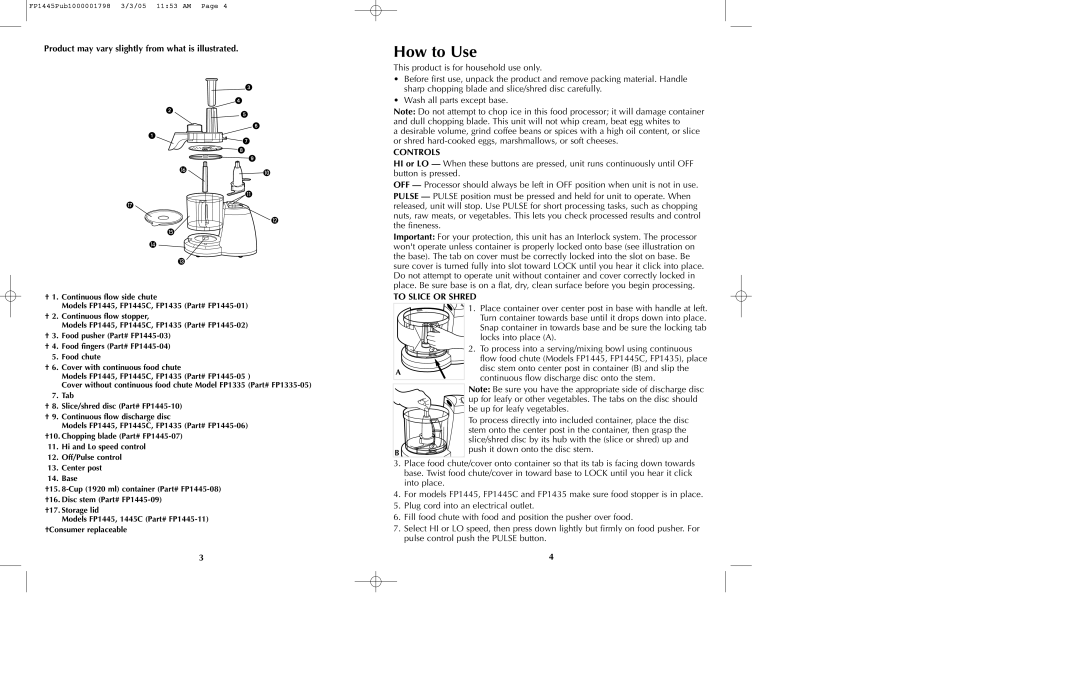
FP1445, FP1445C, FP1335 specifications
The Black & Decker FP1445 is a versatile food processor designed to streamline food preparation in any kitchen. Known for its powerful performance and user-friendly features, this model is perfect for both novice cooks and experienced chefs looking to save time and effort in the kitchen.One of the standout characteristics of the FP1445 is its robust 14-cup capacity. This ample size makes it suitable for preparing meals for large families or entertaining guests, allowing users to process significant quantities of ingredients in one go. The bowl is designed with measurement markings, which adds convenience when following recipes and determining ingredient quantities.
The FP1445 is equipped with a powerful 450-watt motor, providing the necessary strength to tackle a variety of tasks, from chopping vegetables to making dough. This efficiency is complemented by a stainless steel S-blade, which ensures consistent and precise results whether you are slicing, shredding, or pureeing.
Additionally, the food processor boasts an array of slicing and shredding discs that cater to a multitude of culinary needs. The adjustable slicing disc offers several thickness options, allowing users to customize the cut of their ingredients. The reversible shredding disc is another highlight, providing both coarse and fine shredding capabilities, making it ideal for preparing toppings, salads, or ingredients for baking.
Safety is a significant focus in the design of the FP1445. It features a safety interlock system, which prevents the processor from operating unless the bowl and lid are securely in place. This thoughtful attribute enhances peace of mind for users, especially when handling sharper blades.
Cleaning and maintenance are made easy with removable parts that are dishwasher-safe, which significantly cuts down on post-cooking cleanup time. The compact design of the food processor also allows for easy storage, making it a convenient addition to any kitchen without taking up excessive counter space.
In summary, the Black & Decker FP1445 food processor combines functionality, safety, and ease of use into one reliable kitchen appliance. With its 14-cup capacity, powerful motor, versatile blades, and user-friendly features, it is well-suited to meet the diverse needs of home cooks, ensuring that meal preparation is efficient and enjoyable.