
FP2650S specifications
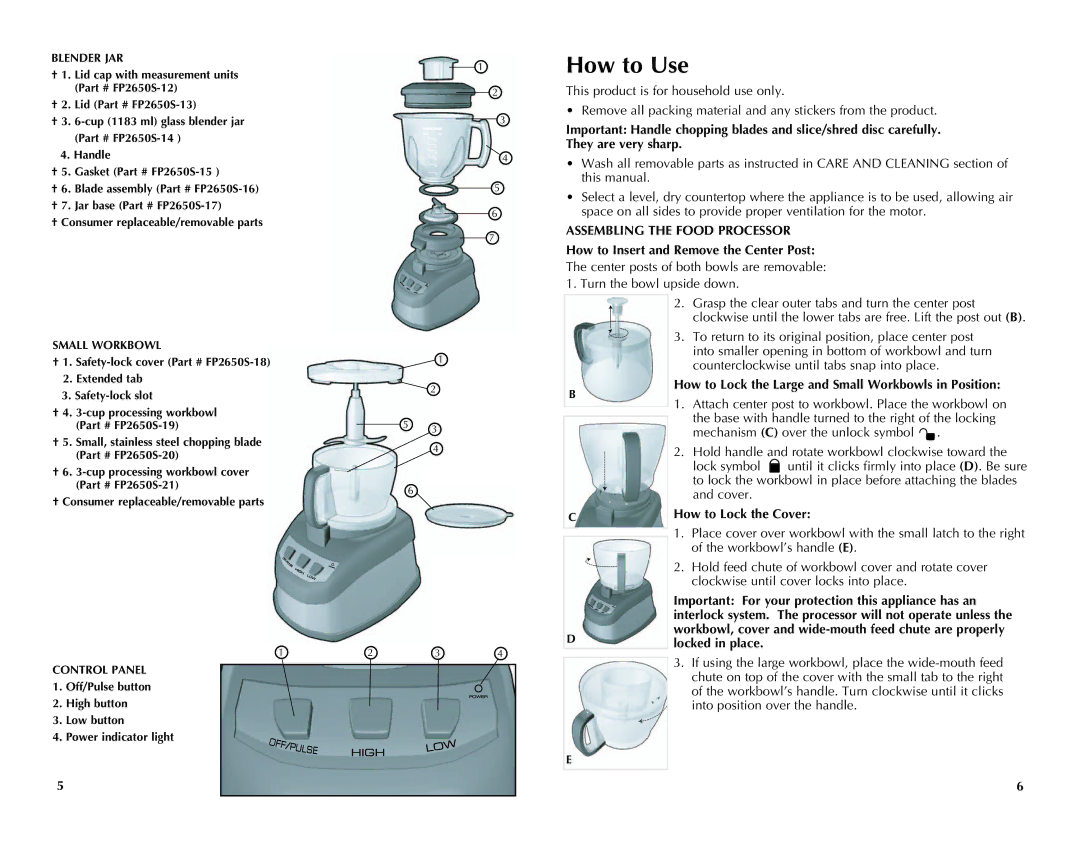
The Black & Decker FP2650S is a versatile food processor designed to streamline meal preparation and elevate the culinary experience for home cooks. With its powerful 450-watt motor, this kitchen appliance effortlessly handles a variety of food processing tasks, making it an essential tool for busy kitchens.One of the standout features of the FP2650S is its 12-cup capacity, which allows for large batch processing, making it ideal for families or entertaining. The processor comes equipped with a large feeding tube, accommodating whole fruits and vegetables without the need for pre-cutting, further enhancing efficiency in food preparation.
The FP2650S is designed with multiple speed settings, providing users with the flexibility to adjust based on the food being processed. The two-speed options, along with a pulse function, allow for precise control when chopping, slicing, shredding, and mixing. This adaptability ensures that users achieve the desired texture and consistency for various dishes.
Safety is paramount with the FP2650S. The food processor features a safety lock mechanism that prevents the motor from operating unless the lid is properly secured, minimizing the risk of accidents in the kitchen. This design consideration reflects Black & Decker’s commitment to providing user-friendly and safe kitchen appliances.
Another notable characteristic of the FP2650S is its array of attachments and blades included with the unit. It comes with a stainless steel slicing disk, shredding disk, and chopping blade, all of which are designed for easy interchangeability and effortless cleaning. The components are dishwasher safe, making maintenance a breeze for busy individuals.
In terms of technology, the FP2650S boasts a compact design that makes it easy to store in kitchen cabinets or on countertops without taking up too much space. The sleek appearance also allows it to blend seamlessly with modern kitchen decor.
Overall, the Black & Decker FP2650S is a powerful, efficient, and safe food processor that enhances the cooking experience. With its robust features, safety mechanisms, and ease of use, it serves as an indispensable aid in the kitchen, helping users save time and effort in their meal preparation endeavors. Whether shredding cheese, slicing vegetables, or preparing dough, this food processor proves to be a reliable companion for all cooking enthusiasts.