CHANGING THE BLADE
DISCONNECT THE MACHINE FROM THE POWER SOURCE. USE ONLY 10" DIAMETER SAW BLADES RATED FOR 4700 RPM OR HIGHER. USE ONLY SAW BLADES WITH 5/8" ARBOR HOLES.
1.NOTE: One 7/8" wrench is supplied with the saw for changing the saw blade.
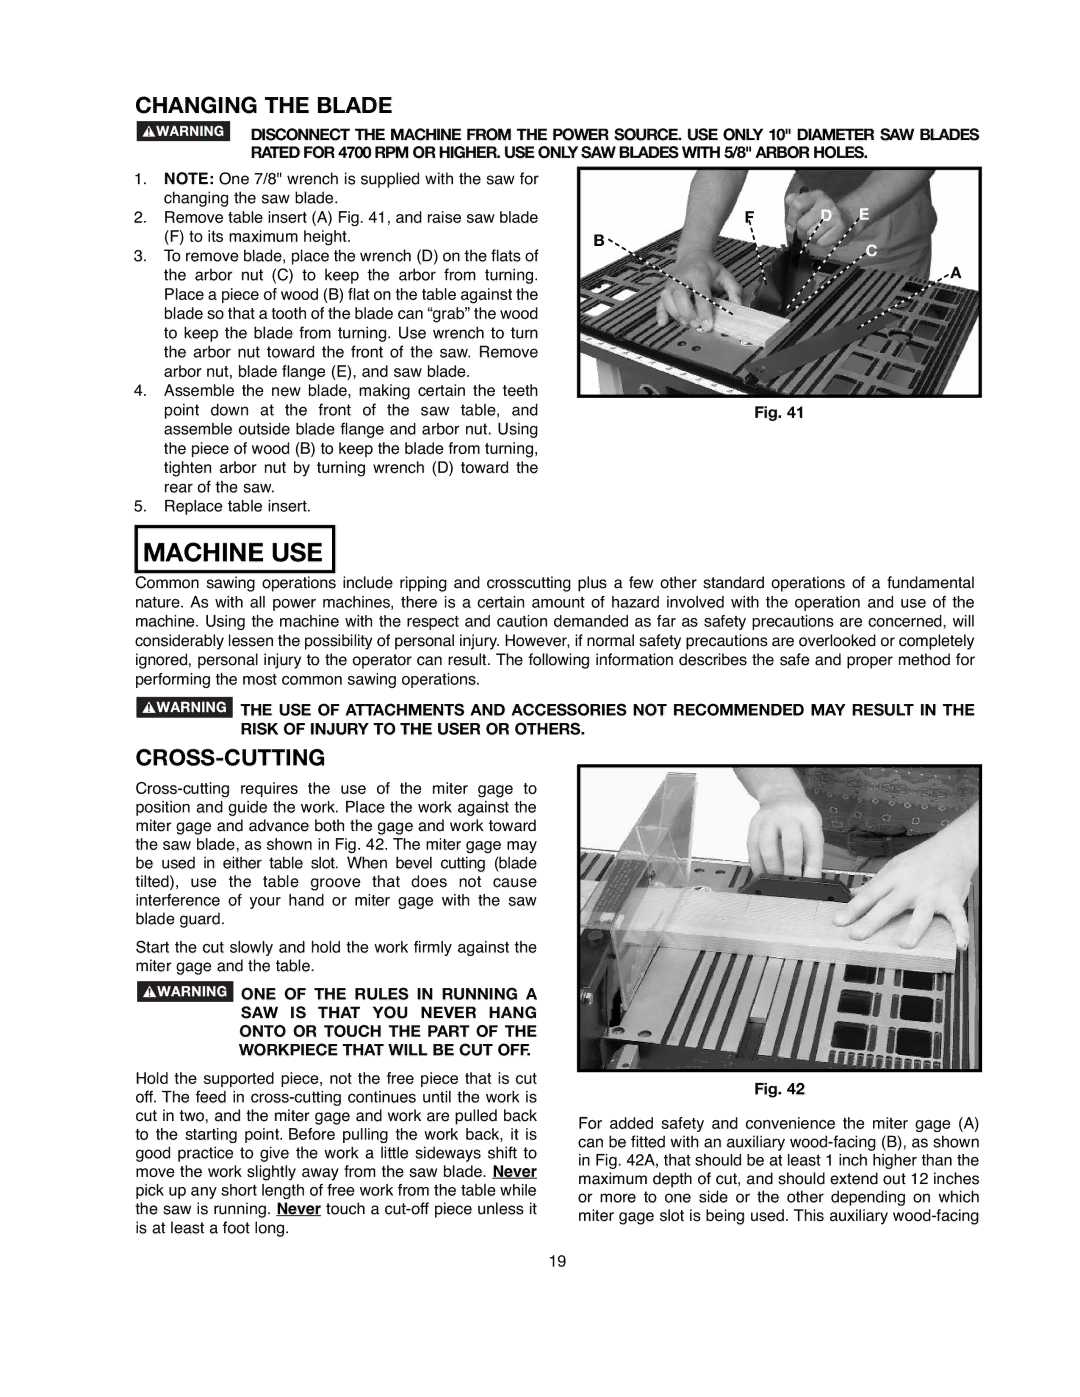
2.Remove table insert (A) Fig. 41, and raise saw blade
(F) to its maximum height.
3.To remove blade, place the wrench (D) on the flats of the arbor nut (C) to keep the arbor from turning. Place a piece of wood (B) flat on the table against the blade so that a tooth of the blade can “grab” the wood to keep the blade from turning. Use wrench to turn the arbor nut toward the front of the saw. Remove arbor nut, blade flange (E), and saw blade.
4.Assemble the new blade, making certain the teeth point down at the front of the saw table, and assemble outside blade flange and arbor nut. Using the piece of wood (B) to keep the blade from turning, tighten arbor nut by turning wrench (D) toward the rear of the saw.
5.Replace table insert.
F | D | E |
B |
| C |
|
| |
|
| A |
Fig. 41
MACHINE USE
Common sawing operations include ripping and crosscutting plus a few other standard operations of a fundamental nature. As with all power machines, there is a certain amount of hazard involved with the operation and use of the machine. Using the machine with the respect and caution demanded as far as safety precautions are concerned, will considerably lessen the possibility of personal injury. However, if normal safety precautions are overlooked or completely ignored, personal injury to the operator can result. The following information describes the safe and proper method for performing the most common sawing operations.
![]() THE USE OF ATTACHMENTS AND ACCESSORIES NOT RECOMMENDED MAY RESULT IN THE RISK OF INJURY TO THE USER OR OTHERS.
THE USE OF ATTACHMENTS AND ACCESSORIES NOT RECOMMENDED MAY RESULT IN THE RISK OF INJURY TO THE USER OR OTHERS.
CROSS-CUTTING
Start the cut slowly and hold the work firmly against the miter gage and the table.
![]() ONE OF THE RULES IN RUNNING A SAW IS THAT YOU NEVER HANG ONTO OR TOUCH THE PART OF THE WORKPIECE THAT WILL BE CUT OFF.
ONE OF THE RULES IN RUNNING A SAW IS THAT YOU NEVER HANG ONTO OR TOUCH THE PART OF THE WORKPIECE THAT WILL BE CUT OFF.
Hold the supported piece, not the free piece that is cut off. The feed in
Fig. 42
For added safety and convenience the miter gage (A) can be fitted with an auxiliary
19