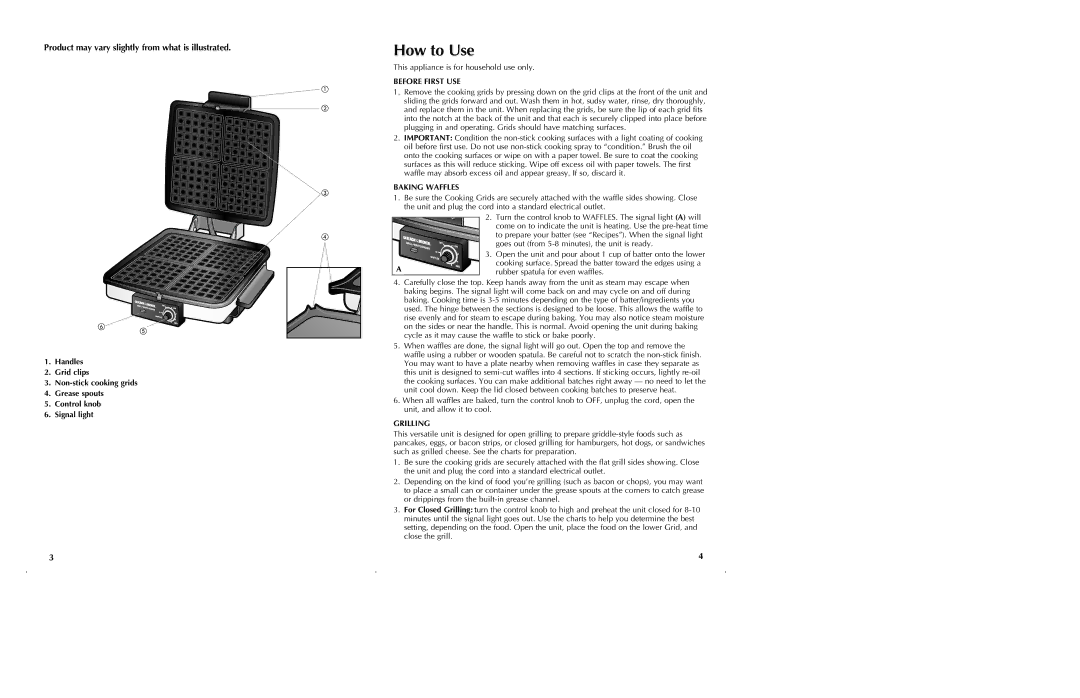
Product may vary slightly from what is illustrated.
How to Use
This appliance is for household use only.
BEFORE FIRST USE
1.Remove the cooking grids by pressing down on the grid clips at the front of the unit and sliding the grids forward and out. Wash them in hot, sudsy water, rinse, dry thoroughly, and replace them in the unit. When replacing the grids, be sure the lip of each grid fits into the notch at the back of the unit and that each is securely clipped into place before plugging in and operating. Grids should have matching surfaces.
2.IMPORTANT: Condition the
BAKING WAFFLES
1.Be sure the Cooking Grids are securely attached with the waffle sides showing. Close the unit and plug the cord into a standard electrical outlet.
A |
2.Turn the control knob to WAFFLES. The signal light (A) will come on to indicate the unit is heating. Use the
3.Open the unit and pour about 1 cup of batter onto the lower cooking surface. Spread the batter toward the edges using a rubber spatula for even waffles.
1.Handles
2.Grid clips
3.
4.Grease spouts
5.Control knob
6.Signal light
4.Carefully close the top. Keep hands away from the unit as steam may escape when baking begins. The signal light will come back on and may cycle on and off during baking. Cooking time is
5.When waffles are done, the signal light will go out. Open the top and remove the waffle using a rubber or wooden spatula. Be careful not to scratch the
6.When all waffles are baked, turn the control knob to OFF, unplug the cord, open the unit, and allow it to cool.
GRILLING
This versatile unit is designed for open grilling to prepare
1.Be sure the cooking grids are securely attached with the flat grill sides showing. Close the unit and plug the cord into a standard electrical outlet.
2.Depending on the kind of food you’re grilling (such as bacon or chops), you may want to place a small can or container under the grease spouts at the corners to catch grease or drippings from the
3.For Closed Grilling: turn the control knob to high and preheat the unit closed for
3 | 4 |
