| 3 |
| 1 |
6 | G100 |
4
G600
2
1
3
5
6
5
4
ENGLISH
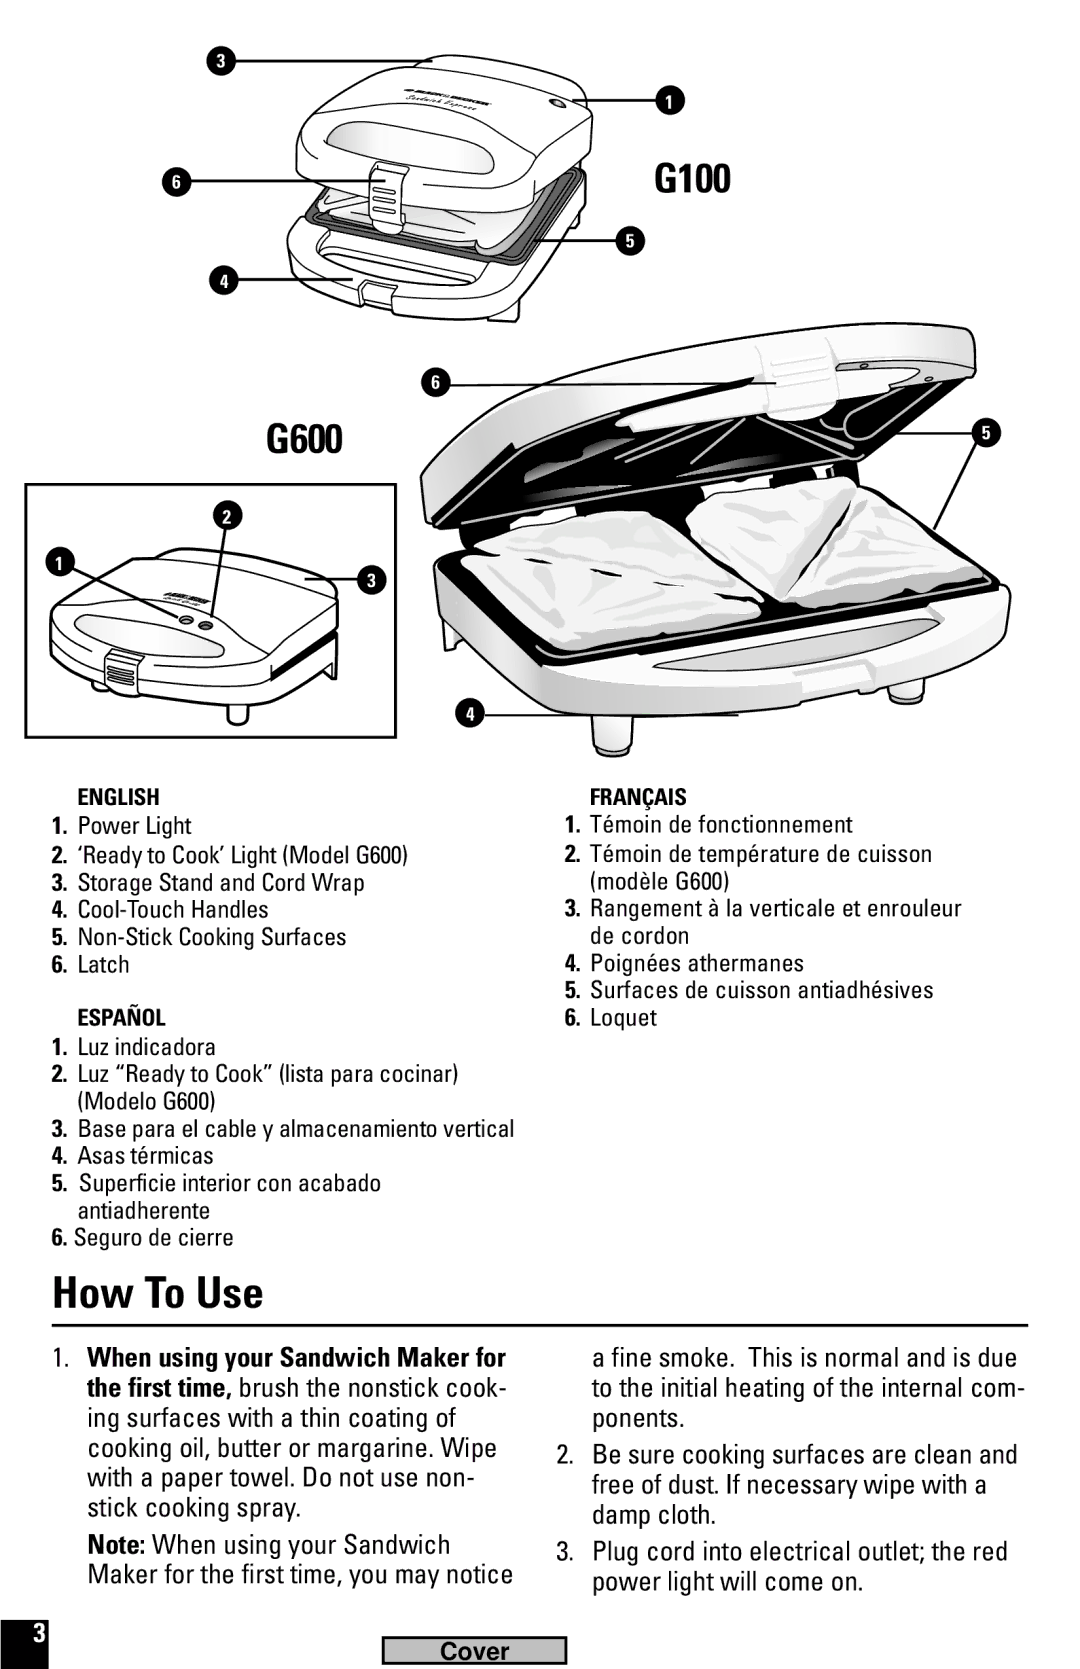
1.Power Light
2.‘Ready to Cook’ Light (Model G600)
3.Storage Stand and Cord Wrap
4.
5.
6.Latch
ESPAÑOL
1.Luz indicadora
2.Luz “Ready to Cook” (lista para cocinar) (Modelo G600)
3.Base para el cable y almacenamiento vertical
4.Asas térmicas
5.Superficie interior con acabado antiadherente
6.Seguro de cierre
FRANÇAIS
1.Témoin de fonctionnement
2.Témoin de température de cuisson (modèle G600)
3.Rangement à la verticale et enrouleur de cordon
4.Poignées athermanes
5.Surfaces de cuisson antiadhésives
6.Loquet
How To Use
1.When using your Sandwich Maker for the first time, brush the nonstick cook- ing surfaces with a thin coating of cooking oil, butter or margarine. Wipe with a paper towel. Do not use non- stick cooking spray.
Note: When using your Sandwich Maker for the first time, you may notice
3
Cover
a fine smoke. This is normal and is due to the initial heating of the internal com- ponents.
2.Be sure cooking surfaces are clean and free of dust. If necessary wipe with a damp cloth.
3.Plug cord into electrical outlet; the red power light will come on.
