
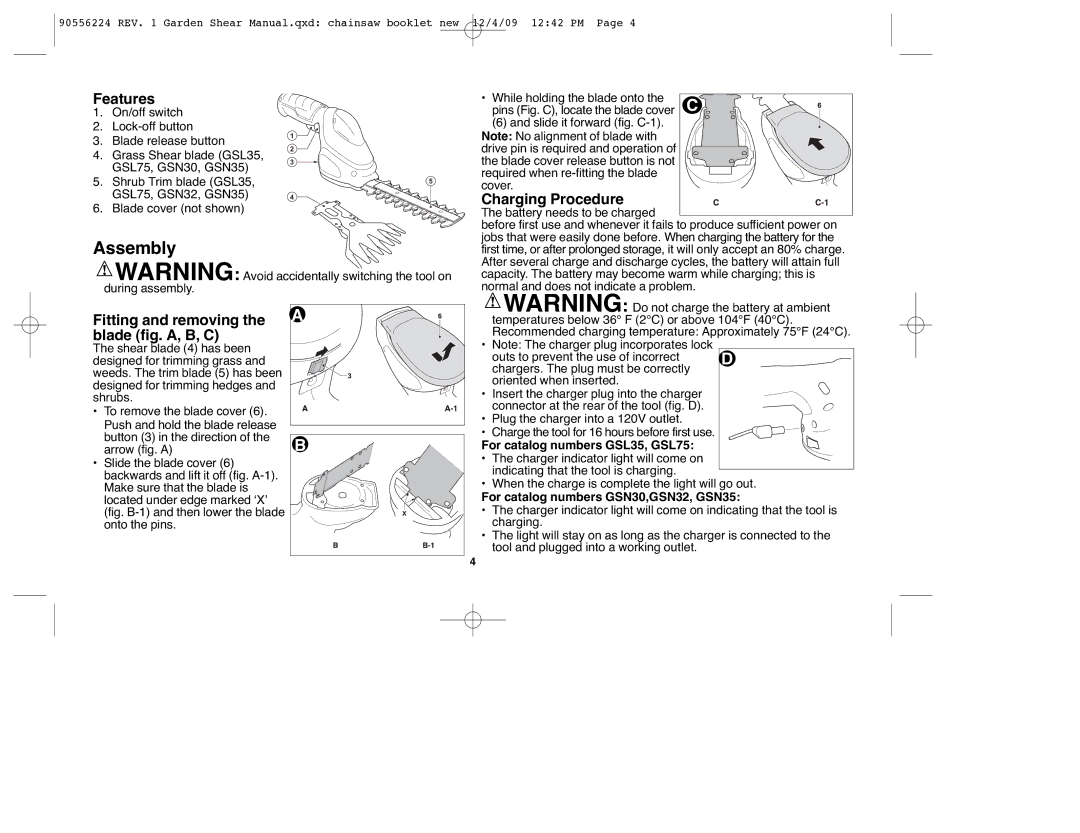
GSL75, GSN35, GSN30, GSN32, GSL35 specifications
Black & Decker, a trusted name in power tools and home appliances, has an impressive lineup of cordless garden tools that cater to both amateur gardeners and professional landscapers. Among these, the GSN35, GSN32, GSL35, GSN30, and GSL75 garden tools stand out for their performance and innovative features.The Black & Decker GSN35 hedge trimmer is powered by a robust 40V lithium-ion battery, providing extended runtime and reliability. Its lightweight design allows for effortless maneuverability. The GSN35 features a dual-action blade that reduces vibration while enhancing cutting efficiency, making it suitable for various hedge sizes. It also includes a wraparound front handle that offers superior control and comfort during use.
Next in line is the GSN32, which shares many characteristics with the GSN35 but is designed for different trimming needs. This model boasts a 20V battery system, making it more suitable for lighter tasks around the garden. The GSN32 is equipped with a 22-inch laser-cut blade, ensuring clean and precise cuts. Its compact design makes it easy to store, and it comes with a safety lock that prevents accidental activation.
The GSL35 string trimmer combines versatility and power. With a 40V lithium-ion battery, it allows users to switch between trimming and edging effortlessly, thanks to its efficient pivoting head. The GSL35 also features an automatic line feed system that ensures a consistent line length while maintaining an uninterrupted workflow. Its lightweight construction helps reduce fatigue during prolonged use.
For those who prefer a smaller tool, the GSN30 is an excellent option. Designed for small to medium-sized gardens, it is powered by a 20V battery and is particularly easy to handle. The GSN30 offers a 16-inch cutting width, perfect for precise trimming in tight spaces. Its simple mechanism allows for quick line replacement, ensuring users spend more time gardening and less time maintaining their tools.
Finally, the GSL75 combines the benefits of a string trimmer and edger in one unit. This model is equipped with a 60V battery for maximum power and longer runtime. The GSL75 also features a telescopic handle, allowing users to adjust the height for improved comfort. Its durable cutting head can tackle various terrains, making it a versatile addition to any garden maintenance toolkit.
In conclusion, Black & Decker's GSN35, GSN32, GSL35, GSN30, and GSL75 models exemplify the brand's commitment to innovation and customer satisfaction. With powerful batteries, ergonomic designs, and versatile functionalities, these tools are designed to make gardening tasks easier and more efficient, appealing to a wide range of gardening enthusiasts.