How to Use

BREWING A CUP OF COFFEE

This appliance is for household use only.

Wash removable parts as instructed in the Care and Cleaning section.

PREPARING UNIT FOR FIRST USE

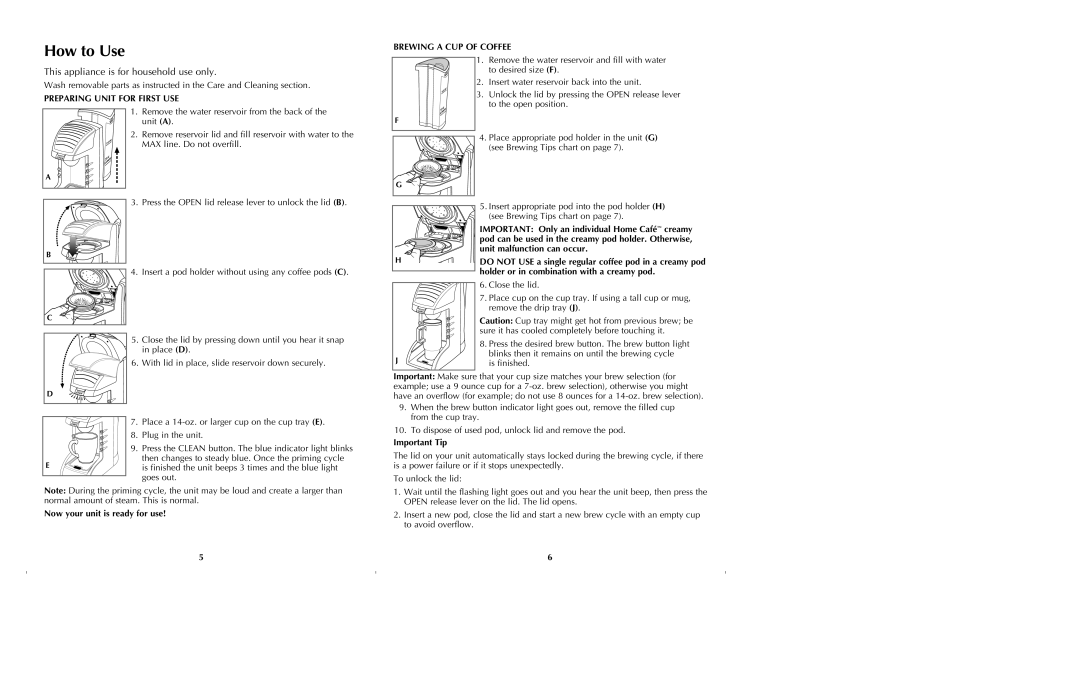
1. Remove the water reservoir from the back of the unit (A).

2. Remove reservoir lid and fill reservoir with water to the MAX line. Do not overfill.

A

F

G

1.

Remove the water reservoir and fill with water


to desired size (F).

2.

Insert water reservoir back into the unit.

3.

Unlock the lid by pressing the OPEN release lever


to the open position.

4.

Place appropriate pod holder in the unit (G)


(see Brewing Tips chart on page 7).

B

3.Press the OPEN lid release lever to unlock the lid (B).

4.Insert a pod holder without using any coffee pods (C).

H

5. Insert appropriate pod into the pod holder (H)

(see Brewing Tips chart on page 7).

IMPORTANT: Only an individual Home Cafécreamy pod can be used in the creamy pod holder. Otherwise, unit malfunction can occur.

DO NOT USE a single regular coffee pod in a creamy pod holder or in combination with a creamy pod.

C

6. Close the lid.

7. Place cup on the cup tray. If using a tall cup or mug,

remove the drip tray (J).

Caution: Cup tray might get hot from previous brew; be

sure it has cooled completely before touching it.

5.

Close the lid by pressing down until you hear it snap


in place (D).

6.

With lid in place, slide reservoir down securely.

D


7.

Place a 14-oz. or larger cup on the cup tray (E).

8.

Plug in the unit.

9.

Press the CLEAN button. The blue indicator light blinks

E

then changes to steady blue. Once the priming cycle

is finished the unit beeps 3 times and the blue light


goes out.

Note: During the priming cycle, the unit may be loud and create a larger than normal amount of steam. This is normal.

Now your unit is ready for use!


8. Press the desired brew button. The brew button light

J

blinks then it remains on until the brewing cycle

is finished.


Important: Make sure that your cup size matches your brew selection (for example; use a 9 ounce cup for a 7-oz. brew selection), otherwise you might have an overflow (for example; do not use 8 ounces for a 14-oz. brew selection).

9.When the brew button indicator light goes out, remove the filled cup from the cup tray.

10.To dispose of used pod, unlock lid and remove the pod.

Important Tip

The lid on your unit automatically stays locked during the brewing cycle, if there is a power failure or if it stops unexpectedly.

To unlock the lid:

1.Wait until the flashing light goes out and you hear the unit beep, then press the OPEN release lever on the lid. The lid opens.

2.Insert a new pod, close the lid and start a new brew cycle with an empty cup to avoid overflow.

5

6

Page 4
Image 4
Black & Decker GT305. GT320 manual How to Use, Brewing a CUP of Coffee, Preparing Unit for First USE, Important Tip

GT305. GT320 specifications

The Black & Decker GT305 and GT320 are two innovative cordless string trimmers that cater to homeowners and landscaping enthusiasts alike. Both models represent a fine blend of power, efficiency, and user-friendly design, making yard maintenance tasks easier and more enjoyable.

The GT305 features a lightweight design, weighing in at only 5.5 lbs, which allows for easy maneuverability and reduced fatigue during extended use. Its 20V MAX lithium-ion battery offers a strong runtime, ensuring you can tackle your yard tasks without frequent recharging. The automatic feed spool allows for continuous trimming without interruptions, and the trimmer line can be easily replaced, maintaining optimal performance throughout your trimming session.

One of the standout technologies in the GT305 is its PowerDrive transmission. This feature enhances performance by providing greater torque and efficiency, allowing users to cut through tougher grass and weeds with ease. The adjustable height and pivoting head allow users to achieve precise cuts in hard-to-reach areas, making it perfect for edging and trimming along sidewalks or flower beds.

Conversely, the GT320 builds upon the foundation set by the GT305, incorporating more advanced features and enhanced capabilities. The GT320 also utilizes the 20V MAX lithium-ion battery but has a longer runtime, making it suitable for larger yards. With its Comfort Grip handle, users experience less strain on their hands and wrists, ensuring an enjoyable yard care experience.

Both models feature a 2-in-1 function, allowing users to quickly convert from a trimmer to an edger. This versatility is particularly advantageous for homeowners looking for a tool that can handle multiple landscaping tasks without the need for additional equipment. The GT320 also boasts a wider cutting swath, making it easier to cover larger areas efficiently, reducing overall trimming time.

The ergonomic design of both trimmers ensures optimal balance and control, while safety features such as a protective shield keep users safe from debris. Additionally, they are designed with environmental considerations in mind, producing zero emissions during operation—making them an eco-friendly choice for yard maintenance.

In summary, the Black & Decker GT305 and GT320 are powerful, lightweight, and versatile tools designed to meet the demands of modern landscaping. With their innovative features and user-friendly designs, these trimmers are well-suited to help homeowners achieve a beautifully manicured yard. Whether you opt for the reliable GT305 or the enhanced capabilities of the GT320, both models deliver exceptional performance and efficiency for all your trimming and edging needs.