USE OF EXTENSION CORDS |
|
|
|
|
|
| |||||
Make sure the extension cord is in good condition before using. Always use the proper | |||||||||||
size extension cords with the tool – that is, proper wire size for various lengths of cord and | |||||||||||
heavy enough to carry the current the tool will draw. Use of an undersized cord will cause | |||||||||||
a drop in line voltage resulting in loss of power and overheating. For proper size cords see | |||||||||||
chart below. |
| Volts |
| Minimum Gage for Cord Sets |
|
| |||||
|
|
|
| ||||||||
|
|
| Total Length of Cord in Feet |
| |||||||
|
| 120V |
|
|
| ||||||
|
| 240V |
|
| |||||||
|
|
|
| ||||||||
|
| Ampere |
| ||||||||
|
| More |
| Not more | American Wire Gage |
|
| ||||
|
| Than | - | Than | 18 | 16 |
| 16 | 14 |
| |
|
| 0 | 6 |
|
| ||||||
|
| 6 | - | 10 | 18 | 16 |
| 14 | 12 |
| |
|
| 10 | - | 12 | 16 | 16 |
| 14 | 12 |
| |
MOTOR |
| 12 | - | 16 | 14 | 12 |
| Not Recommended |
| ||
|
|
|
|
|
|
|
|
|
|
| |
Be sure your power supply agrees with nameplate marking. 120 VoltsAC only means your | |||||||||||
tool will operate on standard 60 Hz household power. Do not operate AC tools on DC. A | |||||||||||
rating of 120 volts AC/DC means that you tool will operate on standard 60 Hz AC or DC | |||||||||||
power. This information is printed on the nameplate. Lower voltage will cause loss of | |||||||||||
power and can result in | |||||||||||
tool does not operate, check the power supply. |
|
|
| ||||||||
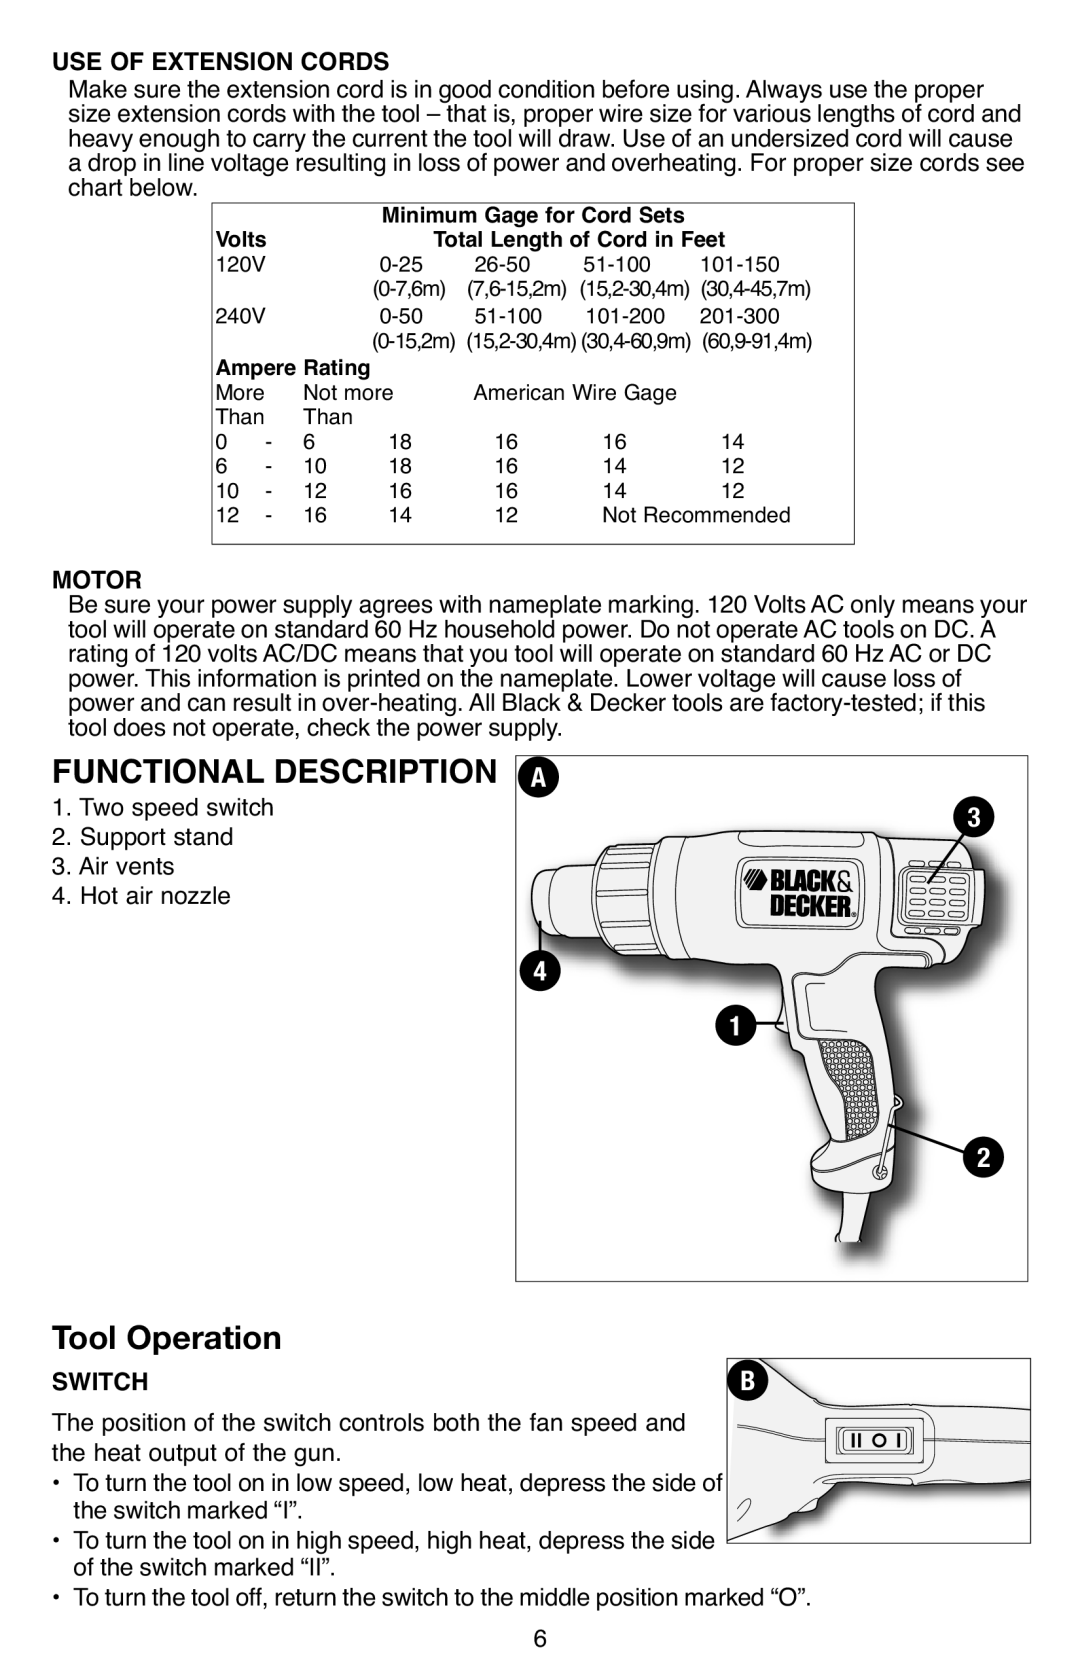
FUNCTIONAL DESCRIPTION |
|
|
|
|
| ||||||
| A |
|
|
| |||||||
1. Two speed switch |
|
|
|
|
|
| 3 | ||||
2. Support stand |
|
|
|
|
|
|
|
|
| ||
3. Air vents |
|
|
|
|
|
|
|
|
| ||
4. Hot air nozzle |
|
|
|
|
|
|
|
|
| ||
4
1 ![]()
2
Tool Operation
SWITCHB
The position of the switch controls both the fan speed and
the heat output of the gun.
• Toturn the tool on in low speed, low heat, depress the side of the switch marked “I”.
• Toturn the tool on in high speed, high heat, depress the side of the switch marked “II”.
• Toturn the tool off, return the switch to the middle position marked “O”. 6
