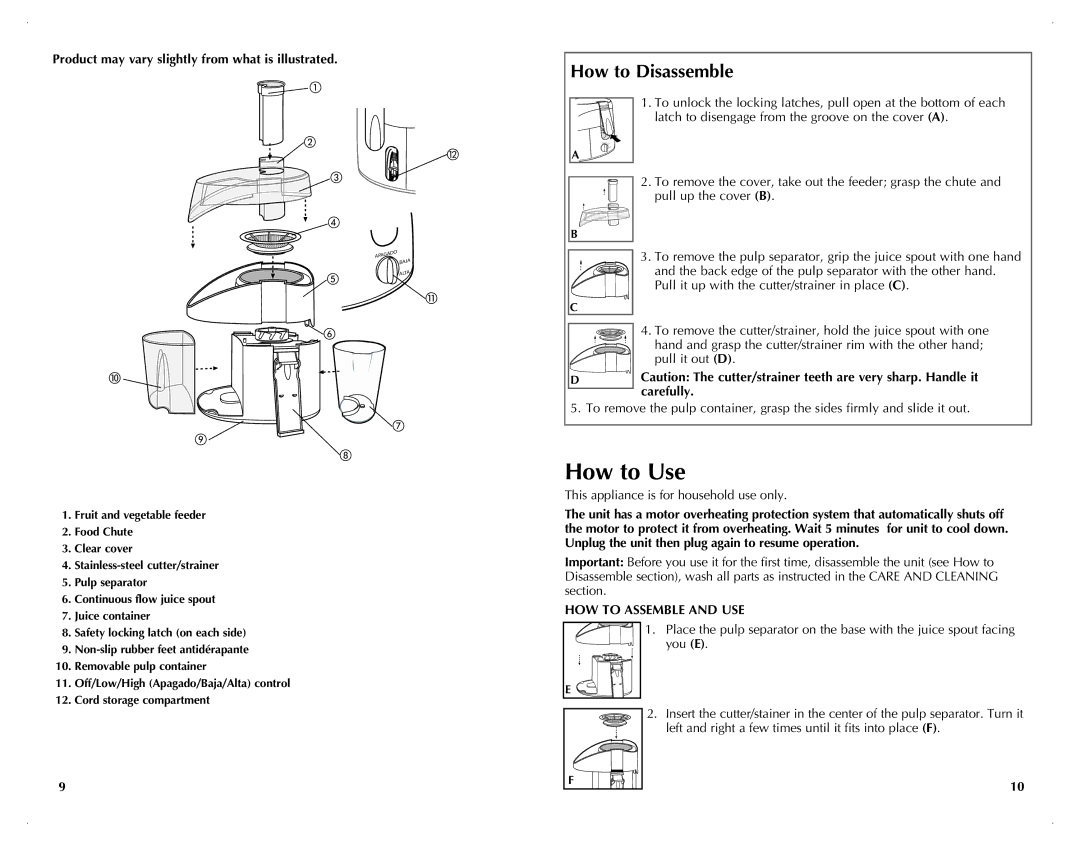
Product may vary slightly from what is illustrated.
| APAG | ADO |
|
| |
|
| BAJA |
|
| ALTA |
|
|
![]()
![]()
![]()
![]()
1. | Fruit and vegetable feeder |
2. | Food Chute |
3. | Clear cover |
4. | |
5. | Pulp separator |
6. | Continuous flow juice spout |
7. | Juice container |
How to Disassemble
1. To unlock the locking latches, pull open at the bottom of each latch to disengage from the groove on the cover (A).
A![]()
2. To remove the cover, take out the feeder; grasp the chute and pull up the cover (B).
B
3. To remove the pulp separator, grip the juice spout with one hand and the back edge of the pulp separator with the other hand. Pull it up with the cutter/strainer in place (C).
C
4. To remove the cutter/strainer, hold the juice spout with one hand and grasp the cutter/strainer rim with the other hand; pull it out (D).
D![]() Caution: The cutter/strainer teeth are very sharp. Handle it carefully.
Caution: The cutter/strainer teeth are very sharp. Handle it carefully.
5. To remove the pulp container, grasp the sides firmly and slide it out.
How to Use
This appliance is for household use only.
The unit has a motor overheating protection system that automatically shuts off the motor to protect it from overheating. Wait 5 minutes for unit to cool down. Unplug the unit then plug again to resume operation.
Important: Before you use it for the first time, disassemble the unit (see How to Disassemble section), wash all parts as instructed in the Care and Cleaning section.
How to Assemble and Use
8. | Safety locking latch (on each side) |
9. | |
10. | Removable pulp container |
11. | Off/Low/High (Apagado/Baja/Alta) control |
12. | Cord storage compartment |
E ![]()
1.Place the pulp separator on the base with the juice spout facing you (E).
9
2. Insert the cutter/stainer in the center of the pulp separator. Turn it left and right a few times until it fits into place (F).
F | 10 |
|
