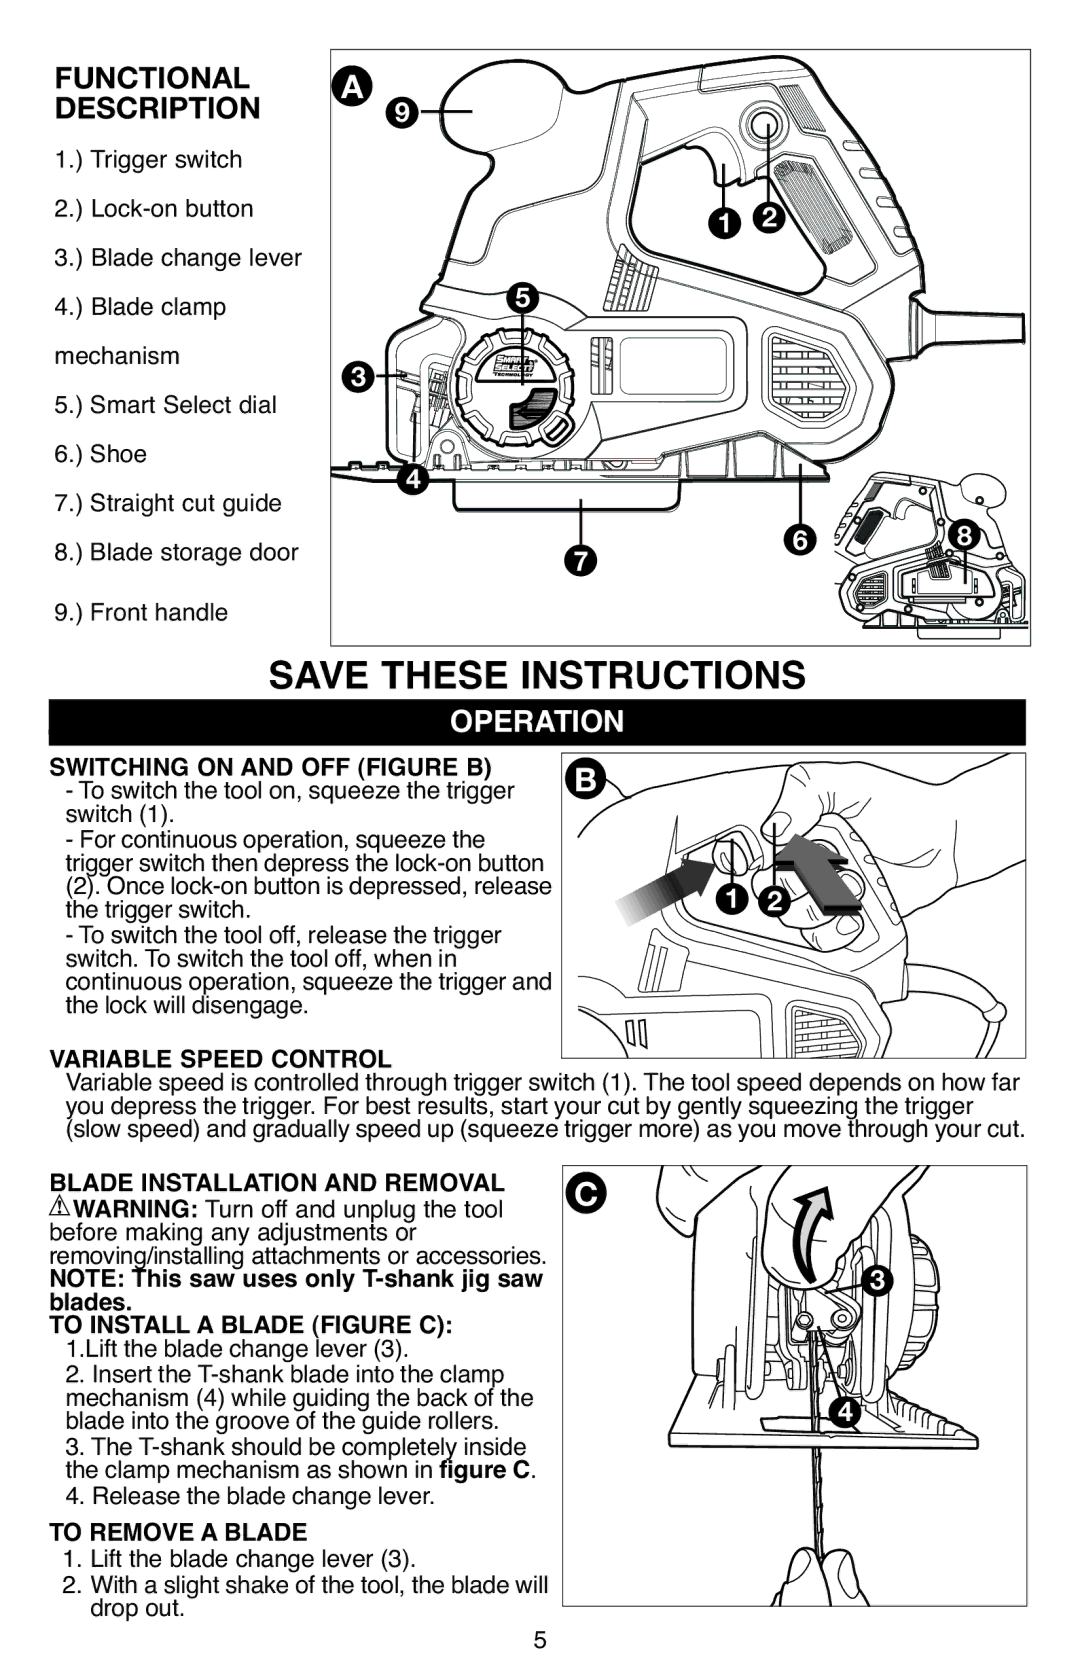
FUNCTIONAL | A 9 |
|
| |
DESCRIPTION |
|
| ||
1.) | Trigger switch |
|
|
|
2.) |
| 1 2 |
| |
3.) | Blade change lever |
|
|
|
4.) | Blade clamp | 5 |
|
|
mechanism | 3 |
|
| |
5.) | Smart Select dial |
|
|
|
6.) | Shoe | 4 |
|
|
7.) | Straight cut guide | 7 |
|
|
8.) | Blade storage door | 6 | 8 | |
|
|
| ||
9.) Front handle SAVE THESE INSTRUCTIONS | ||
OPERATION | ||
SWITCHING ON AND OFF (FIGURE B) |
| B |
- To switch the tool on, squeeze the trigger |
|
|
switch (1). |
|
|
- For continuous operation, squeezethe |
|
|
trigger switch then depress the | 1 2 | |
(2). Once | ||
the trigger switch. |
|
|
- To switch the tool off, release the trigger |
|
|
switch. To switch the tool off, when in |
|
|
continuous operation, squeeze the trigger and |
| |
the lock will disengage. |
|
|
VARIABLE SPEED CONTROL |
|
|
Variable speed is controlled through trigger switch (1). The tool speeddepends on how far | ||
you depress the trigger. For best results, start your cut by gently squeezingthe trigger | ||
(slow speed)and gradualy speed up (squeeze trigger more) as you move throughyour cut. | ||
BLADE INSTALLATION AND REMOVAL |
| C |
WARNING: Turn off and unplug the tool |
|
|
before making any adjustments or |
|
|
removing/installing attachments or accessories. | 3 | |
NOTE: This saw uses only | ||
blades. |
|
|
TO INSTALL ABLADE (FIGURE C): |
|
|
1.Lift the blade change lever (3). |
|
|
2. Insert the |
| 4 |
mechanism (4) while guiding the back of the | ||
blade into the groove of the guide rollers. |
|
|
3. The |
|
|
the clamp mechanism as shown in figure C. |
| |
4. Release the blade change lever. |
|
|
TO REMOVE A BLADE |
|
|
1. Lift the blade change lever (3). |
|
|
2. With a slight shake of the tool, the blade will |
| |
drop out. | 5 |
|
|
| |