
288, Oven, TRO4050, TRO4050B specifications
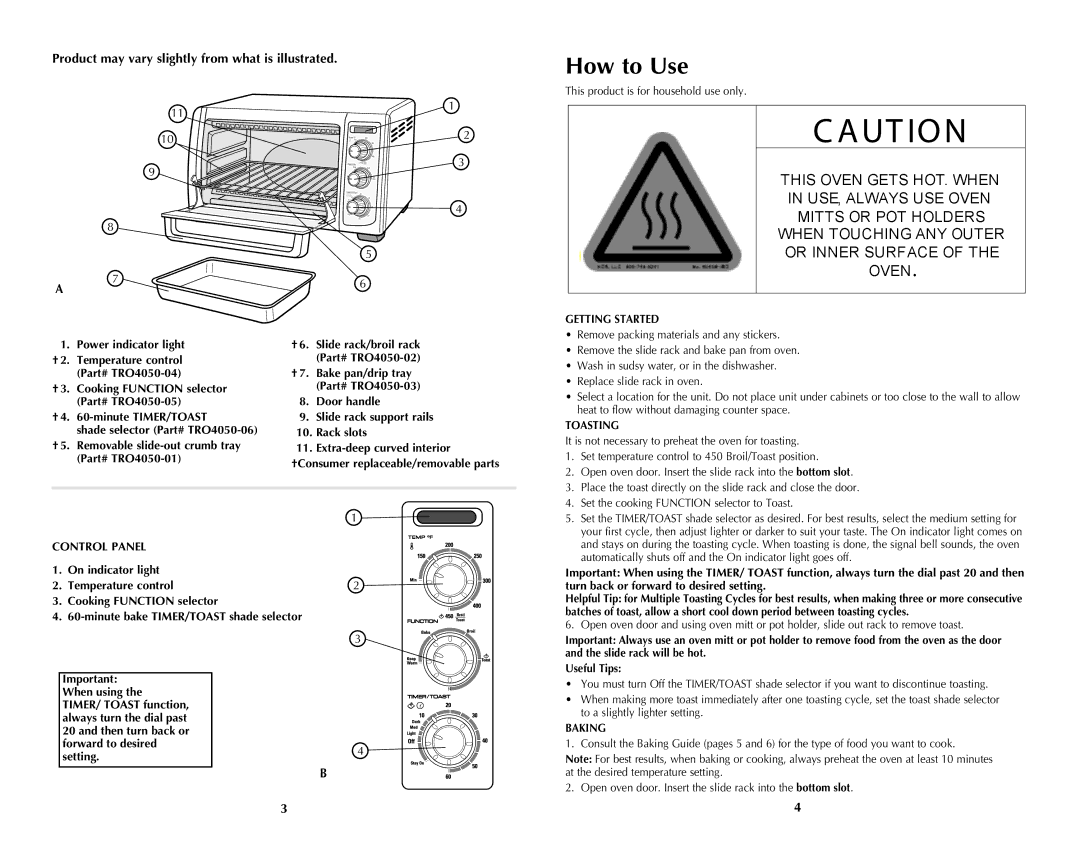
The Black & Decker TRO4050B and TRO4050 are versatile toaster ovens that stand out in today’s crowded kitchen appliance market. With a sleek and modern design, they not only bring functionality but also add a stylish touch to any kitchen decor. The two models share many features, characteristics, and technologies that cater to the needs of home cooks.One of the main features of the TRO4050B and TRO4050 is their spacious interior. Capable of accommodating up to four slices of bread or a 9-inch pizza, these ovens offer ample cooking capacity for various meals and snacks. This makes them an excellent addition for family kitchens or anyone who enjoys entertaining guests.
The convection technology in both models is a standout characteristic. By circulating hot air throughout the oven, convection cooking ensures even heat distribution, which results in perfectly cooked meals every time. This feature is particularly useful for baking and roasting, as it significantly reduces cooking times while enhancing the flavor and texture of dishes.
Another notable aspect of these toaster ovens is their user-friendly controls. With intuitive dials and a digital display, setting the temperature or cooking time is straightforward. The ovens come with several cooking functions, such as bake, broil, toast, and keep warm, allowing users to select the best option for their specific cooking needs. Additionally, an adjustable temperature range enables precise cooking, ensuring everything from crispy toast to tender roasts is achievable.
Safety is also a priority in the design of the TRO4050B and TRO4050. The exterior remains cool to the touch during operation, reducing the risk of burns. A built-in timer with an automatic shut-off feature offers peace of mind by preventing overcooking and potential accidents.
Cleaning is made easy thanks to the removable crumb tray, which catches excess crumbs and makes post-cooking clean-up a breeze. The oven's interior is designed with non-stick surfaces that resist stains and facilitate quick wipe-downs.
In summary, the Black & Decker TRO4050B and TRO4050 toaster ovens combine style, efficiency, and advanced cooking technology. With their spacious interiors, convection capabilities, user-friendly controls, and safety features, they are ideal choices for anyone looking to elevate their culinary experience. Whether you're a novice cook or a seasoned chef, these toaster ovens provide practical solutions for a variety of cooking tasks.