
KV1116A, KV1108A specifications
The Black Box KV1108A and KV1116A are two versatile KVM (Keyboard, Video, Mouse) switches designed for professional settings where reliable management of multiple servers or computers is necessary. These devices are engineered to enhance workspace efficiency by providing seamless control over multiple systems from a single console.One of the standout features of the KV1108A and KV1116A is their ability to support a wide range of video resolutions, allowing for high-quality output up to 1920x1200 at 60Hz. This ensures that users can experience clear and crisp visuals, which is vital for operations that require detailed monitoring and management. The KV switch's capability to support high-definition video makes it suitable for applications in data centers, control rooms, and other environments where clarity and reliability are paramount.
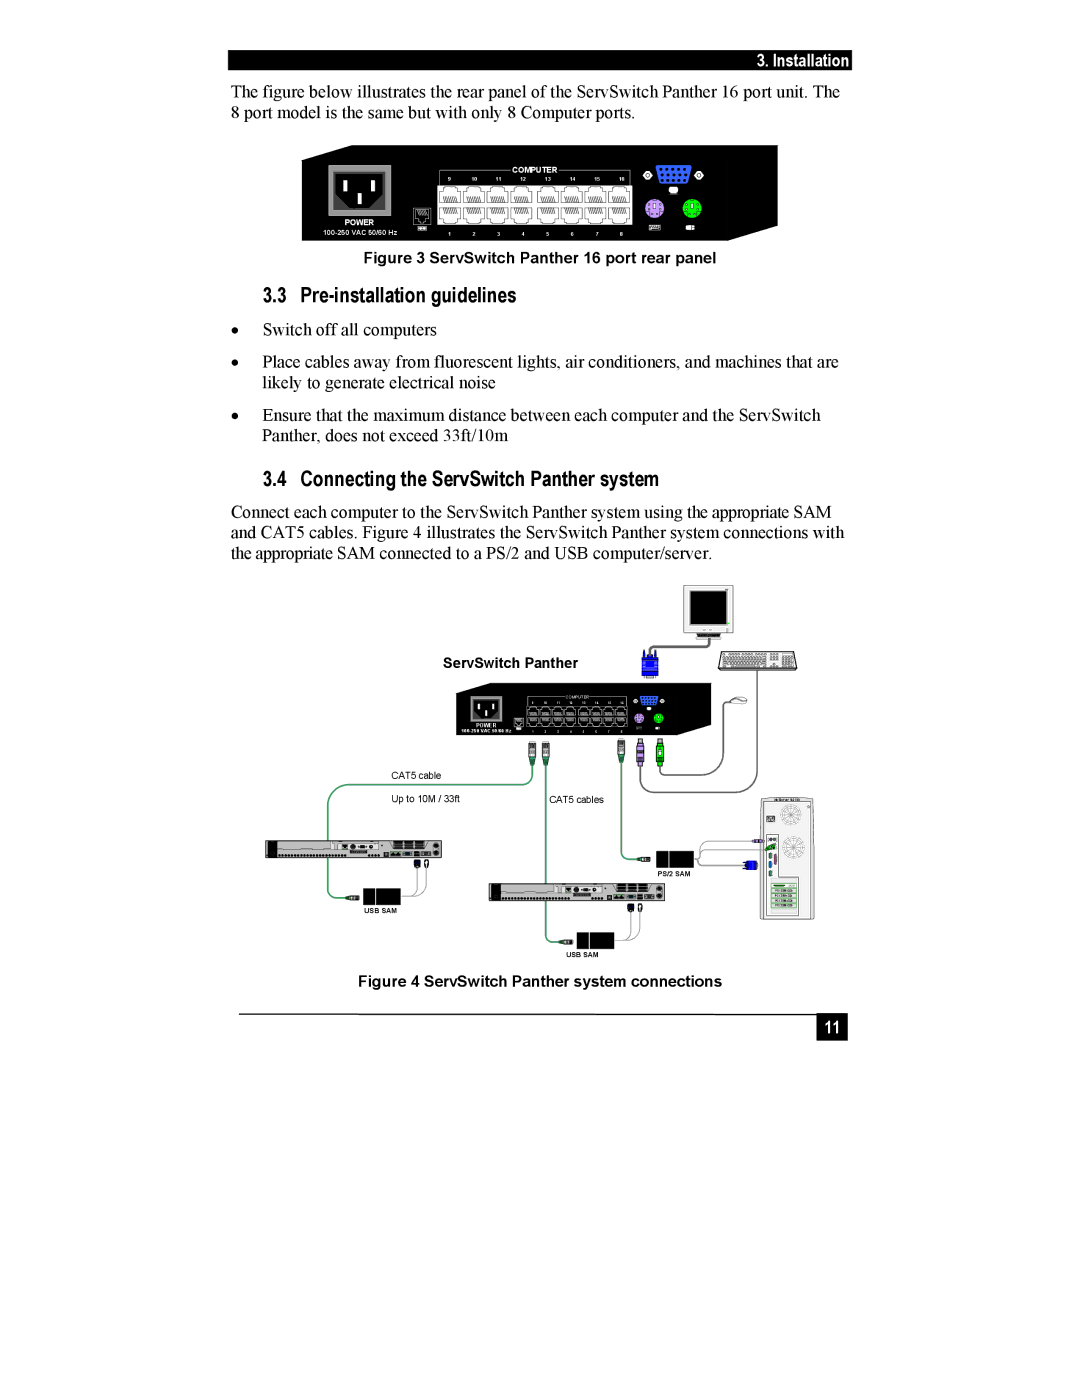
In terms of connectivity, both the KV1108A and KV1116A come equipped with multiple ports, enabling them to control up to 8 and 16 computers, respectively. They employ standard 19-inch rack-mountable designs, making integration into existing server racks straightforward. The devices utilize CAT5e/6 cabling to provide a simple yet effective means of connecting the KVM switch to multiple computers, thereby minimizing clutter and simplifying cable management.
Technologically, the KV1108A and KV1116A support both PS/2 and USB keyboard and mouse connections, ensuring compatibility with a wide range of devices. The switches incorporate advanced signal processing technology, which helps deliver reliable data transmission over long distances, reducing the risk of lag or disconnection. Users can also benefit from hot-plug capability, allowing the addition and removal of computers without needing to power down the switch.
Another critical aspect of the KV series is its user-friendly design. The integrated On-Screen Display (OSD) feature allows for easy navigation between connected devices, presenting information in a straightforward format. Users can also easily configure settings through keyboard shortcuts, which enhances operational efficiency.
Both the KV1108A and KV1116A prioritize security, boasting features like secure user access and various authentication methods that safeguard sensitive data and operations. Overall, these KVM switches merge functionality, high performance, and security, making them an excellent choice for IT professionals looking to streamline their workflows and enhance productivity.