Appropriate installation location
•Place the machine on a rigid floor. Do not place it on a long pile rug or similar surfaces.
•Total weight of the washing machine and the dryer
•Do not place the product on the power cable.
•Do not install the product at places where temperature may fall below 0ºC.
•Place the product at least 1 cm away from the edges of other furniture.
Removing packaging reinforcement
Tilt the machine backwards to remove the packaging reinforcement. Remove the packaging reinforcement by pulling the ribbon.
Removing the transportation locks
A Do not remove the transportation locks before taking out the packaging reinforcement.
A Remove the transportation safety bolts before operating the washing machine, otherwise, the product will be damaged.
1.Loosen all the bolts with a spanner until they rotate freely (C).
2.Remove transportation safety bolts by turning them gently.
3.Attach the plastic covers supplied in the User Manual bag into the holes on the rear panel.
(P)
C Keep the transportation safety bolts in a safe place to reuse when the washing machine needs to be moved again in the future.
C Never move the product without the transportation safety bolts properly fixed in place!
Connecting water supply
C The water supply pressure required to run the product is between 1 to 10 bars (0.1 – 10 MPa). It is necessary to have 10 – 80 liters of water flowing from the fully open tap in one minute to have your machine run smoothly. Attach a pressure reducing valve if water pressure is higher.
C If you are going to use the double
C If you want to use both water inlets of the product, connect the hot water hose after removing the stopper and gasket group from the hot water valve. (Applies for the products supplied with a blind stopper group.)
A Models with a single water inlet should not be connected to the hot water tap. In such a case the laundry will get damaged or the product
3
will switch to protection mode and will not operate.
A Do not use old or used water inlet hoses on the new product. It may cause stains on your laundry.
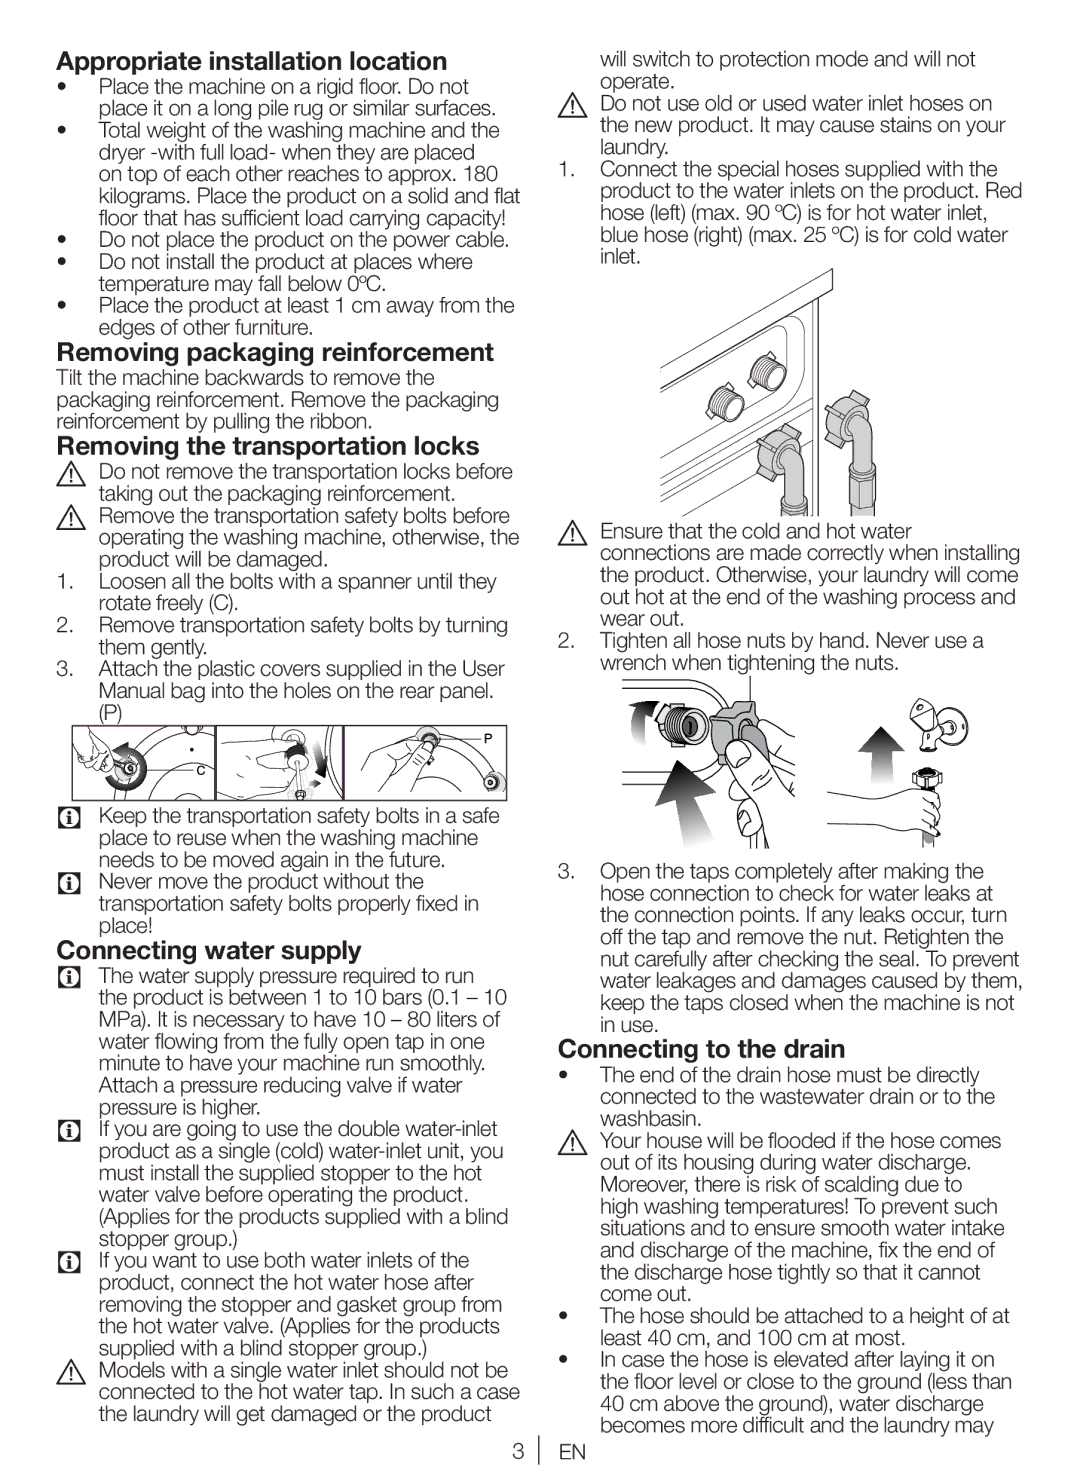
1.Connect the special hoses supplied with the product to the water inlets on the product. Red hose (left) (max. 90 ºC) is for hot water inlet, blue hose (right) (max. 25 ºC) is for cold water inlet.
A Ensure that the cold and hot water connections are made correctly when installing the product. Otherwise, your laundry will come out hot at the end of the washing process and wear out.
2.Tighten all hose nuts by hand. Never use a wrench when tightening the nuts.
3.Open the taps completely after making the hose connection to check for water leaks at the connection points. If any leaks occur, turn off the tap and remove the nut. Retighten the nut carefully after checking the seal. To prevent water leakages and damages caused by them, keep the taps closed when the machine is not in use.
Connecting to the drain
•The end of the drain hose must be directly
connected to the wastewater drain or to the washbasin.
A Your house will be flooded if the hose comes out of its housing during water discharge. Moreover, there is risk of scalding due to high washing temperatures! To prevent such situations and to ensure smooth water intake and discharge of the machine, fix the end of the discharge hose tightly so that it cannot come out.
•The hose should be attached to a height of at least 40 cm, and 100 cm at most.
•In case the hose is elevated after laying it on the floor level or close to the ground (less than
40 cm above the ground), water discharge becomes more difficult and the laundry may
EN