CLEANING INSTRUCTIONS
CAUTION:
Burn Hazard
Brewing and serving temperatures of coffee are extremely hot.
Hot coffee will cause serious skin burns.
CAUTION:
Electric Shock
Hazard
Do not submerge or immerse brewer in water.
IMPORTANT:
DO NOT use steel wool, sharp objects, or caustic, abrasive or chlorinated cleansers to clean the brewer.
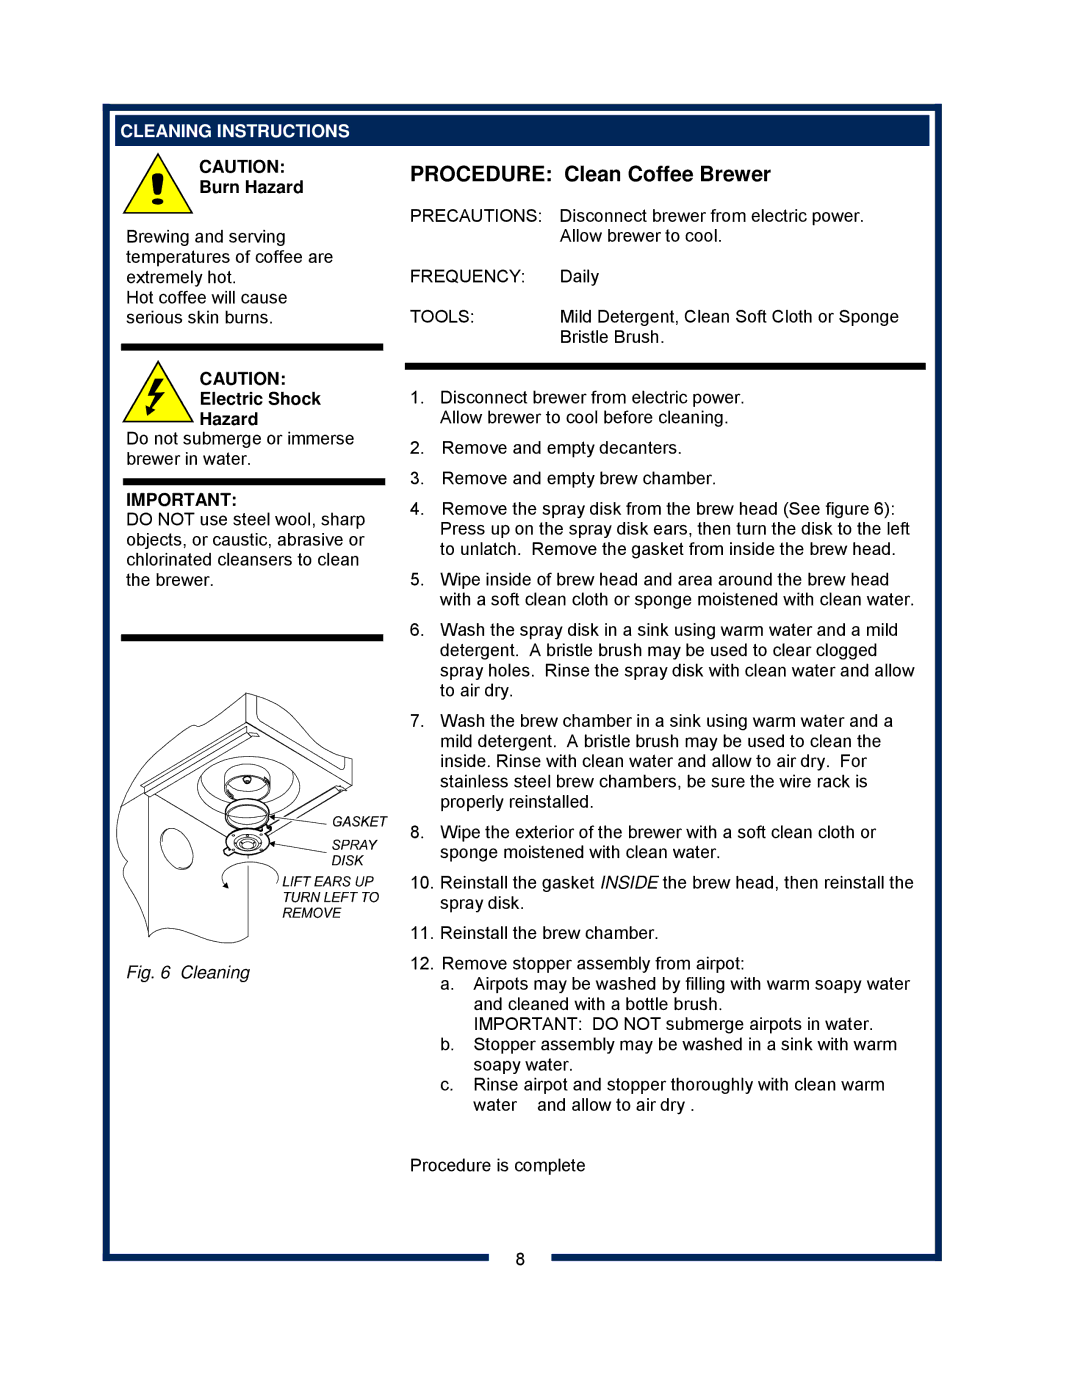
Fig. 6 Cleaning
PROCEDURE: Clean Coffee Brewer
PRECAUTIONS: Disconnect brewer from electric power.
| Allow brewer to cool. |
FREQUENCY: | Daily |
TOOLS: | Mild Detergent, Clean Soft Cloth or Sponge |
| Bristle Brush. |
|
|
|
|
1.Disconnect brewer from electric power. Allow brewer to cool before cleaning.
2.Remove and empty decanters.
3.Remove and empty brew chamber.
4.Remove the spray disk from the brew head (See figure 6): Press up on the spray disk ears, then turn the disk to the left to unlatch. Remove the gasket from inside the brew head.
5.Wipe inside of brew head and area around the brew head with a soft clean cloth or sponge moistened with clean water.
6.Wash the spray disk in a sink using warm water and a mild detergent. A bristle brush may be used to clear clogged spray holes. Rinse the spray disk with clean water and allow to air dry.
7.Wash the brew chamber in a sink using warm water and a mild detergent. A bristle brush may be used to clean the inside. Rinse with clean water and allow to air dry. For stainless steel brew chambers, be sure the wire rack is properly reinstalled.
8.Wipe the exterior of the brewer with a soft clean cloth or sponge moistened with clean water.
10.Reinstall the gasket INSIDE the brew head, then reinstall the spray disk.
11.Reinstall the brew chamber.
12.Remove stopper assembly from airpot:
a.Airpots may be washed by filling with warm soapy water and cleaned with a bottle brush.
IMPORTANT: DO NOT submerge airpots in water.
b.Stopper assembly may be washed in a sink with warm soapy water.
c.Rinse airpot and stopper thoroughly with clean warm
water and allow to air dry .
Procedure is complete
8