Contents
OPERATOR’S MANUAL
Two-Stage Snow Thrower - C, D Style
MTD LLC, P.O. BOX 361131 CLEVELAND, OHIO
Customer Support
Table of Contents
Finding and Recording Model Number
Warranty
in this manual and on the machine
Safety Labels
Restrict the use
Your Responsibility
TrainingPreparation
Safe Operation
Practices
HEED ITS WARNING Your Responsibility Restrict the use
Operation
Maintenance & Storage
Safe Operation Practices
Do not modify engine
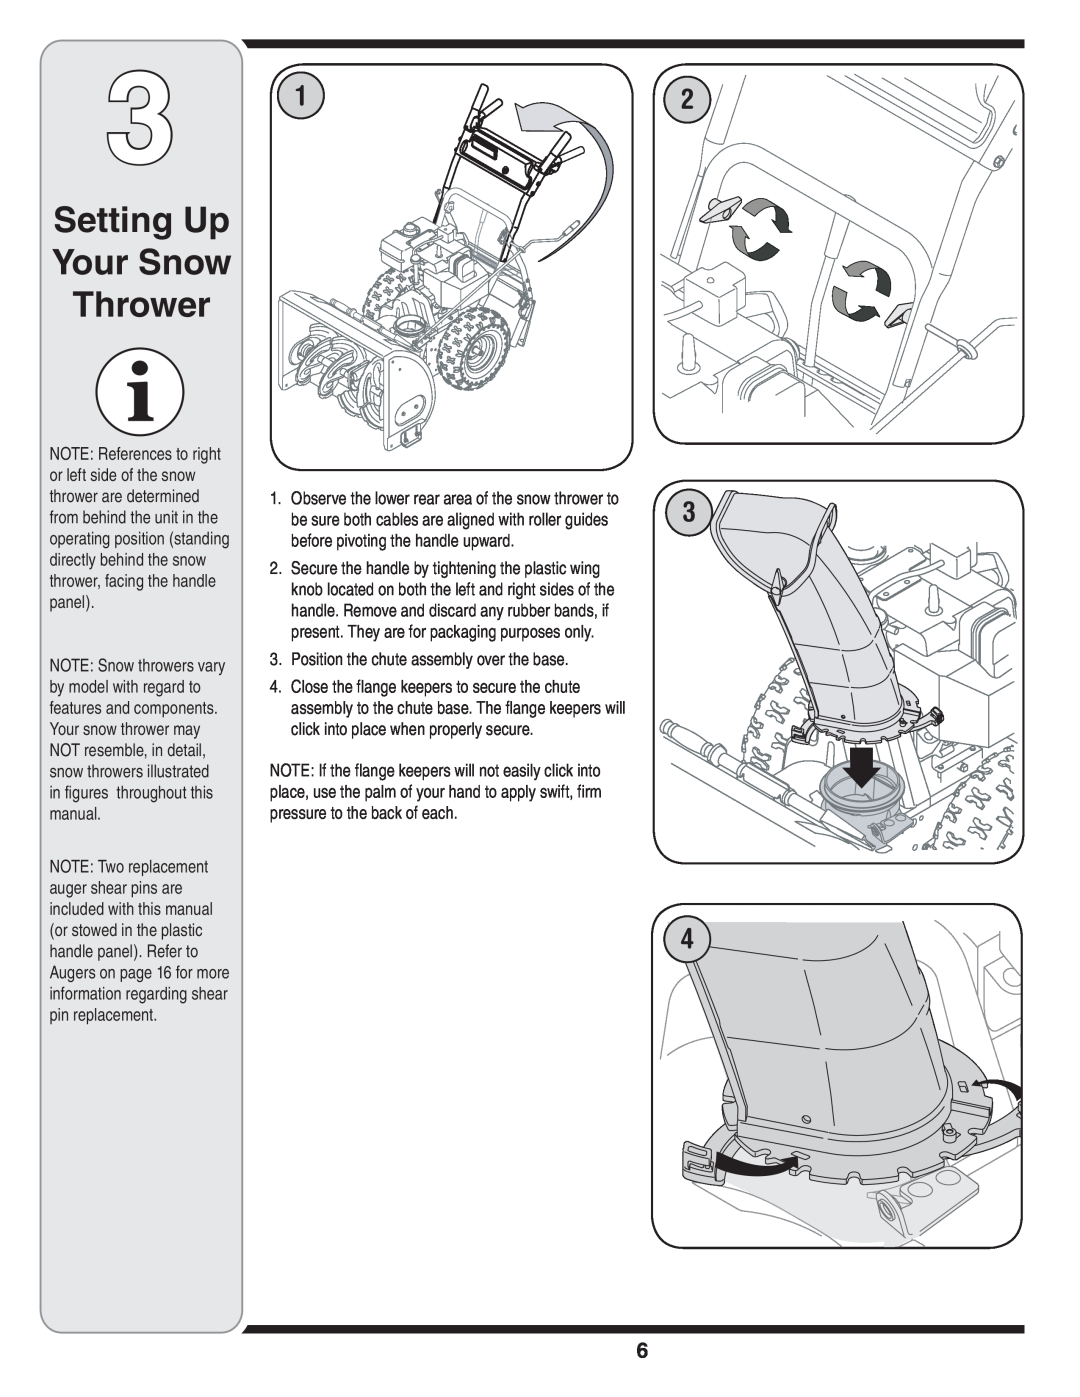
Setting Up Your Snow Thrower
3. Position the chute assembly over the base
Tire Pressure
Extinguish cigarettes, cigars, pipes and other sources of ignition
Operating Your Snow Thrower
Know Your Snow Thrower
Forward
Auger Control
If your home’s
Gas & Oil Fill-Up
Stopping The Engine
Electric Starter
To Engage Augers
Chute Clean-Out Tool
To Engage Drive
Recoil Starter
Making Adjustments
To adjust the skid shoes
Gear Shaft
Maintaining Your Snow Thrower
Engine
Wheels
proceed as follows
Auger Belt Replacement
replacement auger belt
place a piece of plastic under the gas cap
3. a. Grasp the idler pulley and pivot it toward the right
Friction Wheel Removal
Reassemble the side plates with a new rubber ring
Off-Season Storage
Preparing Engine
Preparing Snow Thrower
Cause
Trouble Shooting
Problem
Remedy
Styles C & D
Illustrated Parts List
To order replacement parts, contact
or visit
Styles C & D
Washer, Flat, .350 sq. x
631-04133
Screw, Self-tapping, 5/16-18
Panel, Handle, no cutout C-Style
Styles C & D
Illustrated Parts List
To order replacement parts, contact
or visit
Page
Page
MANUFACTURER’S LIMITED WARRANTY FOR