LIGHTING AND OPERATING INSTRUCTIONS
1.STOP! Read the safety information above on this label.
2.The gas valve must be shut off by putting the ON/OFF switch to position “0”. Wait five (5) minutes to clear out any gas. If you smell gas, STOP! Follow “B” in the safety information above. If you do not smell gas, go to the next step.
3.This water heater is equipped with a safety pilot burner and an automatic ignition control system.
4.Set the ON/OFF switch (flip down cover plate on frontal panel strip) marked I/0 to the I position. In this position, the water heater is ready to use.
5.If the red LED indicator light (visible through the peephole in the front panel strip) is flashing, this is a warning that the batteries are less than 1.2 Volts and will need to be replaced within the next couple of weeks. Plan to have two D type 1.5 volt
6.Turn the hot water faucet on the minimum flow rate required to activate the heater. The automatic ignition system first ignites the safety pilot burner which then ignites the main burner in about 4 seconds.
7.The pilot flame will extinguish
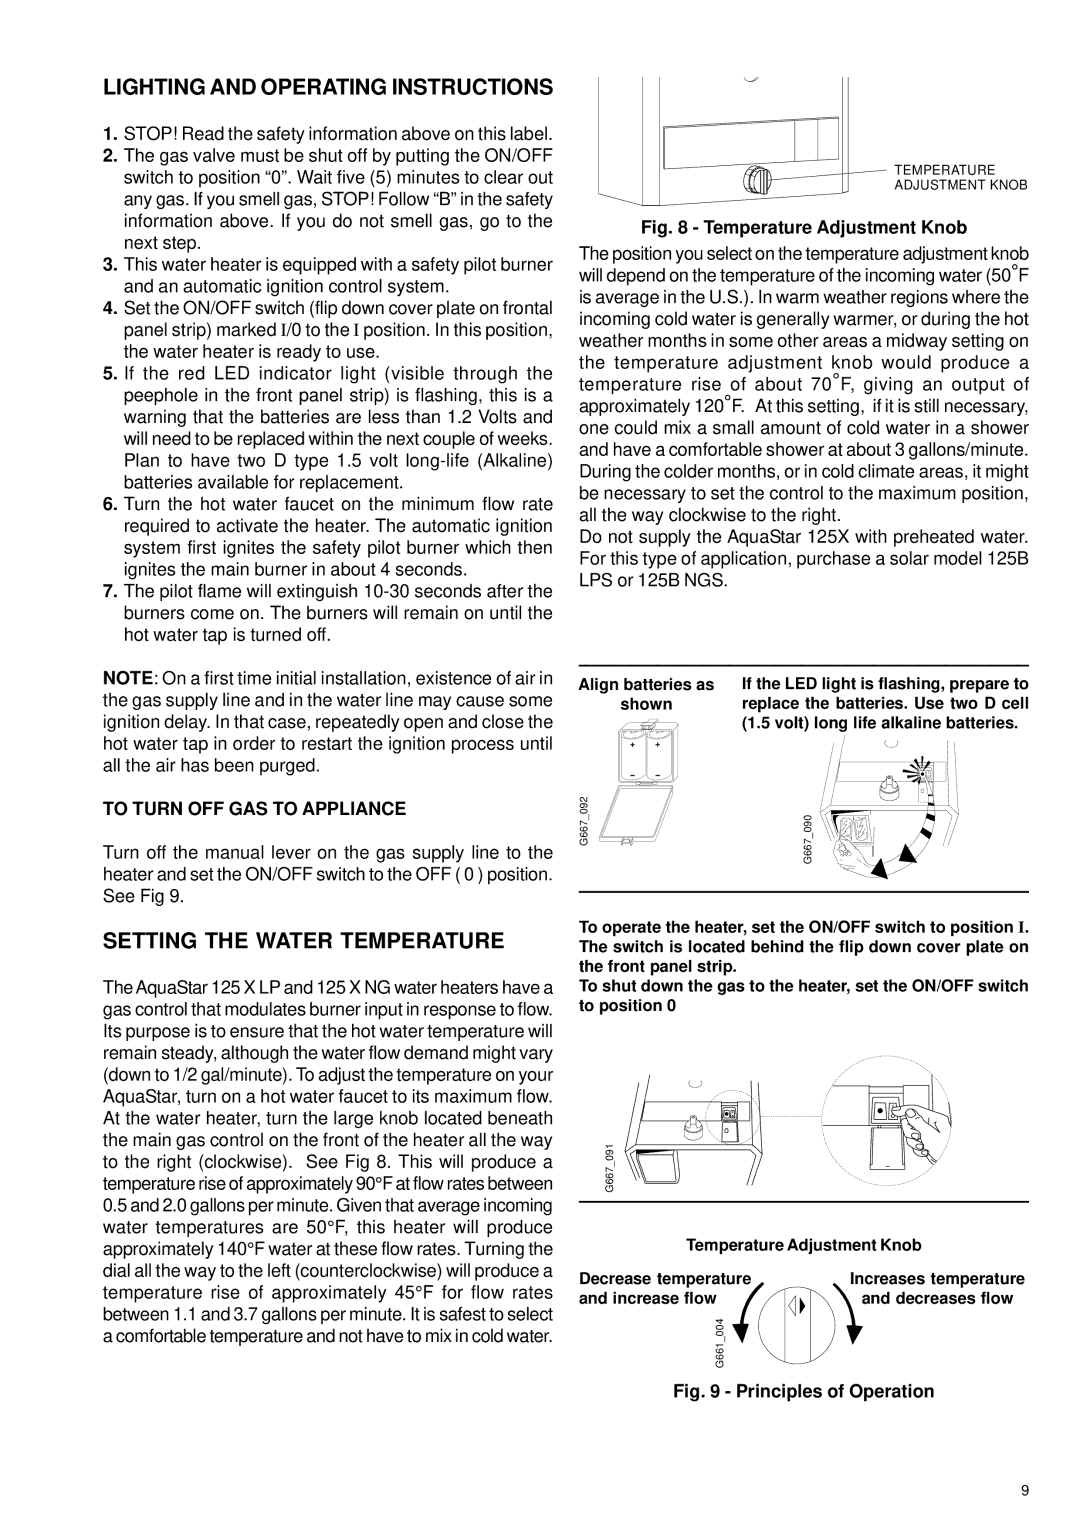
TEMPERATURE
ADJUSTMENT KNOB
Fig. 8 - Temperature Adjustment Knob
The position you select on the temperature adjustment knob will depend on the temperature of the incoming water (50°F is average in the U.S.). In warm weather regions where the incoming cold water is generally warmer, or during the hot weather months in some other areas a midway setting on the temperature adjustment knob would produce a temperature rise of about 70°F, giving an output of approximately 120°F. At this setting, if it is still necessary, one could mix a small amount of cold water in a shower and have a comfortable shower at about 3 gallons/minute. During the colder months, or in cold climate areas, it might be necessary to set the control to the maximum position, all the way clockwise to the right.
Do not supply the AquaStar 125X with preheated water. For this type of application, purchase a solar model 125B LPS or 125B NGS.
NOTE: On a first time initial installation, existence of air in the gas supply line and in the water line may cause some ignition delay. In that case, repeatedly open and close the hot water tap in order to restart the ignition process until all the air has been purged.
TO TURN OFF GAS TO APPLIANCE
Turn off the manual lever on the gas supply line to the heater and set the ON/OFF switch to the OFF ( 0 ) position. See Fig 9.
SETTING THE WATER TEMPERATURE
The AquaStar 125 X LP and 125 X NG water heaters have a gas control that modulates burner input in response to flow. Its purpose is to ensure that the hot water temperature will remain steady, although the water flow demand might vary (down to 1/2 gal/minute). To adjust the temperature on your AquaStar, turn on a hot water faucet to its maximum flow. At the water heater, turn the large knob located beneath the main gas control on the front of the heater all the way to the right (clockwise). See Fig 8. This will produce a temperature rise of approximately 90°F at flow rates between
0.5and 2.0 gallons per minute. Given that average incoming water temperatures are 50°F, this heater will produce approximately 140°F water at these flow rates. Turning the dial all the way to the left (counterclockwise) will produce a temperature rise of approximately 45°F for flow rates between 1.1 and 3.7 gallons per minute. It is safest to select a comfortable temperature and not have to mix in cold water.
Align batteries as | If the LED light is flashing, prepare to |
shown | replace the batteries. Use two D cell |
| (1.5 volt) long life alkaline batteries. |
G667 092 | G667 090 |
To operate the heater, set the ON/OFF switch to position I. The switch is located behind the flip down cover plate on the front panel strip.
To shut down the gas to the heater, set the ON/OFF switch to position 0
G667_091
Temperature Adjustment Knob
Decrease temperature | Increases temperature |
and increase flow | and decreases flow |
G661_004 |
|
Fig. 9 - Principles of Operation
9