BM 2610945718
PLUNGE CUTS
Disconnect battery pack from tool before making adjustments. Set depth adjustment according to material to be cut. Tilt saw forward with cutting guide notch lined up with the line you’ve drawn. Raise the lower guard, using lift lever and hold the saw by the front and rear handles (Fig. 10).
With the blade just clearing the material to be cut, start the motor. Gradually lower the back end of saw using the front end of the foot as the hinge point. WARNING: As blade starts cutting the material, release the lower guard immediately. When the foot rests flat on the surface being cut, proceed cutting in forward direction to end of cut. WARNING:
Allow blade to come to a complete stop before lifting the saw from cut. Also, never pull the saw backward since blade will climb out of the material and KICKBACK will occur. Turn saw around and finish the cut in the normal manner, sawing forward. If corners of your pocket cut are not completely cut through, use a jigsaw or hand saw to finish the corners.
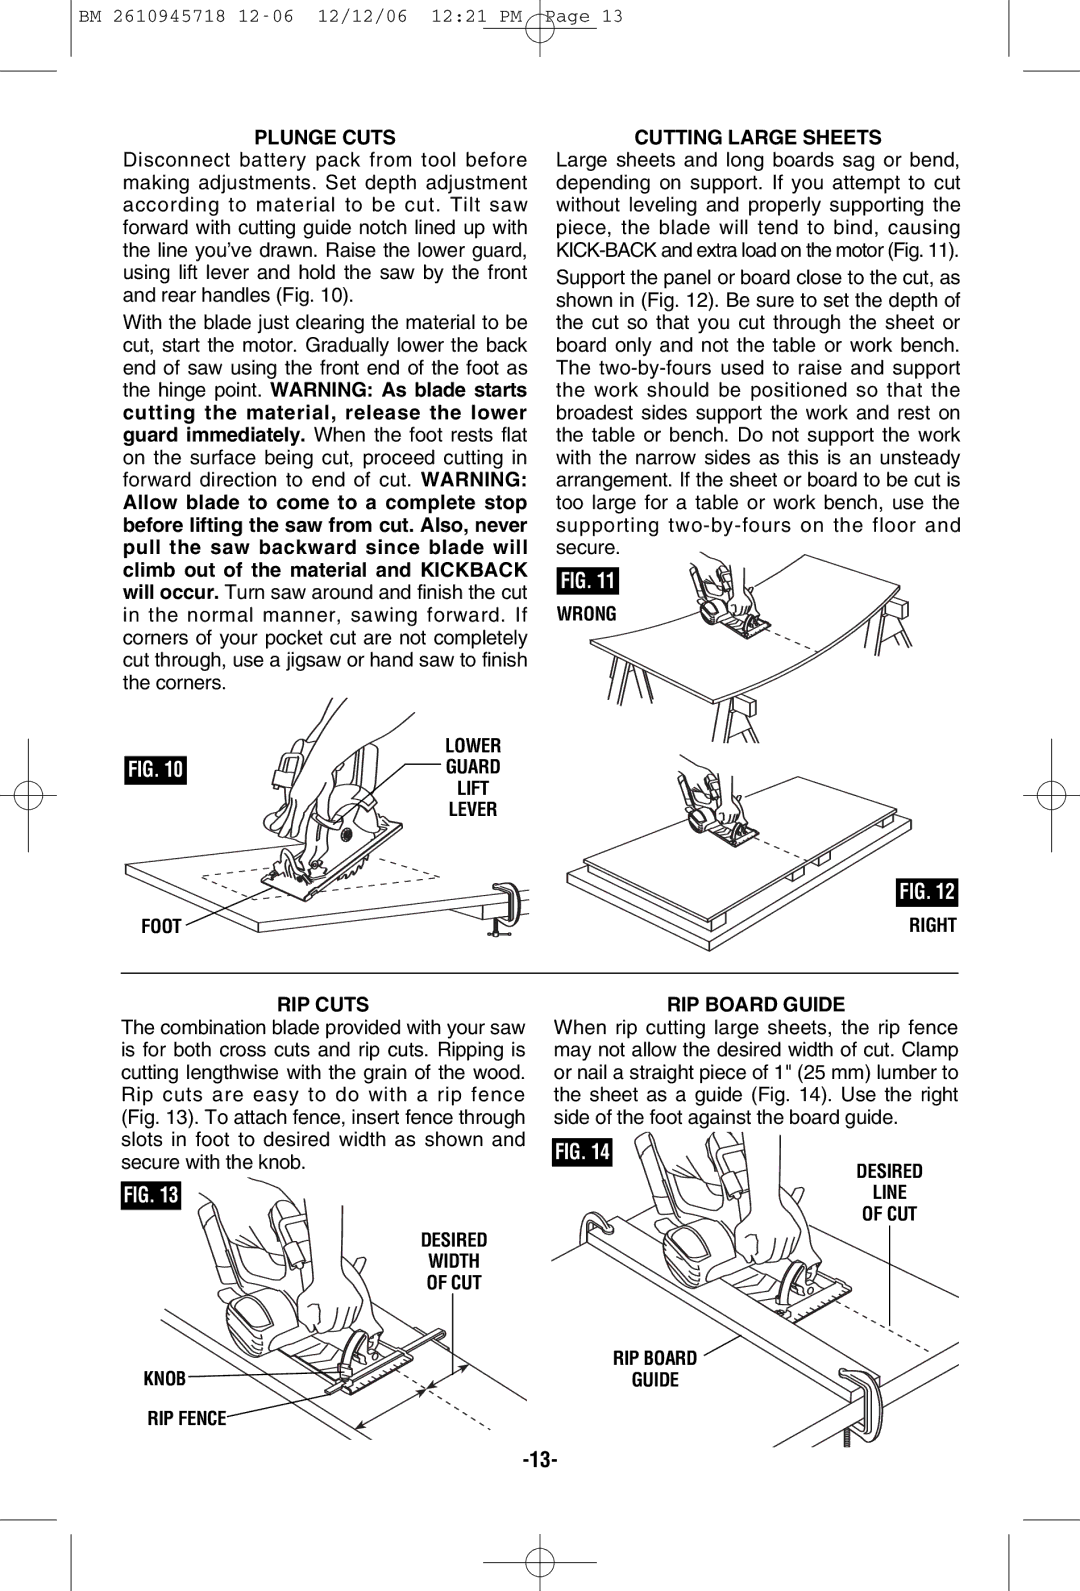
CUTTING LARGE SHEETS
Large sheets and long boards sag or bend, depending on support. If you attempt to cut without leveling and properly supporting the piece, the blade will tend to bind, causing
Support the panel or board close to the cut, as shown in (Fig. 12). Be sure to set the depth of the cut so that you cut through the sheet or board only and not the table or work bench. The
FIG. 11
WRONG
FIG. 10
FOOT
LOWER
GUARD
LIFT
LEVER
FIG. 12
RIGHT
RIP CUTS
The combination blade provided with your saw is for both cross cuts and rip cuts. Ripping is cutting lengthwise with the grain of the wood. Rip cuts are easy to do with a rip fence (Fig. 13). To attach fence, insert fence through slots in foot to desired width as shown and secure with the knob.
FIG. 13
DESIRED
WIDTH
OF CUT
RIP BOARD GUIDE
When rip cutting large sheets, the rip fence may not allow the desired width of cut. Clamp or nail a straight piece of 1" (25 mm) lumber to the sheet as a guide (Fig. 14). Use the right side of the foot against the board guide.
FIG. 14
DESIRED
LINE
OF CUT
KNOB ![]()
![]()
![]()
![]()
![]()
![]()
![]() RIP FENCE
RIP FENCE
RIP BOARD
GUIDE