![]() 2610031969
2610031969
GEAR SHIFTING
Your tool is equipped with two separate gear ranges, low gear and high gear. Low gear provides
ATTENTION: If your tool appears to be running, but the chuck will not turn, check to make sure the gear shifting switch is pushed fully into desired setting.
ADJUSTABLE CLUTCH
Your tool features 21 clutch settings. Output torque will increase as the clutch ring, is
rotated from 1 to 20. The drill “ ![]()
![]() ” position will lock up the clutch to permit drilling and driving heavy duty work (Fig. 1).
” position will lock up the clutch to permit drilling and driving heavy duty work (Fig. 1).
AUTOLOCK™
Your tool is equipped with an automatic locking system. This feature will lock the bit holder in one position when the trigger switch is
released. This will allow you to tighten or loosen a nut or screw by rotating the tool by hand with the switch off. This is convenient when higher turning torque is needed.
BUILT IN WORK LIGHT
Your tool is also equipped with a light that turns on automatically when the switch is activated, for better visibility when drilling/driving (Fig. 1).
BATTERY CHARGE CONDITION
INDICATOR LIGHTS
Your tool is equipped with charge condition indicator lights (Fig. 1). The indicator lights shows the charge condition of the battery for a few second when the On/Off trigger is pressed halfway or fully.
LED | Capacity |
Continuous lighting 3 x green | > 2/3 |
Continuous lighting 2 x green | > 1/3 |
Continuous lighting 1 x green | < 1/3 |
Flashing light 1 x green | reserve |
|
|
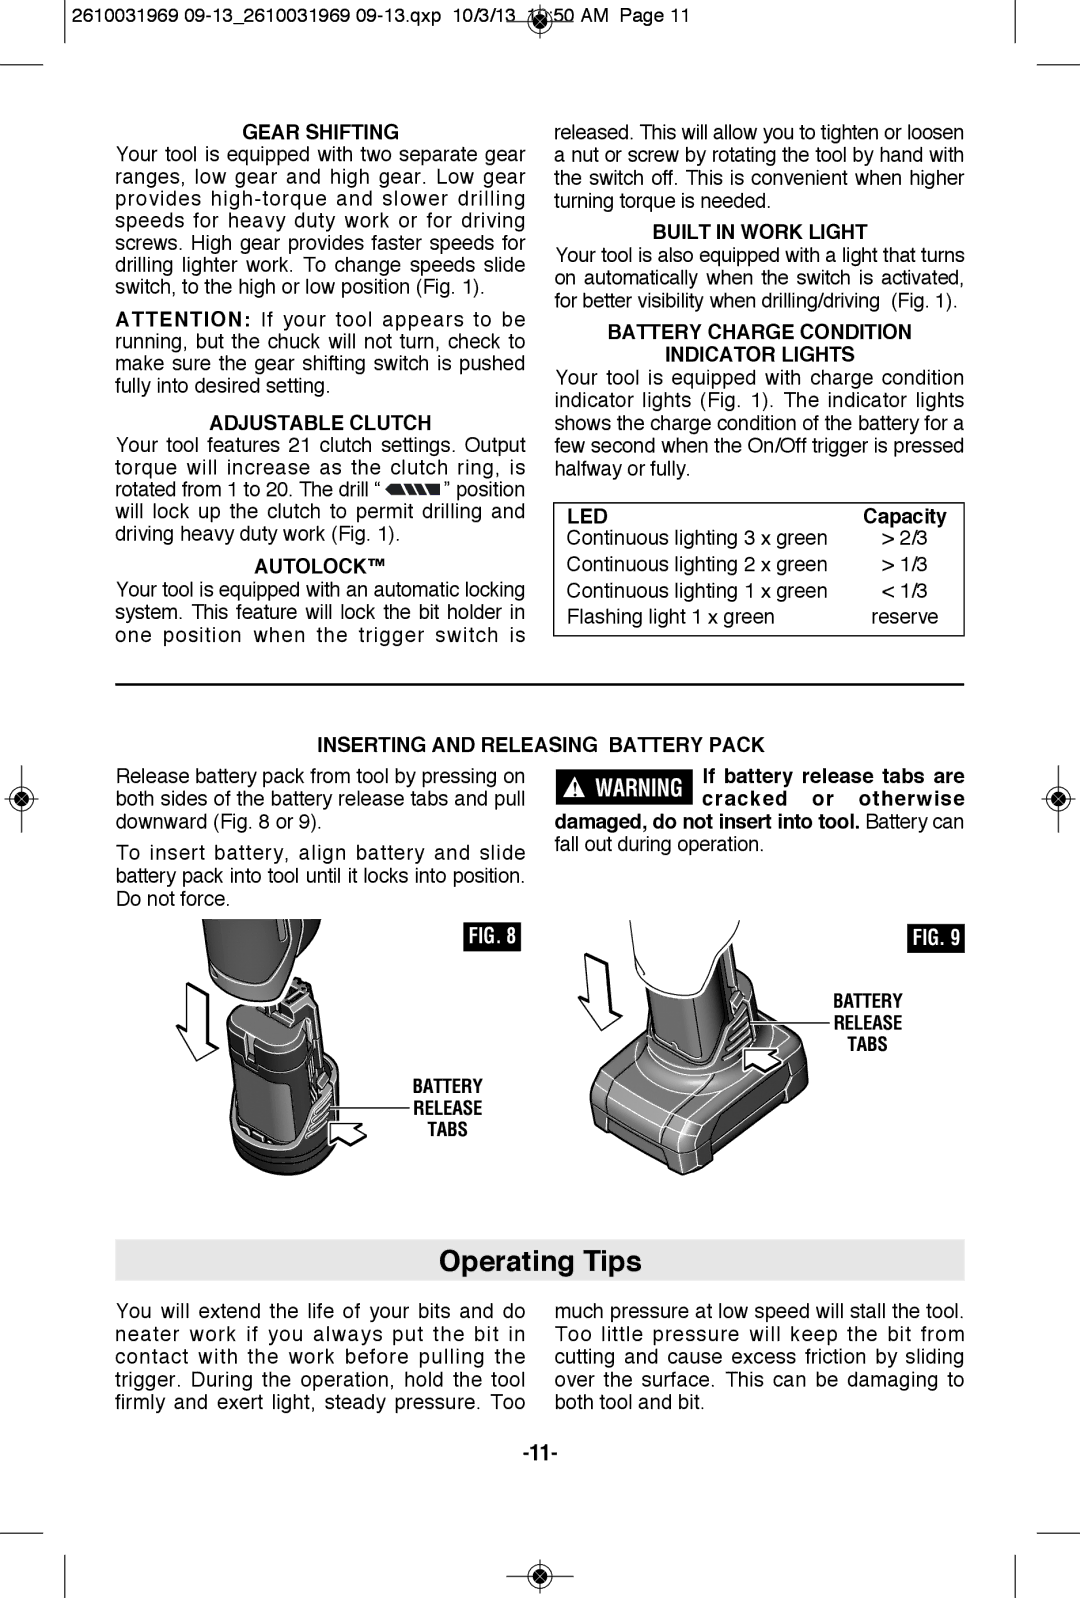
INSERTING AND RELEASING BATTERY PACK
Release battery pack from tool by pressing on both sides of the battery release tabs and pull downward (Fig. 8 or 9).
To insert battery, align battery and slide battery pack into tool until it locks into position. Do not force.
If battery release tabs are ! WARNING cracked or otherwise damaged, do not insert into tool. Battery can
fall out during operation.
FIG. 8 | FIG. 9 |
BATTERY
RELEASE
TABS
BATTERY
RELEASE
TABS
Operating Tips
You will extend the life of your bits and do neater work if you always put the bit in contact with the work before pulling the trigger. During the oper ation, hold the tool firmly and exert light, steady pressure. Too
much pressure at low speed will stall the tool. Too little pressure will keep the bit from cutting and cause excess friction by sliding over the surface. This can be damaging to both tool and bit.