BM 1619929E58
!WARNING Do not carry the tool by the chuck. Tool may unexpectedly
fall if the chuck is not fully engaged.
The
Hammer drilling and chiseling are only possible when using the
The
REMOVING THE SDS-plus® CHUCK
(Model RH328VCQ only)
Grasp the locking ring of the
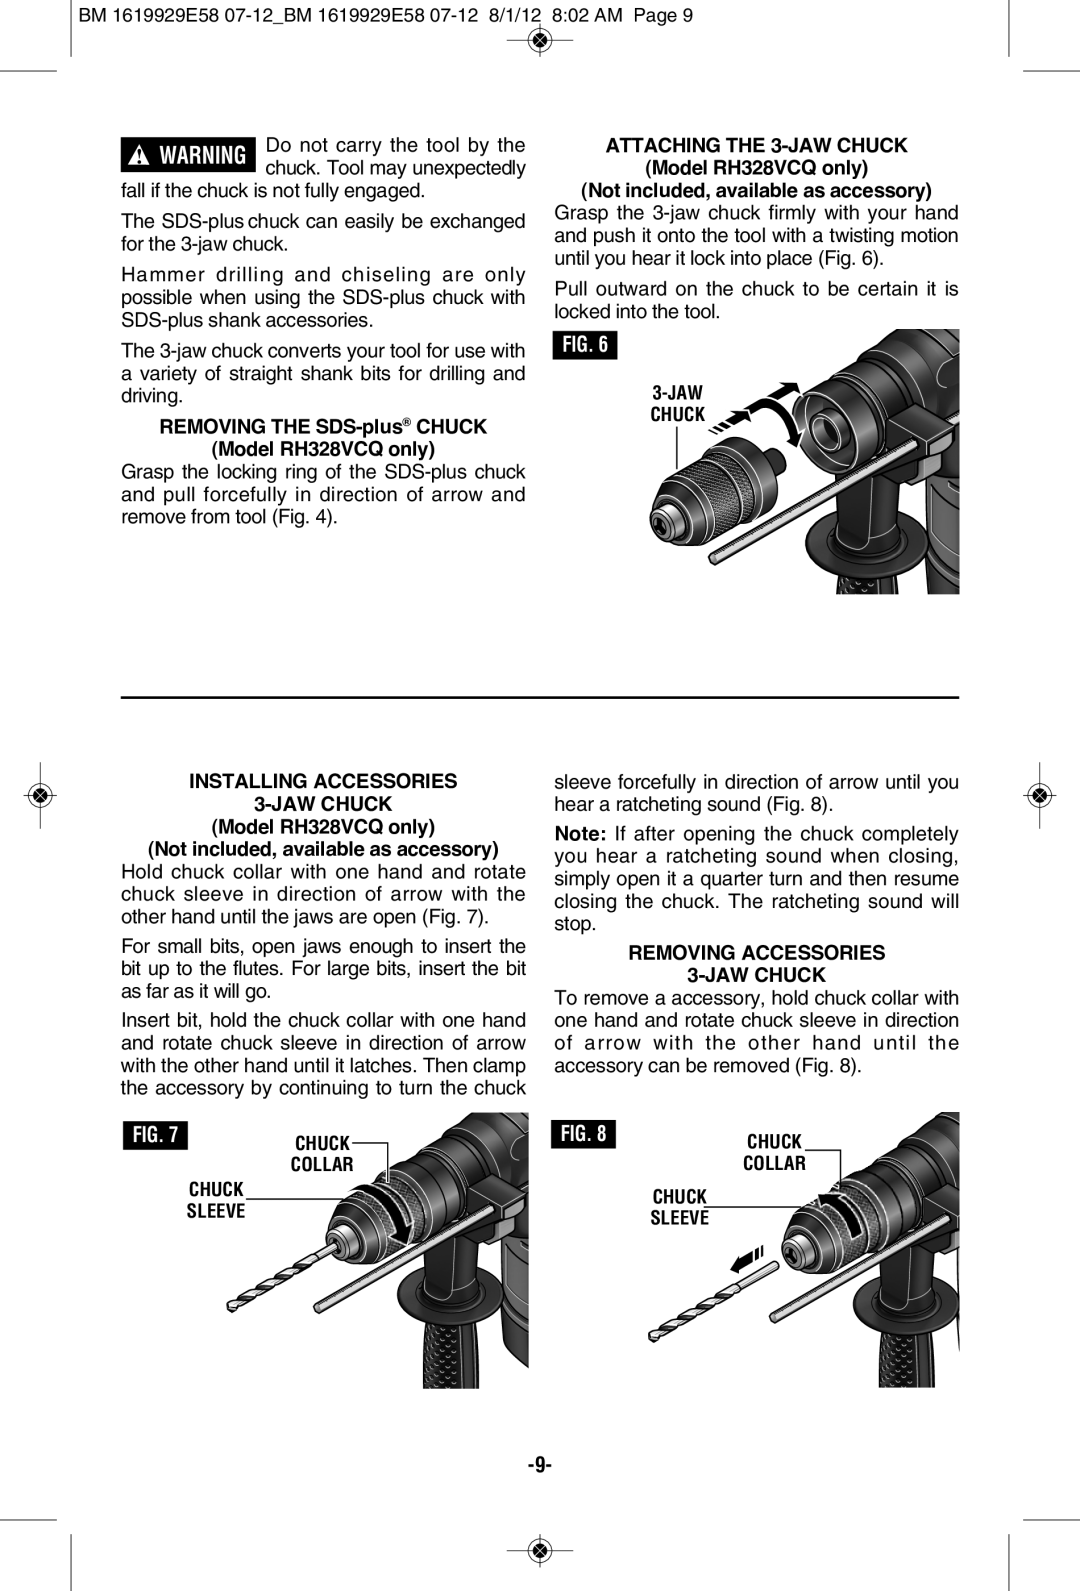
ATTACHING THE 3-JAW CHUCK
(Model RH328VCQ only)
(Not included, available as accessory)
Grasp the
Pull outward on the chuck to be certain it is locked into the tool.
FIG. 6
INSTALLING ACCESSORIES
3-JAW CHUCK
(Model RH328VCQ only)
(Not included, available as accessory)
Hold chuck collar with one hand and rotate chuck sleeve in direction of arrow with the other hand until the jaws are open (Fig. 7).
For small bits, open jaws enough to insert the bit up to the flutes. For large bits, insert the bit as far as it will go.
Insert bit, hold the chuck collar with one hand and rotate chuck sleeve in direction of arrow with the other hand until it latches. Then clamp the accessory by continuing to turn the chuck
sleeve forcefully in direction of arrow until you hear a ratcheting sound (Fig. 8).
Note: If after opening the chuck completely you hear a ratcheting sound when closing, simply open it a quarter turn and then resume closing the chuck. The ratcheting sound will stop.
REMOVING ACCESSORIES
3-JAW CHUCK
To remove a accessory, hold chuck collar with one hand and rotate chuck sleeve in direction of arrow with the other hand until the accessory can be removed (Fig. 8).
FIG. 7 |
| CHUCK |
| |
|
| COLLAR | ||
| CHUCK | |||
| SLEEVE |
|
| |
| I | |||||
FIG. 8 | ||||||
| CHUCK |
| ||||
|
| COLLAR |
| |||
| CHUCK |
| ||||
|
| |||||
| SLEEVE |
|
|
| ||