![]() BM 2610034452
BM 2610034452
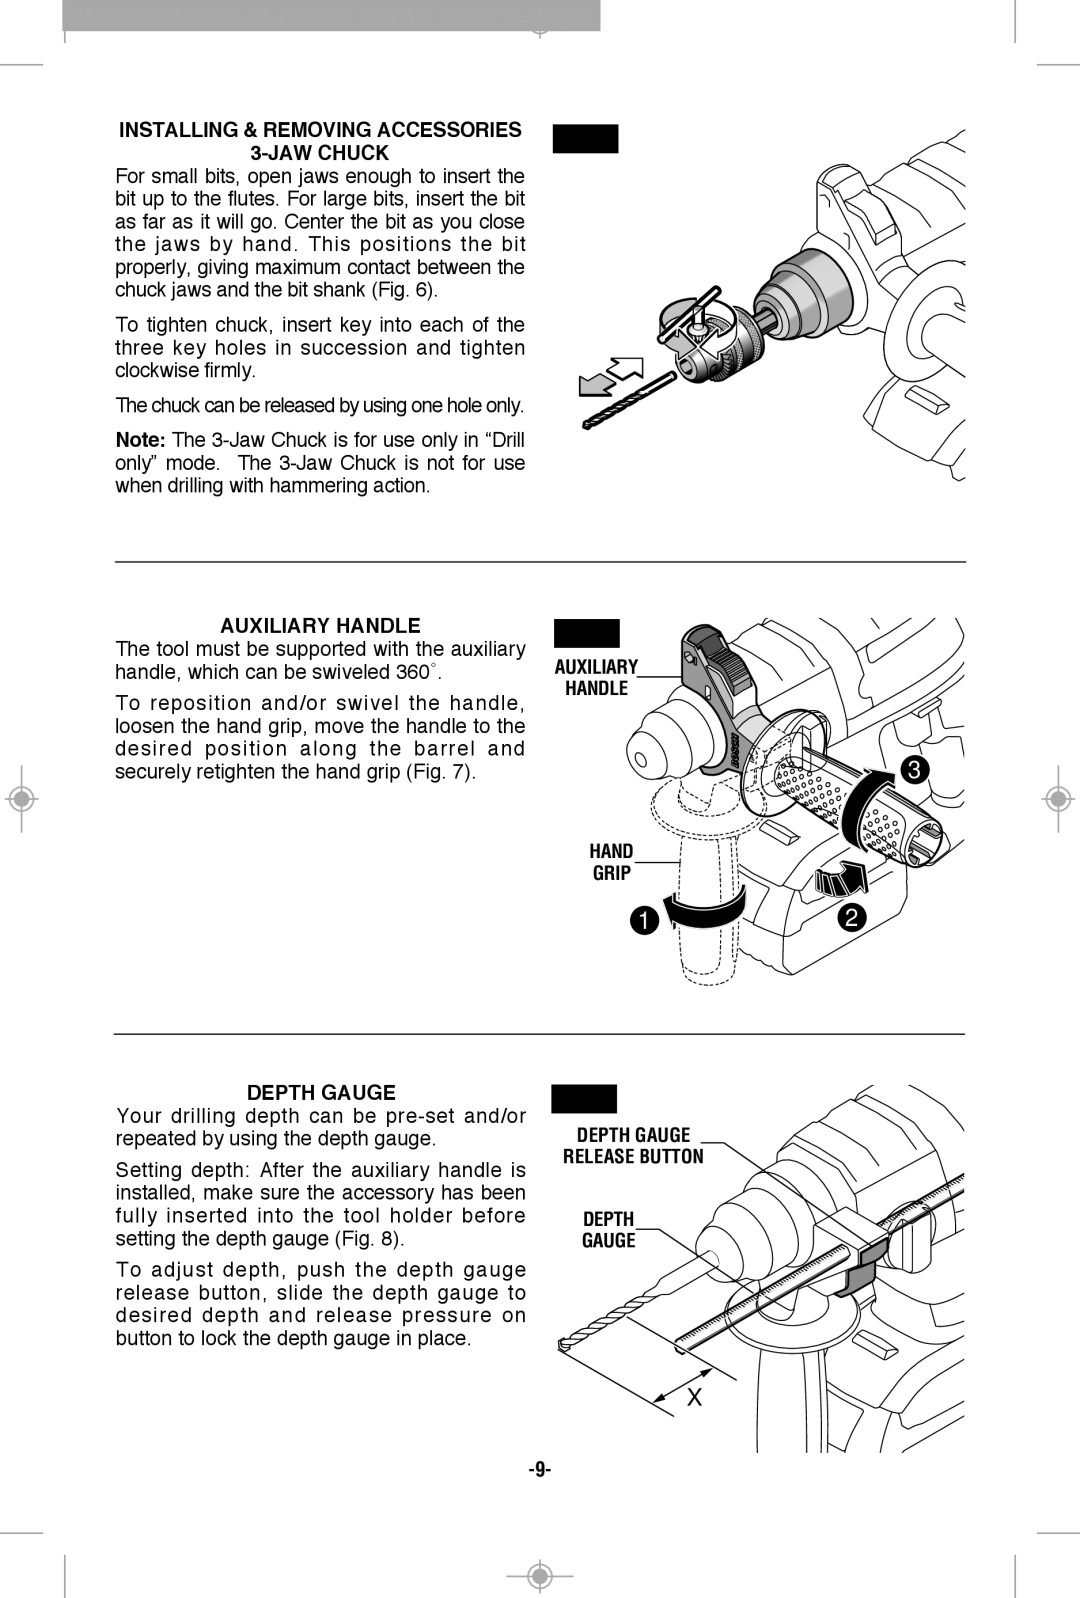
INSTALLING & REMOVING ACCESSORIES
3-JAW CHUCK
For small bits, open jaws enough to insert the bit up to the flutes. For large bits, insert the bit as far as it will go. Center the bit as you close the jaws by hand. This positions the bit properly, giving maximum contact between the chuck jaws and the bit shank (Fig. 6).
To tighten chuck, insert key into each of the three key holes in succession and tighten clockwise firmly.
The chuck can be released by using one hole only.
Note: The
FIG. 6
2 |
AUxILIARy HANDLE
The tool must be supported with the auxiliary handle, which can be swiveled 360˚.
To reposition and/or swivel the handle, loosen the hand grip, move the handle to the desired position along the barrel and securely retighten the hand grip (Fig. 7).
FIG. 7
AUXILIARY
HANDLE
3
HAND
GRIP
1 | 2 |
DEPTH GAUGE
Your drilling depth can be
Setting depth: After the auxiliary handle is installed, make sure the accessory has been fully inserted into the tool holder before setting the depth gauge (Fig. 8).
To adjust depth, push the depth gauge release button, slide the depth gauge to desired depth and release pressure on button to lock the depth gauge in place.
FIG. 8
DEPTH GAUGE
RELEASE BUTTON
DEPTH
GAUGE
X