INSTALLATION
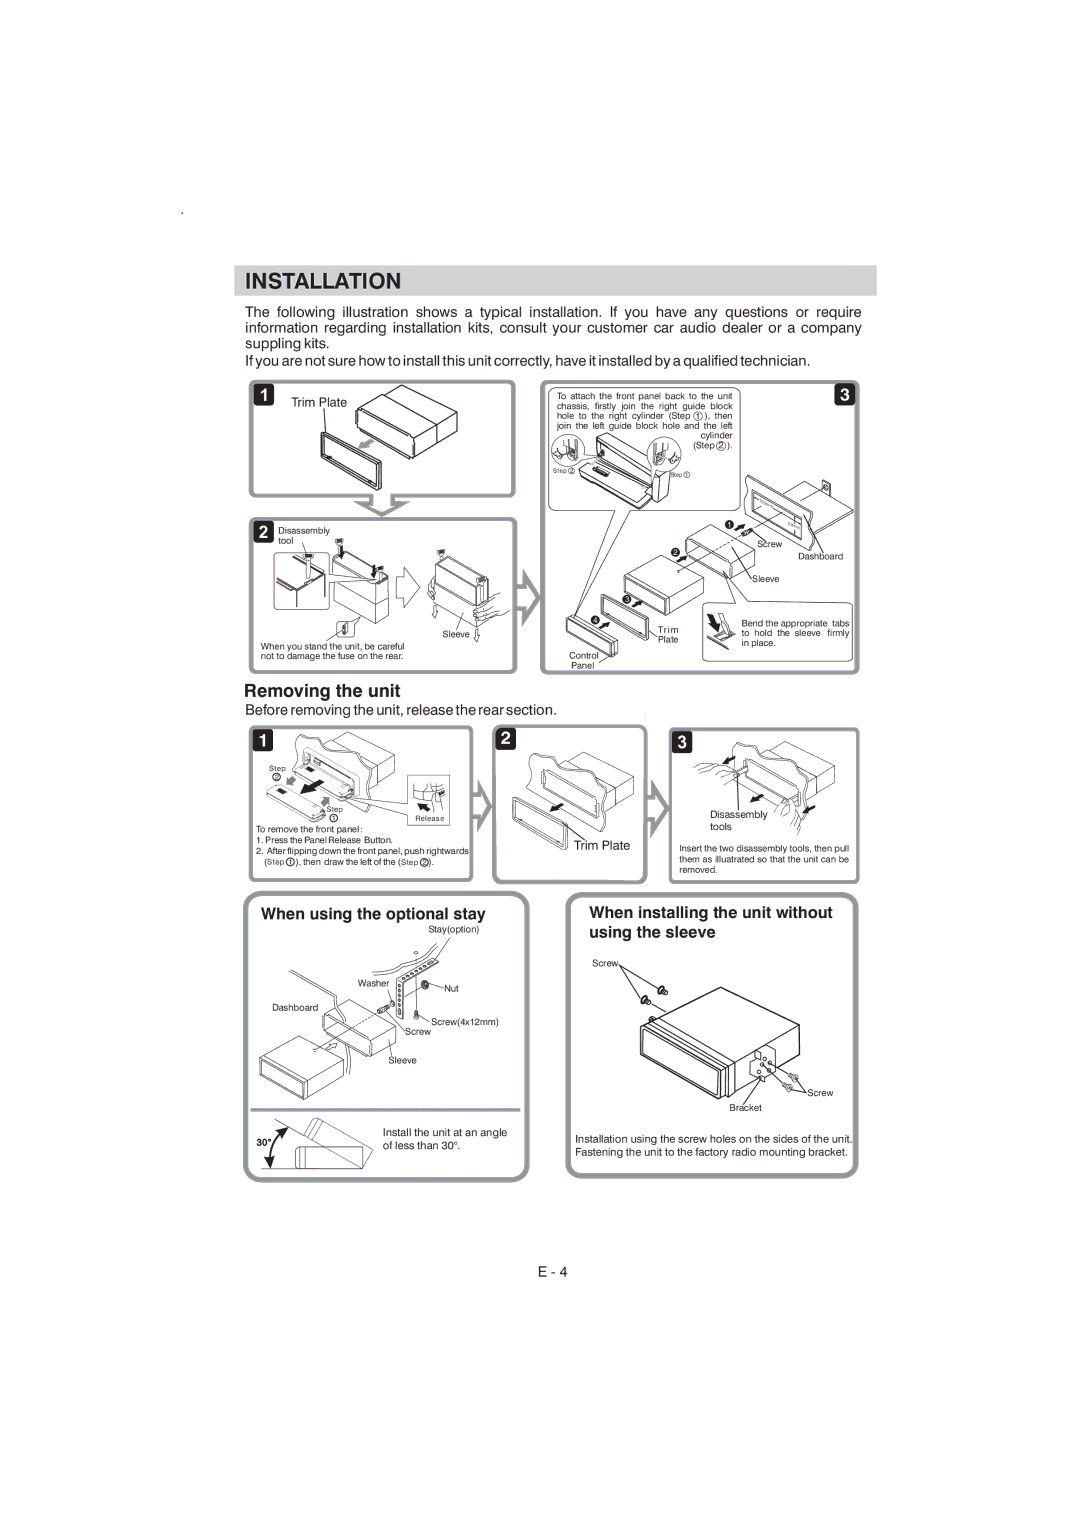
The following illustration shows a typical installation. If you have any questions or require information regarding installation kits, consult your customer car audio dealer or a company suppling kits.
If you are not sure how to install this unit correctly, have it installed by a qualified technician.
1Trim Plate
To attach the front panel back to the unit | 3 |
chassis, firstly join the right guide block hole to the right cylinder (Step 1 ), then join the left guide block hole and the left cylinder (Step 2 ).
Step 2
2Disassemblytool
Step 1
| 18 | 2m | m |
|
|
|
| ||
1 |
|
| 53 | mm |
|
|
|
Screw
| 2 | |
| 3 | |
| 4 | |
Sleeve | Trim | |
Plate | ||
|
When you stand the unit, be careful
not to damage the fuse on the rear.Control Panel
Dashboard
Sleeve
Bend the appropriate tabs to hold the sleeve firmly in place.
Removing the unit
Before removing the unit, release the rear section.
1 | 2 | 3 |
Step 2 ![]()
Step
1Release
To remove the front panel:
1. Press the Panel Release Button. | . |
2.After flipping down the front panel, push rightwards (Step 1 ), then draw the left of the (Step 2 ).
| Disassembly |
| tools |
Trim Plate | Insert the two disassembly tools, then pull |
| them as illuatrated so that the unit can be |
| removed. |
When using the optional stay
Stay(option)
Washer | Nut |
| |
Dashboard |
|
| Screw(4x12mm) |
Screw |
|
Sleeve |
|
Install the unit at an angle
30° | of less than 30°. |
|
When installing the unit without using the sleeve
Screw
![]() Screw
Screw
Bracket
Installation using the screw holes on the sides of the unit. Fastening the unit to the factory radio mounting bracket.
E - 4