Installation Tips (cont.)
Installation Instructions
WARNING
Always turn off the amplifier or receiver when connecting speakers or any other components to the system.
NOTE
This manual assumes the installer possesses skill in the proper use of hand and power tools, knowledge of local building and fire codes, and a familiarity with the environment behind the wall or ceiling in which the speakers will be installed.
Tools You’ll Need
1.A utility knife, jig saw, or other tool for cutting the required hole in the mounting surface.
2.A #2 Phillips screwdriver.
3.A wire cutter or stripper for preparing the speaker wires.
4.A pencil.
Retrofit Installations
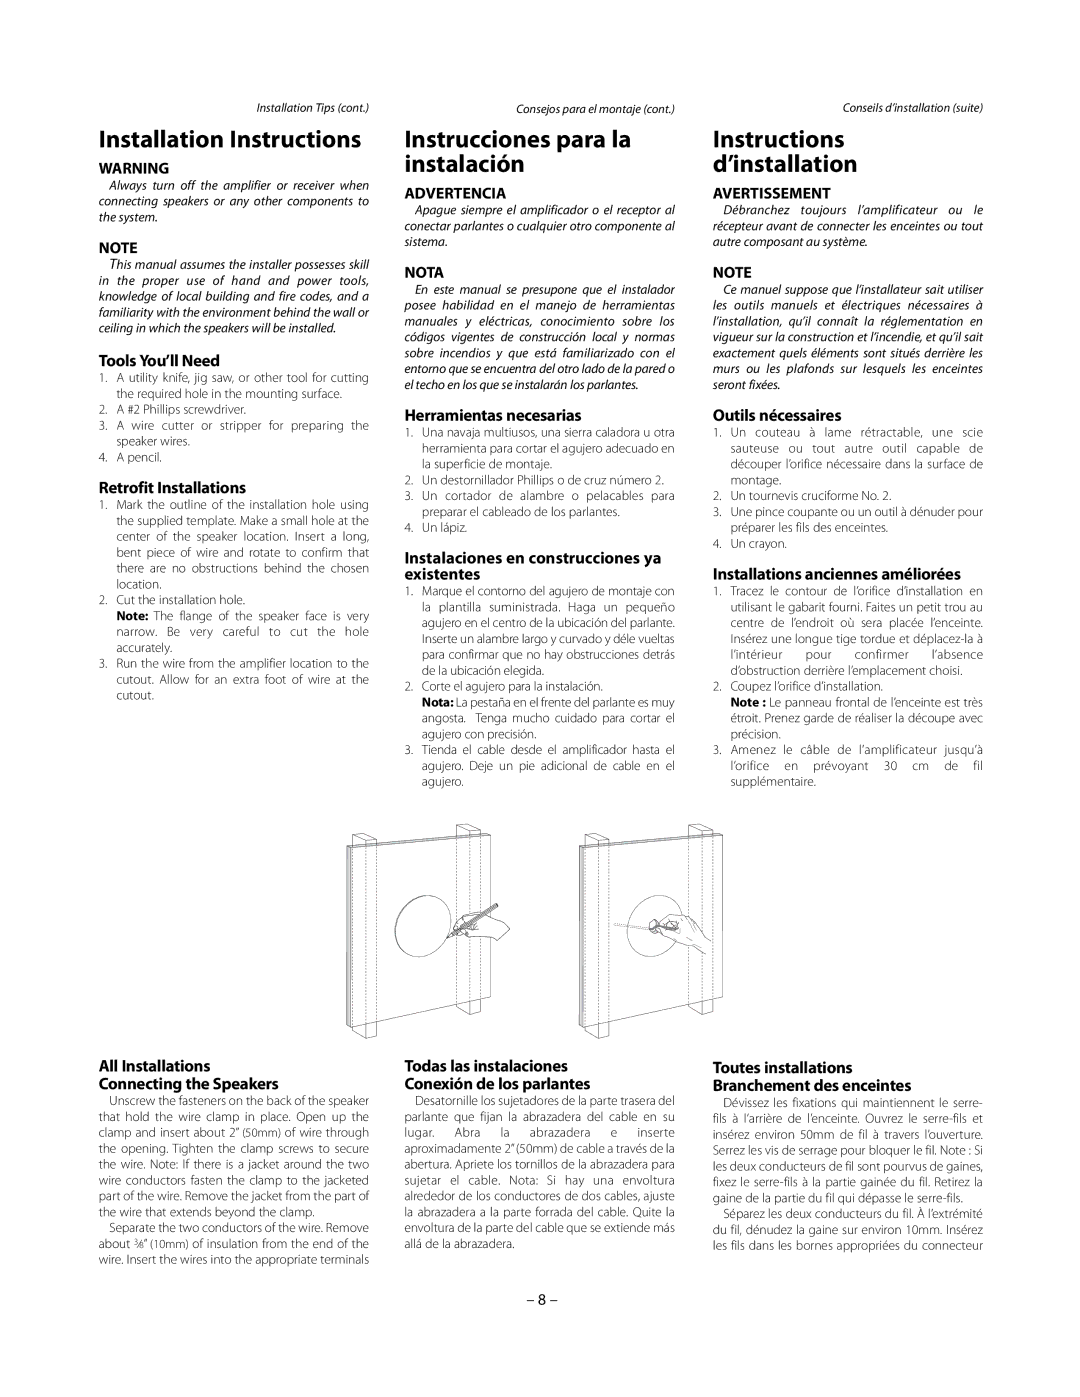
1.Mark the outline of the installation hole using the supplied template. Make a small hole at the center of the speaker location. Insert a long, bent piece of wire and rotate to confirm that there are no obstructions behind the chosen location.
2.Cut the installation hole.
Note: The flange of the speaker face is very narrow. Be very careful to cut the hole accurately.
3.Run the wire from the amplifier location to the cutout. Allow for an extra foot of wire at the cutout.
All Installations
Connecting the Speakers
Unscrew the fasteners on the back of the speaker that hold the wire clamp in place. Open up the clamp and insert about 2” (50mm) of wire through the opening. Tighten the clamp screws to secure the wire. Note: If there is a jacket around the two wire conductors fasten the clamp to the jacketed part of the wire. Remove the jacket from the part of the wire that extends beyond the clamp.
Separate the two conductors of the wire. Remove about 3⁄8” (10mm) of insulation from the end of the wire. Insert the wires into the appropriate terminals
Consejos para el montaje (cont.)
Instrucciones para la instalación
ADVERTENCIA
Apague siempre el amplificador o el receptor al conectar parlantes o cualquier otro componente al sistema.
NOTA
En este manual se presupone que el instalador posee habilidad en el manejo de herramientas manuales y eléctricas, conocimiento sobre los códigos vigentes de construcción local y normas sobre incendios y que está familiarizado con el entorno que se encuentra del otro lado de la pared o el techo en los que se instalarán los parlantes.
Herramientas necesarias
1.Una navaja multiusos, una sierra caladora u otra herramienta para cortar el agujero adecuado en la superficie de montaje.
2.Un destornillador Phillips o de cruz número 2.
3.Un cortador de alambre o pelacables para preparar el cableado de los parlantes.
4.Un lápiz.
Instalaciones en construcciones ya existentes
1.Marque el contorno del agujero de montaje con la plantilla suministrada. Haga un pequeño agujero en el centro de la ubicación del parlante. Inserte un alambre largo y curvado y déle vueltas para confirmar que no hay obstrucciones detrás de la ubicación elegida.
2.Corte el agujero para la instalación.
Nota: La pestaña en el frente del parlante es muy angosta. Tenga mucho cuidado para cortar el agujero con precisión.
3.Tienda el cable desde el amplificador hasta el agujero. Deje un pie adicional de cable en el agujero.
Todas las instalaciones
Conexión de los parlantes
Desatornille los sujetadores de la parte trasera del parlante que fijan la abrazadera del cable en su lugar. Abra la abrazadera e inserte aproximadamente 2”(50mm) de cable a través de la abertura. Apriete los tornillos de la abrazadera para sujetar el cable. Nota: Si hay una envoltura alrededor de los conductores de dos cables, ajuste la abrazadera a la parte forrada del cable. Quite la envoltura de la parte del cable que se extiende más allá de la abrazadera.
Conseils d’installation (suite)
Instructions d’installation
AVERTISSEMENT
Débranchez toujours l’amplificateur ou le récepteur avant de connecter les enceintes ou tout autre composant au système.
NOTE
Ce manuel suppose que l’installateur sait utiliser les outils manuels et électriques nécessaires à l’installation, qu’il connaît la réglementation en vigueur sur la construction et l’incendie, et qu’il sait exactement quels éléments sont situés derrière les murs ou les plafonds sur lesquels les enceintes seront fixées.
Outils nécessaires
1.Un couteau à lame rétractable, une scie sauteuse ou tout autre outil capable de découper l’orifice nécessaire dans la surface de montage.
2.Un tournevis cruciforme No. 2.
3.Une pince coupante ou un outil à dénuder pour préparer les fils des enceintes.
4.Un crayon.
Installations anciennes améliorées
1.Tracez le contour de l’orifice d’installation en utilisant le gabarit fourni. Faites un petit trou au centre de l’endroit où sera placée l’enceinte. Insérez une longue tige tordue et déplacez-la à l’intérieur pour confirmer l’absence d’obstruction derrière l’emplacement choisi.
2.Coupez l’orifice d’installation.
Note : Le panneau frontal de l’enceinte est très étroit. Prenez garde de réaliser la découpe avec précision.
3.Amenez le câble de l’amplificateur jusqu’à l’orifice en prévoyant 30 cm de fil supplémentaire.
Toutes installations
Branchement des enceintes
Dévissez les fixations qui maintiennent le serre- fils à l’arrière de l’enceinte. Ouvrez le serre-fils et insérez environ 50mm de fil à travers l’ouverture. Serrez les vis de serrage pour bloquer le fil. Note : Si les deux conducteurs de fil sont pourvus de gaines, fixez le serre-fils à la partie gainée du fil. Retirez la gaine de la partie du fil qui dépasse le serre-fils.
Séparez les deux conducteurs du fil. À l’extrémité du fil, dénudez la gaine sur environ 10mm. Insérez les fils dans les bornes appropriées du connecteur