Advanced Options Menu | QUADX |
|
|
Advanced Options  Setup Flash Mode
This mode contains three advanced features.
Trigger Delay, Trigger Skip and
Getting Started
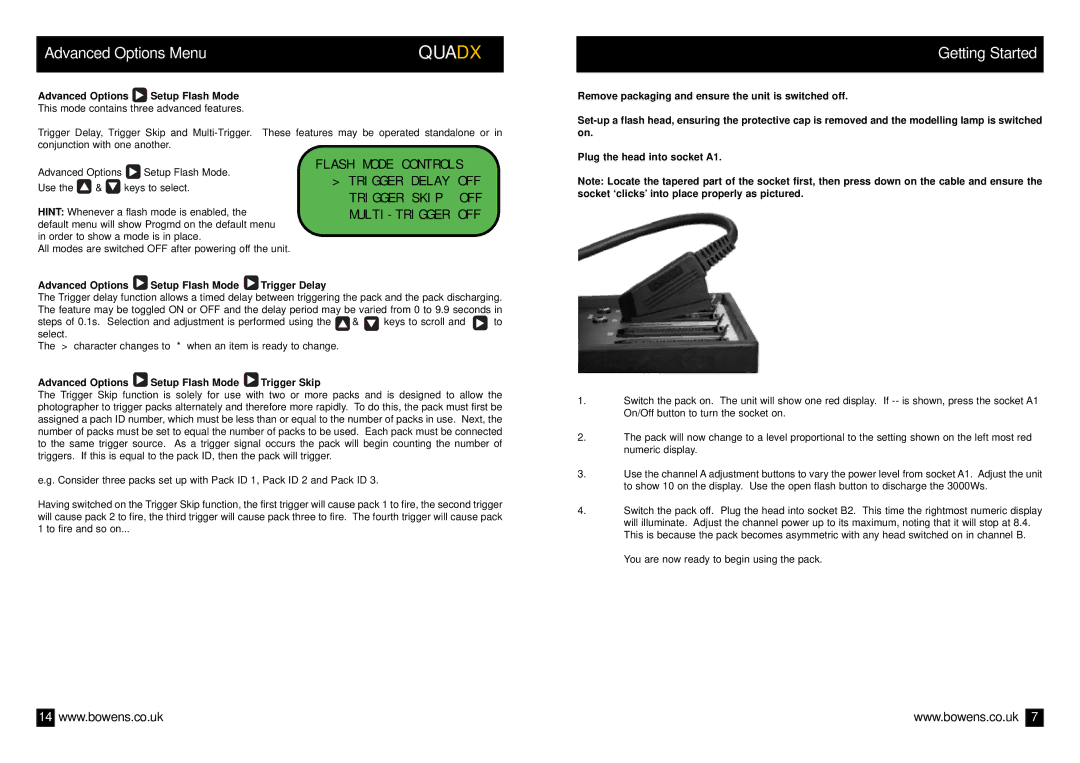
Remove packaging and ensure the unit is switched off.
Advanced Options ![]() Setup Flash Mode.
Setup Flash Mode.
Use the ![]() &
& ![]() keys to select.
keys to select.
HINT: Whenever a flash mode is enabled, the default menu will show Progmd on the default menu in order to show a mode is in place.
All modes are switched OFF after powering off the unit.
FLASH MODE CONTROLS
>TRIGGER DELAY OFF TRIGGER SKIP OFF
Plug the head into socket A1.
Note: Locate the tapered part of the socket first, then press down on the cable and ensure the socket ‘clicks’ into place properly as pictured.
Advanced Options ![]() Setup Flash Mode
Setup Flash Mode ![]() Trigger Delay
Trigger Delay
The Trigger delay function allows a timed delay between triggering the pack and the pack discharging. The feature may be toggled ON or OFF and the delay period may be varied from 0 to 9.9 seconds in
steps of 0.1s. Selection and adjustment is performed using the | & | keys to scroll and | to | ||
select. |
|
|
|
|
|
The > character changes to * when an item is ready to change. |
|
|
| ||
Advanced Options | Setup Flash Mode | Trigger Skip |
|
|
|
The Trigger Skip function is solely for use with two or more packs and is designed to allow the photographer to trigger packs alternately and therefore more rapidly. To do this, the pack must first be assigned a pach ID number, which must be less than or equal to the number of packs in use. Next, the number of packs must be set to equal the number of packs to be used. Each pack must be connected to the same trigger source. As a trigger signal occurs the pack will begin counting the number of triggers. If this is equal to the pack ID, then the pack will trigger.
e.g. Consider three packs set up with Pack ID 1, Pack ID 2 and Pack ID 3.
Having switched on the Trigger Skip function, the first trigger will cause pack 1 to fire, the second trigger will cause pack 2 to fire, the third trigger will cause pack three to fire. The fourth trigger will cause pack 1 to fire and so on...
1.Switch the pack on. The unit will show one red display. If
2.The pack will now change to a level proportional to the setting shown on the left most red numeric display.
3.Use the channel A adjustment buttons to vary the power level from socket A1. Adjust the unit to show 10 on the display. Use the open flash button to discharge the 3000Ws.
4.Switch the pack off. Plug the head into socket B2. This time the rightmost numeric display will illuminate. Adjust the channel power up to its maximum, noting that it will stop at 8.4. This is because the pack becomes asymmetric with any head switched on in channel B.
You are now ready to begin using the pack.
14 | www.bowens.co.uk | www.bowens.co.uk | 7 |