Menu System Overview | QUADX |
|
|
The QUADX has a three tier menu which is simple to use and operate. The menus are selected using the four navigation keys on the control panel.
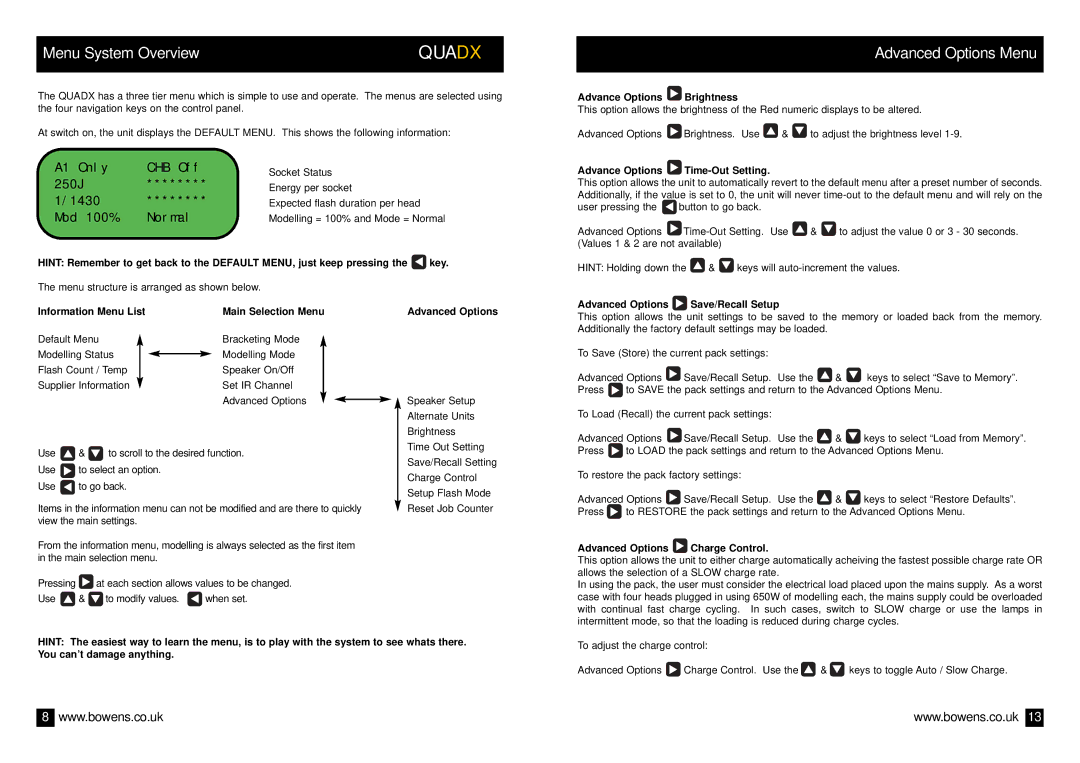
At switch on, the unit displays the DEFAULT MENU. This shows the following information:
A1 Only | CHB Off | Socket Status | |
250J | ******** | ||
Energy per socket | |||
1/1430 | ******** | Expected flash duration per head | |
Mod 100% | Normal | Modelling = 100% and Mode = Normal |
HINT: Remember to get back to the DEFAULT MENU, just keep pressing the ![]() key.
key.
Advanced Options Menu
Advance Options  Brightness
This option allows the brightness of the Red numeric displays to be altered.
Advanced Options ![]() Brightness. Use
Brightness. Use ![]() &
& ![]() to adjust the brightness level
to adjust the brightness level
Advance Options 
Time-Out Setting.
This option allows the unit to automatically revert to the default menu after a preset number of seconds. Additionally, if the value is set to 0, the unit will never
user pressing the | button to go back. |
Advanced Options ![]()
![]() &
& ![]() to adjust the value 0 or 3 - 30 seconds. (Values 1 & 2 are not available)
to adjust the value 0 or 3 - 30 seconds. (Values 1 & 2 are not available)
HINT: Holding down the ![]() &
& ![]() keys will
keys will
The menu structure is arranged as shown below.
Information Menu List | Main Selection Menu |
Advanced Options
Advanced Options  Save/Recall Setup
This option allows the unit settings to be saved to the memory or loaded back from the memory. Additionally the factory default settings may be loaded.
Default Menu
Modelling Status
Flash Count / Temp
Supplier Information
Bracketing Mode
Modelling Mode
Speaker On/Off
Set IR Channel
Advanced Options
![]() Speaker Setup
Speaker Setup
To Save (Store) the current pack settings:
Advanced Options ![]() Save/Recall Setup. Use the
Save/Recall Setup. Use the ![]() &
& ![]() keys to select “Save to Memory”.
keys to select “Save to Memory”.
Press ![]() to SAVE the pack settings and return to the Advanced Options Menu.
to SAVE the pack settings and return to the Advanced Options Menu.
Use ![]() &
& ![]() to scroll to the desired function.
to scroll to the desired function.
Use ![]() to select an option.
to select an option.
Use ![]() to go back.
to go back.
Items in the information menu can not be modified and are there to quickly view the main settings.
From the information menu, modelling is always selected as the first item in the main selection menu.
Pressing ![]() at each section allows values to be changed.
at each section allows values to be changed.
Use ![]() &
& ![]() to modify values.
to modify values. ![]() when set.
when set.
Alternate Units
Brightness
Time Out Setting
Save/Recall Setting
Charge Control
Setup Flash Mode
Reset Job Counter
To Load (Recall) the current pack settings:
Advanced Options ![]() Save/Recall Setup. Use the
Save/Recall Setup. Use the ![]() &
& ![]() keys to select “Load from Memory”.
keys to select “Load from Memory”.
Press ![]() to LOAD the pack settings and return to the Advanced Options Menu.
to LOAD the pack settings and return to the Advanced Options Menu.
To restore the pack factory settings:
Advanced Options ![]() Save/Recall Setup. Use the
Save/Recall Setup. Use the ![]() &
& ![]() keys to select “Restore Defaults”.
keys to select “Restore Defaults”.
Press ![]() to RESTORE the pack settings and return to the Advanced Options Menu.
to RESTORE the pack settings and return to the Advanced Options Menu.
Advanced Options  Charge Control.
This option allows the unit to either charge automatically acheiving the fastest possible charge rate OR allows the selection of a SLOW charge rate.
In using the pack, the user must consider the electrical load placed upon the mains supply. As a worst case with four heads plugged in using 650W of modelling each, the mains supply could be overloaded with continual fast charge cycling. In such cases, switch to SLOW charge or use the lamps in intermittent mode, so that the loading is reduced during charge cycles.
HINT: The easiest way to learn the menu, is to play with the system to see whats there. You can’t damage anything.
To adjust the charge control:
Advanced Options ![]() Charge Control. Use the
Charge Control. Use the ![]() &
& ![]() keys to toggle Auto / Slow Charge.
keys to toggle Auto / Slow Charge.
8 | www.bowens.co.uk | www.bowens.co.uk | 13 |