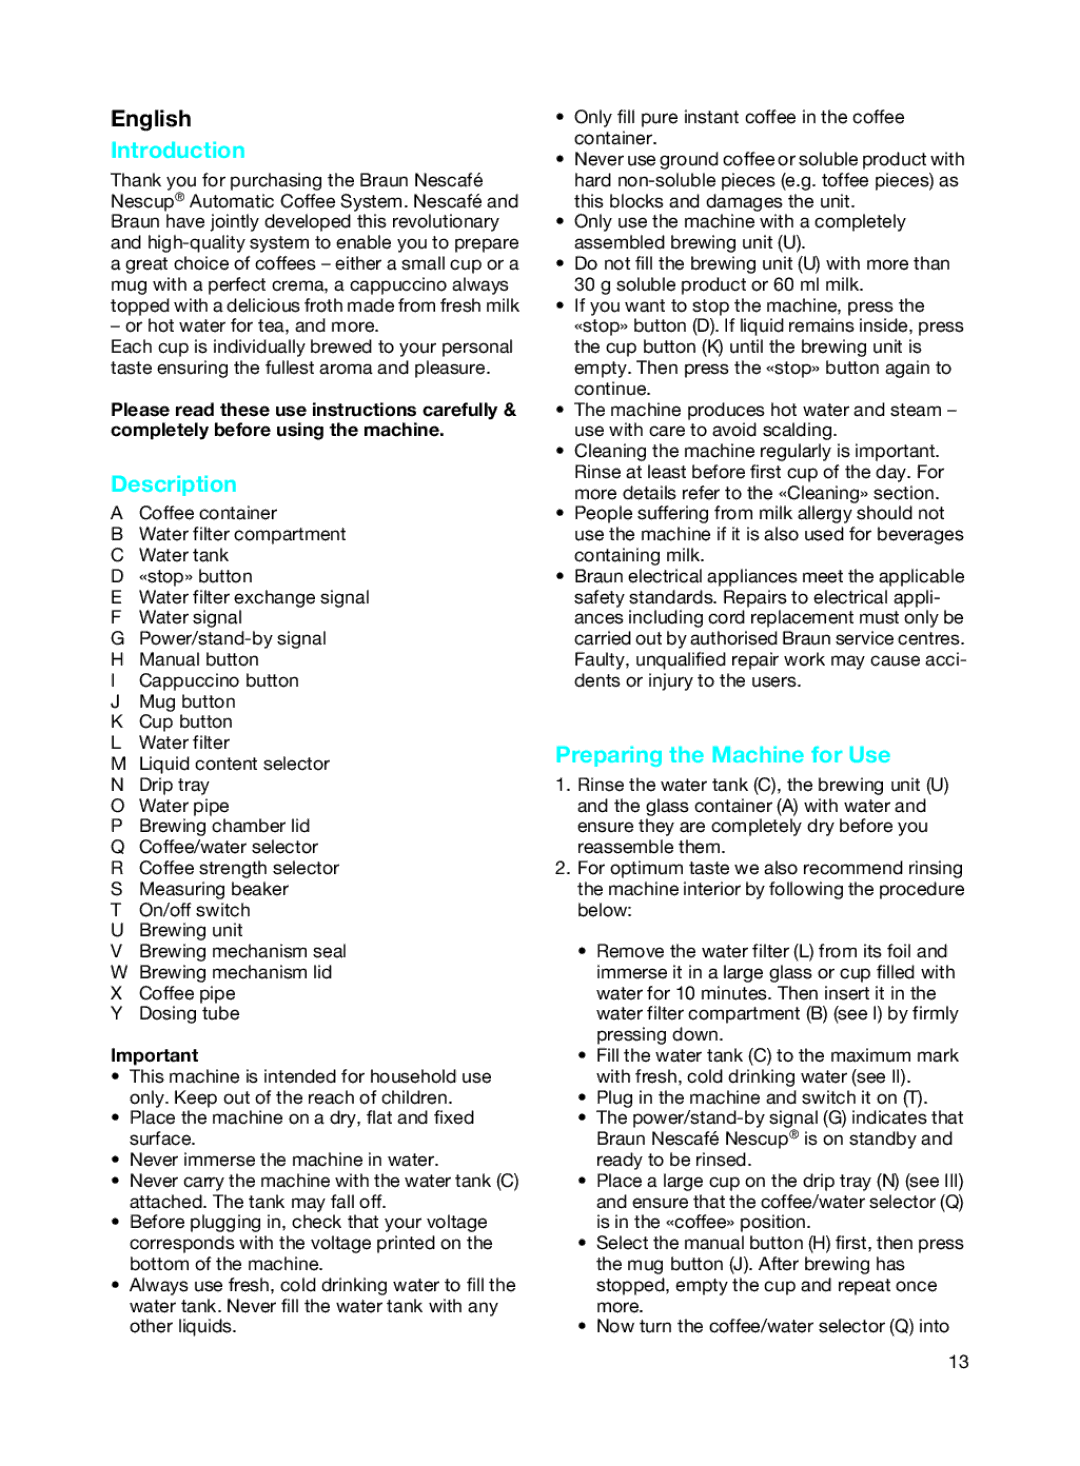
NC1000 specifications
The Braun NC1000 is a cutting-edge nose and ear trimmer designed for those who prioritize both functionality and comfort in their grooming routine. As part of Braun's esteemed line of personal care products, the NC1000 exemplifies a blend of sleek design and innovative technology.One of the standout features of the Braun NC1000 is its advanced MicroGrip technology. This innovation ensures that hair is effectively trimmed without tugging or pulling, minimizing discomfort during use. The precision-engineered blades are designed to cut hair cleanly and efficiently, making the experience smooth and hassle-free. The trimmer also comes with a protective cap that prevents hair from being pulled into the device and ensures safe storage.
Another significant characteristic of the NC1000 is its dual-use capability, allowing users to groom not only the nose and ears but also the eyebrows and other delicate areas. The thoughtfully designed attachment systems let users switch between different trimming heads easily, enhancing its versatility as a grooming tool. This multifunctionality makes it a must-have for anyone looking to maintain their personal hygiene without the hassle of multiple devices.
Ergonomics play a crucial role in the design of the Braun NC1000. Its comfortable grip allows for easy maneuverability, enabling users to access hard-to-reach areas effortlessly. The compact design makes it travel-friendly, fitting easily in a toiletry bag or drawer, perfect for individuals on the go.
The Braun NC1000 is also equipped with a washable head, making maintenance simple and efficient. After use, the trimmer can be rinsed under running water, ensuring cleanliness and hygiene. This ease of cleaning is a welcome feature for users who want to maintain their grooming tools without significant effort.
In terms of power, the NC1000 operates on a battery system designed for longevity. The device ensures consistent performance over time, reducing the frequency of battery changes. This reliability is essential for users who depend on their grooming tools daily.
In summary, the Braun NC1000 is a state-of-the-art grooming device that combines advanced technology, user-friendly design, and multifunctional capabilities. Its MicroGrip technology, ergonomic design, and ease of maintenance make it an essential addition to any personal care routine, appealing to those who value both performance and comfort in their grooming experience.