
KS145H specifications
The Bravetti KS145H is a versatile kitchen appliance that combines the functionality of a grill and griddle, making it an ideal addition to any culinary space. This innovative cooking device is designed for both amateur cooks and seasoned chefs, providing a range of features that enhance the cooking experience.One of the standout features of the Bravetti KS145H is its dual cooking surface. The grill is specifically designed with ridges that allow for the perfect sear on meats and vegetables, while the flat griddle side is ideal for pancakes, eggs, and other breakfast favorites. This flexibility allows users to prepare multiple dishes simultaneously, saving time and increasing efficiency in the kitchen.
The KS145H boasts a non-stick cooking surface, which means that food easily releases from the surface, making for effortless cooking and cleaning. Users will appreciate the time-saving aspect of having to use minimal oil or butter, which also contributes to healthier meal preparation.
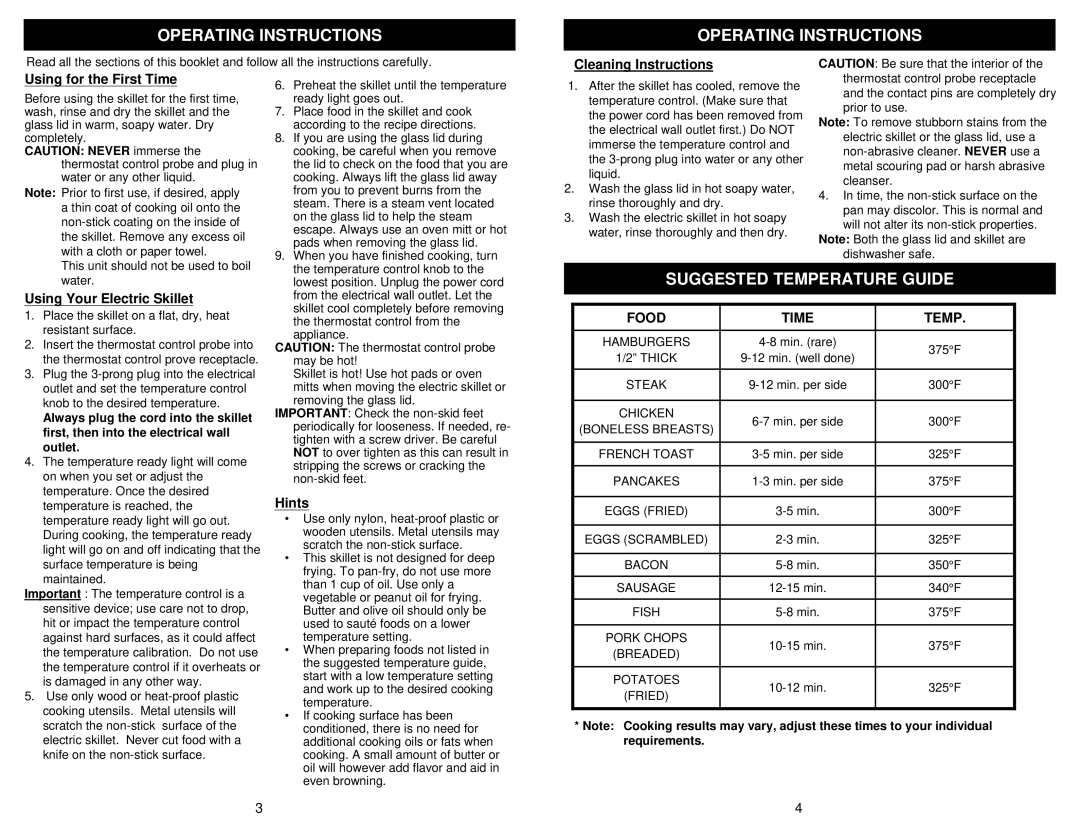
Temperature control is another significant characteristic of the Bravetti KS145H. With adjustable heat settings, users can easily tailor the cooking temperature to suit a variety of foods, from delicate fish to hearty steaks. This feature ensures that every meal can be cooked to perfection, enhancing flavor and texture.
The appliance's compact design is perfect for kitchens with limited counter space. Its lightweight construction makes it convenient to store when not in use, ensuring it won’t crowd your kitchen environment. Additionally, the KS145H is easy to operate, making it a great choice for individuals of all skill levels.
Safety is also a priority with the Bravetti KS145H. It comes equipped with cool-touch handles that minimize the risk of burns while cooking. The built-in indicators provide visual cues for temperature and readiness, enhancing the overall user experience.
The Bravetti KS145H is more than just a cooking appliance; it's a multifunctional tool that brings convenience and creativity to your meals. With its combination of efficient cooking surfaces, adjustable temperature settings, and user-friendly design, this griddle and grill is designed to make meal preparation straightforward and enjoyable. Whether you're grilling vegetables, searing meat, or whipping up a breakfast feast, the Bravetti KS145H is a reliable partner in culinary endeavors.