
LAP30EULBA specifications
The Bretford LAP30EULBA is an innovative and versatile mobile charging cart designed to support modern educational and corporate environments. As technology continues to advance, the need for effective management and organization of electronic devices has become paramount. This cart provides an efficient solution for storing, charging, and transporting laptops and tablets, ensuring that users can seamlessly integrate technology into their daily operations.One of the standout features of the LAP30EULBA is its impressive capacity. This cart can accommodate up to 30 devices simultaneously, making it ideal for classrooms, training sessions, and collaborative workspaces. The interior is designed with adjustable dividers, allowing users to customize the layout to fit various device sizes, from traditional laptops to slim tablets.
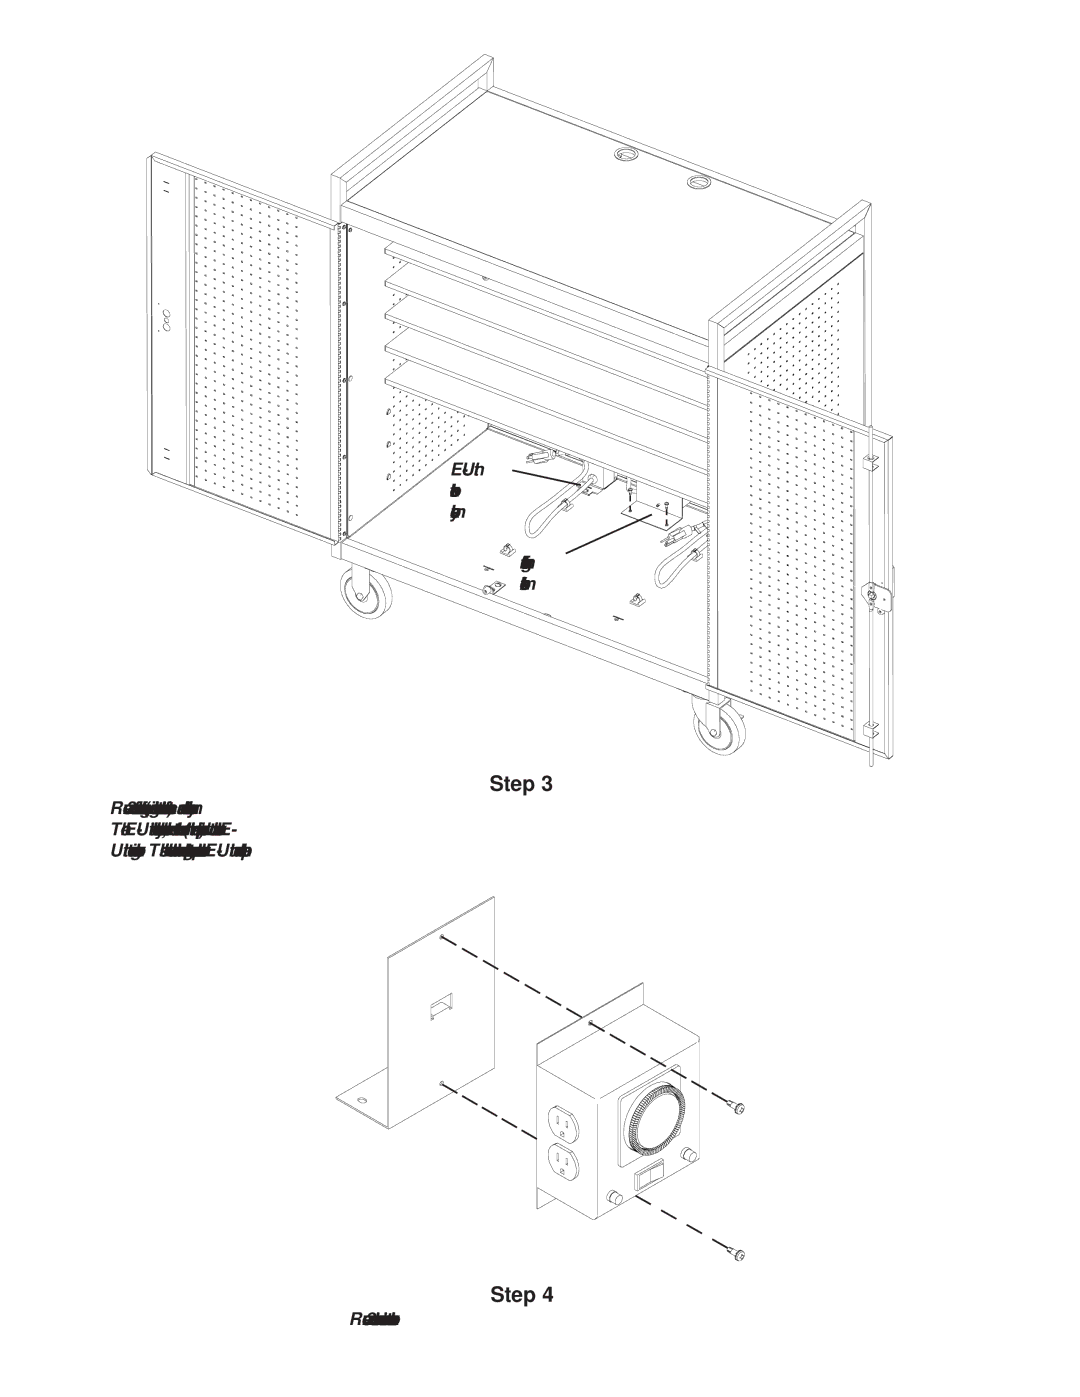
The Bretford LAP30EULBA is equipped with robust charging capabilities. It features a power management system that provides safe and efficient charging for all connected devices. Each compartment is fitted with separate power outlets, enabling users to charge devices individually. The cart also supports a wide input voltage range, allowing it to be used in various environments without compromising performance.
Durability is another hallmark of the LAP30EULBA. Constructed from high-quality materials, this cart can withstand the rigors of daily use in busy settings. Its sturdy design includes resilient wheels for easy mobility, allowing users to transport it seamlessly from one location to another. The built-in handle enhances usability, making it simple to navigate through tight spaces.
In addition to its functional attributes, the Bretford LAP30EULBA emphasizes security. The cart comes equipped with a locking mechanism that protects devices from theft and unauthorized access. Users can have peace of mind knowing their valuable technology is safe when not in use.
Overall, the Bretford LAP30EULBA mobile charging cart redefines how organizations manage their technology assets. With its ample device capacity, efficient charging capabilities, durable construction, and enhanced security features, the LAP30EULBA stands out as an essential tool for any tech-forward environment. Whether in a school, office, or training facility, this cart streamlines the process of keeping devices organized and ready for use, fostering a more productive and engaged atmosphere.