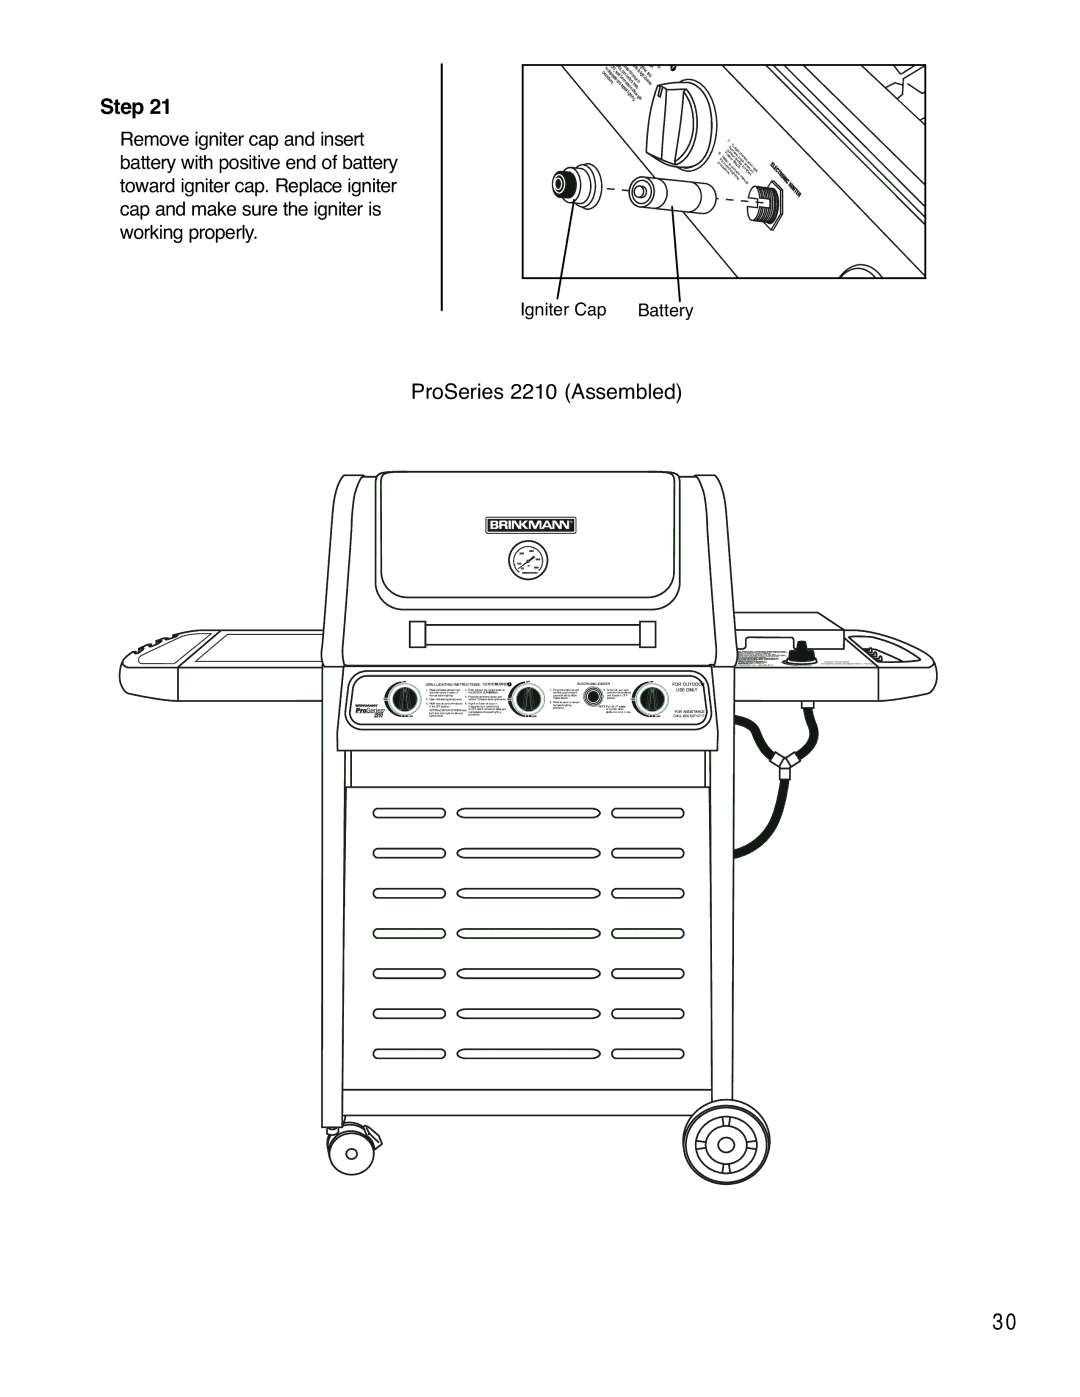
Step 21
Remove igniter cap and insert battery with positive end of battery toward igniter cap. Replace igniter cap and make sure the igniter is working properly.
t | O |
| on | d | on |
| ig | f | |
| F | ds, | oes |
|
| i |
| ||
d F, |
| t er |
| ||||||
o |
|
|
|
| s | t |
| ||
i |
| t n |
| o |
| ||||
pr s |
| u | ot |
|
| a | |||
o |
| wai rn |
|
|
| ||||
c |
|
| t | c oc | lightnd | ||||
sipat 5 o c | u |
| |||||||
edure |
| in tr | r |
| |||||
|
| e m n u | b | r | |||||
| .and | te kn |
|
| |||||
|
|
|
| u ol in | rne | ||||
|
|
| r s o . | ||||||
|
|
| ep | t b |
|
| |||
|
|
| ea o |
|
|
|
| ||
|
|
|
| t |
|
|
|
| |
|
|
|
|
| gallow |
|
| ||
|
|
|
|
| li |
|
|
|
|
|
|
|
|
| ht |
|
|
|
|
|
|
|
|
| i g |
|
| ||
|
|
|
|
| ng as |
| |||
|
| 7 |
|
|
|
| |
|
| . |
|
|
|
| |
|
|
| To |
|
| ||
|
| bu l |
|
| |||
|
| corigh |
|
| |||
8 |
| ntne t |
|
| |||
. | Fol |
| o ,the |
| |||
|
| rrs | sleft | ||||
| R | low |
| ||||
|
|
| l |
|
| ||
| e |
|
|
| kpu |
| |
forfer |
| Sno | h | a | |||
proc | t |
|
|
| |||
o tepbs | nd | ||||||
| match |
| . | HItrigh | |||
| e |
|
|
| 6toand | ||
| dureowner’g |
| GH | ||||
|
|
| li |
|
| urn t | |
|
| . htis . | |||||
|
|
|
|
| nm |
| |
|
|
|
|
| g a |
| |
|
|
|
|
|
| nu | |
|
|
|
|
|
|
| al |
Igniter Cap Battery
ProSeries 2210 (Assembled)
GRILL LIGHTING INSTRUCTIONS: | CENTER BURNER | |||
1. | Read and follow all warnings | 4. | Push and turn the control knob for | |
| and instructions in owner’s |
| the CENTER BURNER to HIGH. | |
| manual before lighting. | 5. | Press the electronic igniter and | |
2. | Open lid before lighting burner. |
| hold for | |
3. | Make sure all control knobs are | 6. | If ignition does not occur in | |
| in the OFF position. |
| 5 seconds, turn control knob | |
| NOTE: The CENTER BURNER must |
| to OFF, wait 5 minutes to allow gas | |
| be lit first, then light the left and |
| to dissipate and repeat lighting | |
| right burners. |
| procedure. |
|
|
| ELECTRONIC IGNITER |
7. | To light the left and right | 9. To turn off, turn each |
| burners, push and turn | control knob clockwise |
| control knobs to HIGH. | until it locks in OFF |
| Follow Step 6. | position. |
8. | Refer to owner’s manual |
|
| for match lighting | NOTE: Turn off LP supply |
| procedure. | at cylinder when |
appliance is not in use.
FOR OUTDOOR
USE ONLY
FOR ASSISTANCE, CALL
30