![]() Locking Caster
Locking Caster
|
|
|
|
| Tire |
|
| Leg |
| ||||
|
|
|
|
|
|
|
|
|
|
|
|
| |
Hubcap |
|
|
|
|
|
|
|
|
|
| |||
|
| Wheel axle |
|
|
|
|
|
| Washer |
|
| ||
|
| bolt |
|
|
|
|
|
|
|
|
|
| |
|
|
|
|
|
|
|
|
|
|
|
|
|
|
|
|
|
|
|
|
|
|
|
|
|
|
|
|
|
|
|
|
|
|
|
|
|
|
|
|
|
|
|
|
|
|
|
|
|
|
|
|
|
|
|
|
|
|
|
|
|
|
|
|
|
|
|
|
|
|
|
|
|
|
|
|
|
|
|
|
|
|
|
|
Choose a good, cleared assembly area and get a friend to help you put your grill together. Lay cardboard down to protect grill finish and assembly area.
Step 1
With the help of a friend, turn the preassembled cart over. Try to minimize the stress to the bottom plate.
Step 2
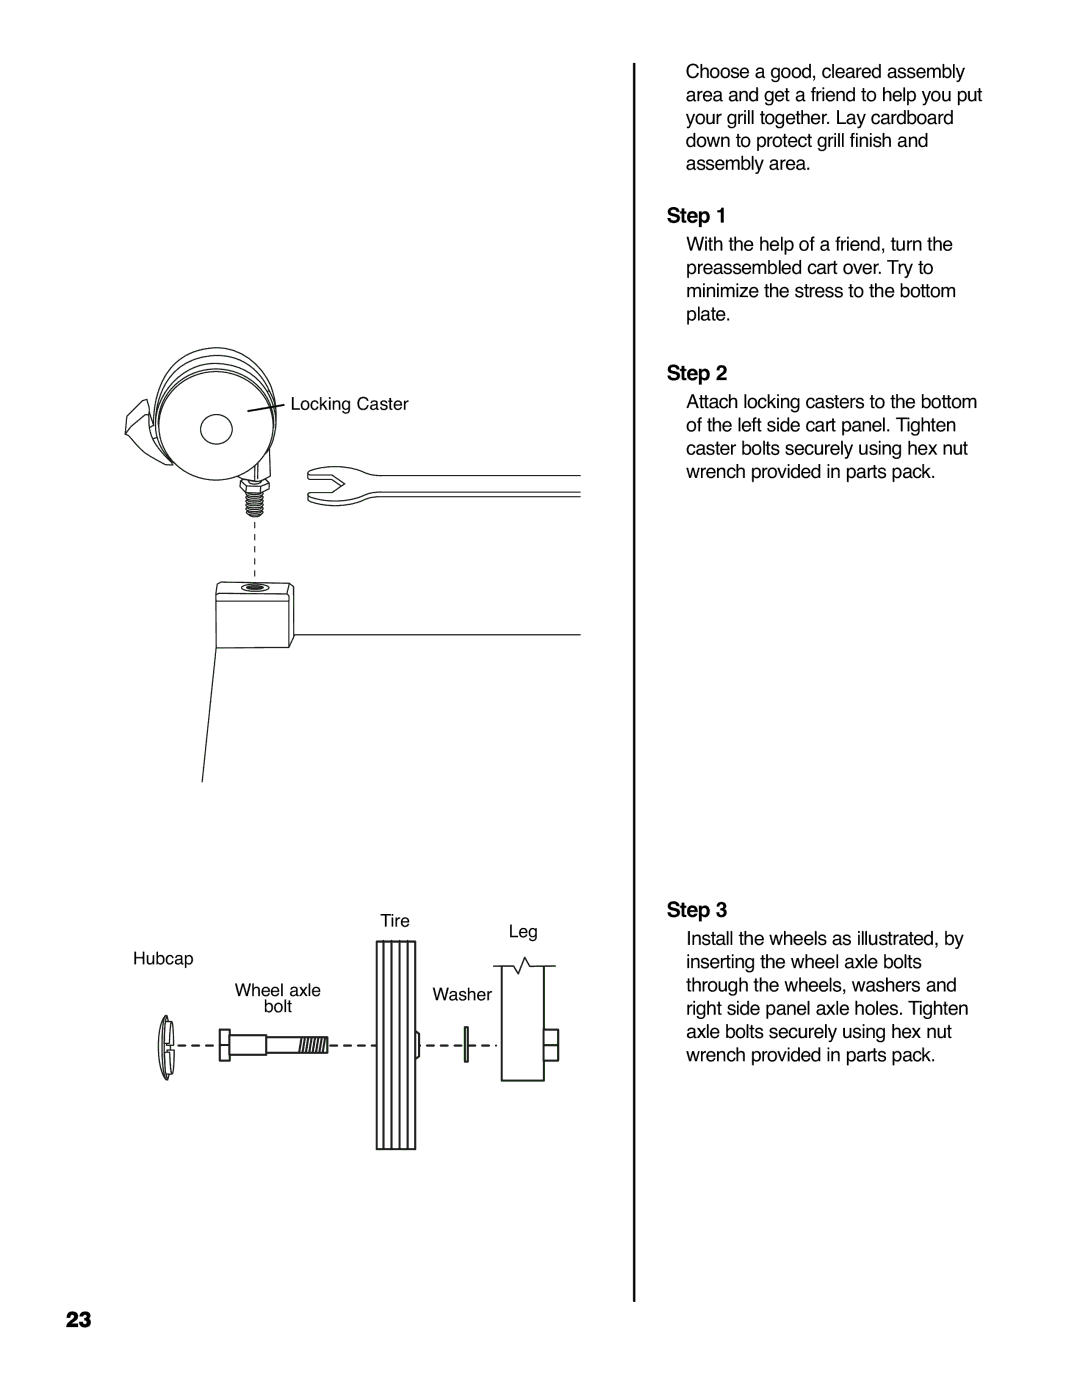
Attach locking casters to the bottom of the left side cart panel. Tighten caster bolts securely using hex nut wrench provided in parts pack.
Step 3
Install the wheels as illustrated, by inserting the wheel axle bolts through the wheels, washers and right side panel axle holes. Tighten axle bolts securely using hex nut wrench provided in parts pack.
23
